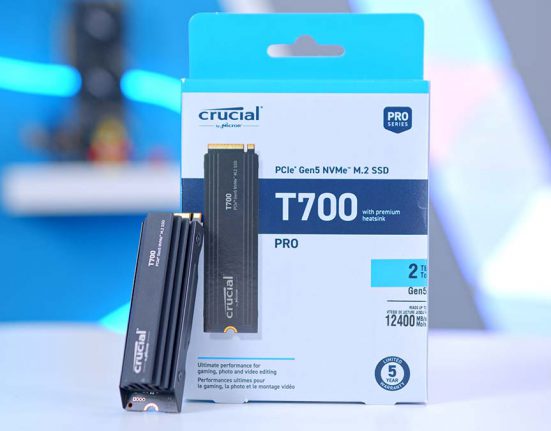
Installing a new hard drive or SSD into your PC build isn’t as easy as plugging everything up and hitting go, and those adding an initial drive to their PC will find themselves needing to complete a couple more steps in order to get the drive to initialise, and become available for use. In this guide we’ll be guiding you through the 10 simple steps to initialise a drive in the latest Windows 11 operating system, to ensure you can get up and running as quickly as possible!
Step 1: Open Disk Manager in Control Panel
The first step is to open Windows Disk Manager within Control Panel. Control panel is the pre-installed Windows software that allows you to control just about everything within a build, from networking and security settings, to peripheral devices like controllers or printers! Control Panel has changed a lot over the years, as Microsoft look to move settings around in their constant bid to make Windows more user friendly.
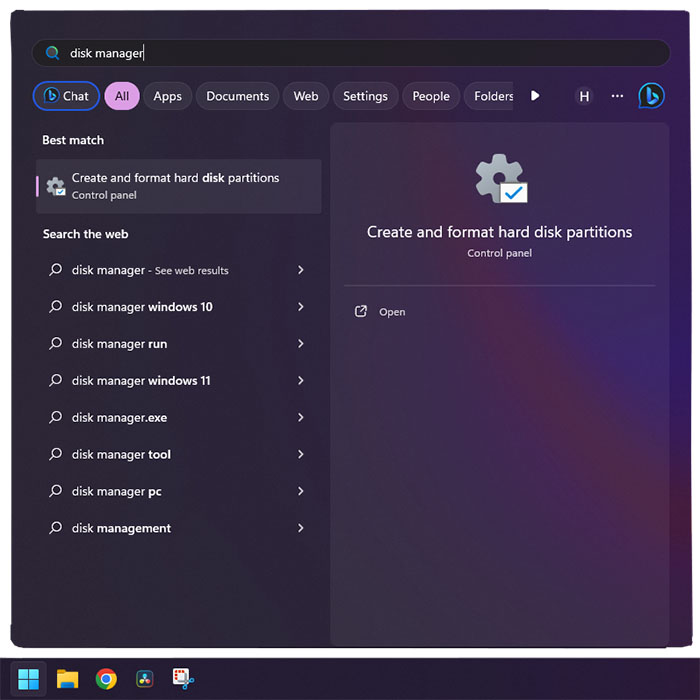
To do this, hit the windows key (or Windows logo in the bottom of your taskbar), and search for ‘Disk Manager’. You should then see a prompt to ‘Create and format hard disk partitions’, open this.
Step 2: Initialise Disk
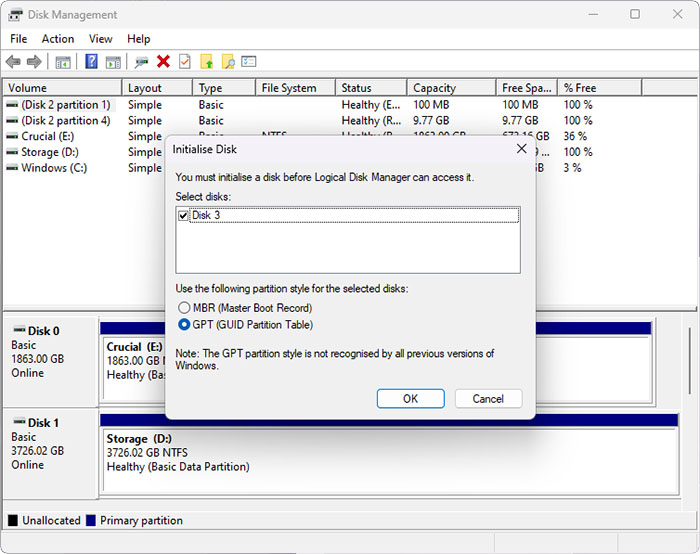
Windows is clever enough to realise a new drive has been installed, and upon hitting the Disk Management program will prompt you to Initialise the Disk before you can continue. We recommend using the GPT (GUID Partition Table) partition style, as it is the most up to date standard.
If you new drive isn’t automatically prompted here, it is likely it is not receiving a power or data connection. If it is an M.2 drive, ensure it is installed and screwed down correctly, and that you have checked the motherboard manual for the right slot configuration. Failing this, jump into your motherboard BIOS by hitting the ‘Del’ key upon boot up, and ensure the drive is showing in your motherboard’ BIOS. If it is not, you have either a connection issue or faulty drive.
Click ‘OK’‘ here to initialise the disk. This should take no more than 60 seconds to complete.
Step 3: Check You Now Have an ‘Unallocated’ Disk Partition
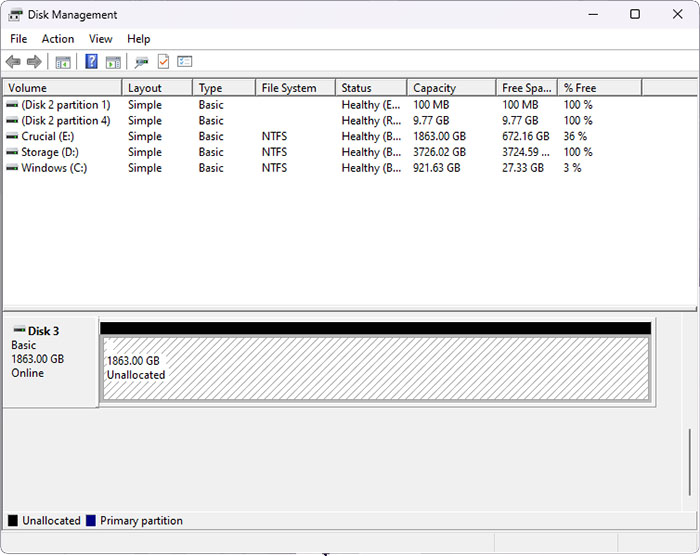
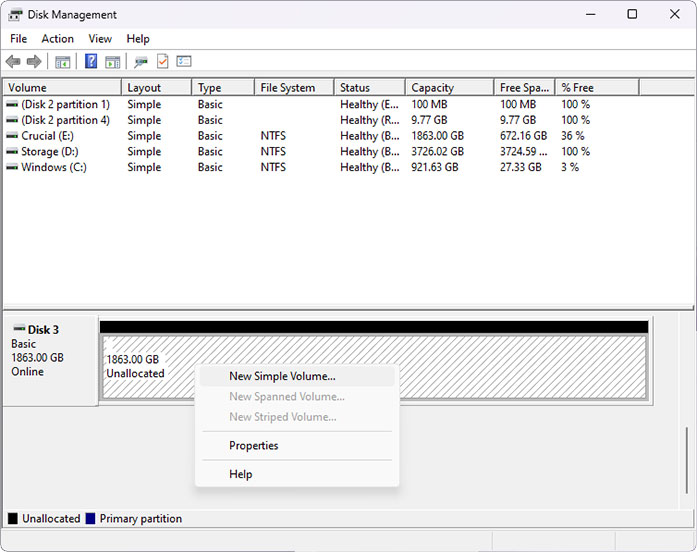
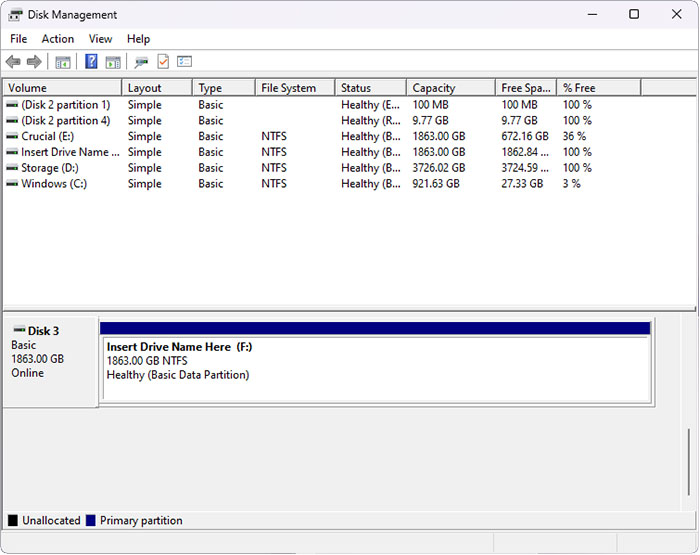
Following initialisation of the disk, check that you now see an unallocated space on the drive that aligns with the drive’s overall capacity. For this example, we are using a 2TB drive with 1863GB of usable space – this is very normal. Usable space within Windows is always going to be a little less than the advertised drive capacity.
Step 4: Create a ‘New Simple Volume’
Next, right click on the unallocated portion of the drive’s space, and select the top option which should be ‘New Simple Volume’. This is going to take the unallocated space on the drive, and format it into a usable partition that we can place files onto, whether that be videos, images, applications or documents.
Step 4: Work Through the New Simple Volume Wizard
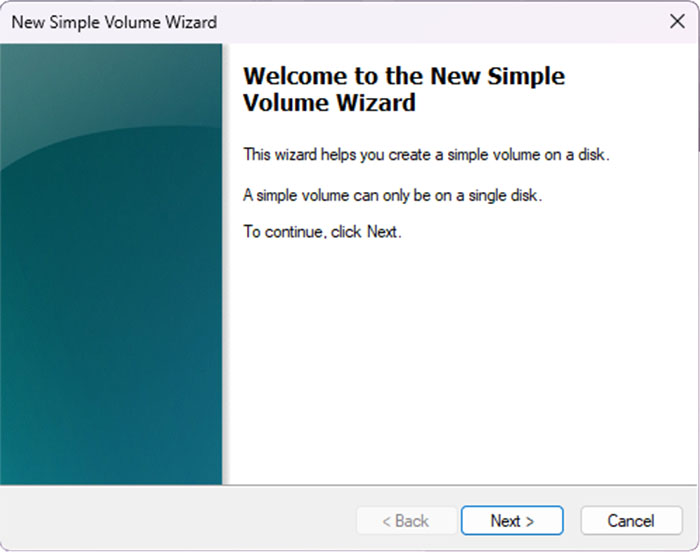
Selecting to create a ‘New Simple Volume’ will open the New Simple volume wizard. Select ‘Next > ‘ to proceed.
Step 5: Choose Volume Size
You’ll next be asked how much space you want to create in your simple volume. For most users, this will mean cranking the simply volume space to the maximum for the most usable space. For other users, wishing to segment drive up in multiple ways to create a number of different ‘virtual drives’ on their system, the value will be lower.
Most people should choose the maximum, which is often the default number in the ‘Simple volume size in MB:’ field.

Step 6: Assign a Letter to the New Volume
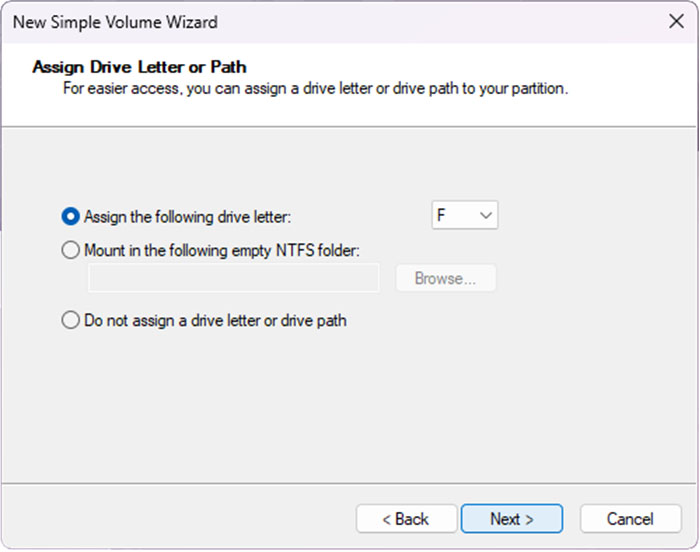
The next stage of the process is to assign the drive a letter. Again, most people can leave this on the default and let Windows do the magic for them. Others, such as a team of video editors with unified drive letters across a range of PCs, might choose a particular letter to represent the drive’s use case. You might also have a favourite letter, which would be find to choose here!
The tool won’t let you use letters already in use by other drives, ruling out the C drive, or possibility of creating conflicts.
Step 7: Close the ‘New Simply Volume Wizard’
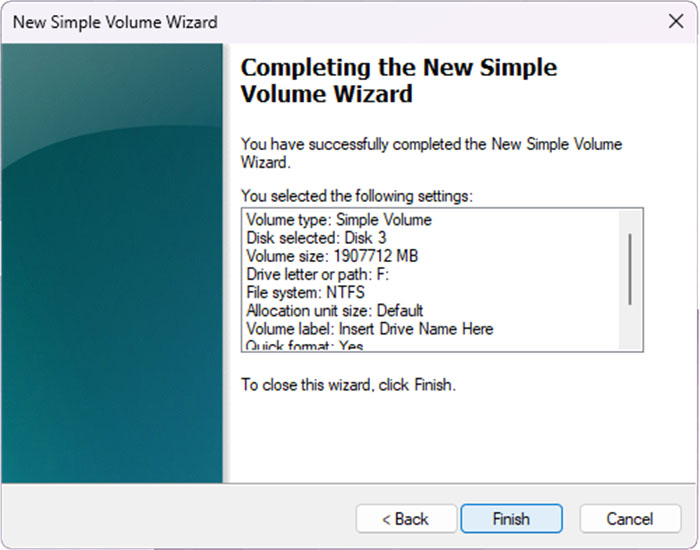
With all of the configuration steps done, you are able to close the wizard by hitting ‘Finish’. Double check all the details are as configured, and close this down.
Step 8: Check All is Fine in Windows Disk Management
Return to your Windows Disk Manager and double check that your new volume appears with the right letter, path and name. You’ll now be able to enjoy this drive in File Explorer, and use it for file storage and management. You may wish to check the disk’s speed in a piece of software such as CrystalDisk Mark, but otherwise you’re done!
The black bar at the top of the drive should now be blue, indicating the drive has an allocated partition.


![[AW] Corsair 2000D + RX 7900 XTX PC Build Feature - GeekaWhat [AW] Corsair 2000D + RX 7900 XTX PC Build Feature](https://geekawhat.com/wp-content/uploads/2023/07/AW-Corsair-2000D-RX-7900-XTX-PC-Build-Feature-551x431.jpg)
