Introduction
The past few months have been rather hectic within the PC building scene, with lots of manufacturers releasing new high-end products. But now the dust has settled, you may be wondering which components offer the ultimate gaming experience?
Here at Geekawhat HQ, we’ve been testing out a wide range of products and comparing them to one another to figure out which GPUs, CPUs, motherboards etc. will create a PC that performs like no other, whilst also creating a unique aesthetic that doesn’t take up lots of space.
Today, we’ll be showing you how to build a PC that offers nothing but the best, while doing so in a small form factor, and breaking down all the components as we go along. Including components such as Intel’s Core i9 13900K and Nvidia’s RTX 4090, we’re cranking the performance dial to the max in this one.
Suggested Article: Build An Awesome Zotac RTX 4090 Gaming PC!
Main Components

CPU: Intel Core i9 13900K
The first component in the build is a total powerhouse. The top-end chip in Intel’s 13th-Gen line-up (for now), the Core i9 13900K is the most powerful CPU on the market right now, beating out every other Intel and AMD option during our benchmarking sessions. With a whopping 24 cores and 32 threads, this CPU can handle any task thrown its way, making it a perfect solution for anyone looking for the best gaming and productivity experience you can get right now.
Key Facts: Base Clock Speed: 3GHz // Boost Clock Speed: 5.8GHz // Core Count: 24 // Thread Count: 32
The single and multithreaded performance from the i9 13900K is unrivalled, and the boost clock of 5.8GHz ensures that demanding tasks such as 4K gaming on max settings is a breeze. If you would like to learn more about the performance of Intel’s latest generation of processors, you can check out our full coverage of Raptor Lake CPU’s in a variety of buyers guides and reviews on our website!
Buy the Intel Core i9 13900K on:

CPU Cooler: Thermaltake TH120 ARGB Sync
To cool our powerful CPU, we’ve picked Thermaltake‘s TH120 ARGB Sync. This AIO liquid cooler has a small radiator in comparison to others, with only room for 120mm fan. This restriction, while not ideal, is a natural by product of the case in this build, and our efforts to keep things as small as possible. With this in mind, it still does a very adequate job of keeping the 13900K cool – we’d just recommend adding an additional 120mm fan for a push/pull config.
Key Facts: Radiator Size: 120mm // Included Fans: 1 // RGB: Yes
Whilst an air cooler would also save some space and money, the cooling capabilities of Thermaltake’s TH120 satisfy the needs of this PC build. It is fairly easy to install, and the sprung screws which fasten it to the included backplate allow you to add plenty of contact for solid CPU to cooler contact.
Buy the Thermaltake TH120 ARGB Sync on:

Motherboard: ASUS ROG Strix Z690-I Gaming WiFi
Onto the motherboard, we’ve opted for the ASUS ROG Strix Z690-I Gaming WiFi in this build. Whist the Z690 motherboards have been replaced with the new Z790 offerings, both Z690 and Z790 chipsets possess a lot of similarities in terms of compatibility and features, with marginal improvements available in the latest generation. In this build, we’ve selected the ASUS ROG Strix variant as it will fit nicely into our compact build whilst offering the connectivity options we need.
Key Facts: Form Factor: Mini-ITX // Built-in IO Shield: Yes // Max Memory: 64GB
The integrated rear I/O takes up a lot of real-estate in order to provide a wide range of connectivity, with two included Thunderbolt USB-C ports, 8 USB ports, a HDMI port, a 2.5 Gigabit Ethernet port, and a WiFi module to ensure that you can connect everything you need up to boost the performance of this high-end beast. Unfortunately, the reduced size does limit the amount of RAM and PCI-E slots available, making future upgrades a little more restricted.
Buy the ASUS ROG Strix Z690-I Gaming WiFi on:

RAM: Thermaltake ToughRAM XG RGB D5 32GB
Due to the restricted DIMM slots on the motherboard, we’ve made sure to include a memory option that will provide optimal performance for years to come. Thermaltake‘s ToughRAM XG RGB D5 is a 32GB DDR5 memory kit, giving us enough DRAM for a smooth and responsive gaming experience. Whilst the difference between DDR4 and DDR5 is pretty small right now, improvements in the latency of DDR5 technology should act as a driving force for performance uplift.
Key Facts: Capacity: 32GB // Clock Speed: 6000MHz // CAS Latency: 36-38-38-76
The 6GHz clock speed from this kit is also something that will begin to provide upside to end users. When paired with the newest series of high-end graphics cards and CPUs, this RAM is a force to be reckoned with. If you’re opting for an Intel 13th Gen Core i5 chip or below, we would recommend cheaper DDR4 kits instead as you can save some money when it comes to performance, but keep in mind that you’ll need to ensure you buy the correct motherboard so as to avoid compatibility issues.
Buy the Thermaltake ToughRAM RGB D5 32GB on:

SSD: Seagate Firecuda 530
Anyone that has seen our previous builds won’t be surprised to see that we’ve chosen the Seagate Firecuda 530 as our M.2 storage option, and with good reason. This SSD provides great read and write speeds, resulting in incredible load times in the most demanding games out right now. Whilst Seagate do provide larger capacity options, but the 1TB drive is our pick for this build.
Key Facts: Capacity: 1TB // Read Speeds: 7300MB/s // Write Speeds: 6900MB/s // Inerface: PCI-E Gen4 x4
The high read and write speeds also makes the the Firecuda 530 a great choice for those looking for improvements in demanding productivity tasks, as it will allow programs to handle running at a faster pace, reducing the likelihood of experiencing buffering or loading issues. Because of this, the Firecuda 530 is a great all-rounder that is going to provide performance that can keep up with the powerful components in this build.
Buy the Seagate Firecuda 530 on:

GPU: Nvidia RTX 4090 Founders Edition
An RTX 4090 graphics card is the only option for anyone looking for the best performance right now. Nvidia‘s latest series of GPUs have blown the competition out of the water, with the Ada Lovelace architecture adding significant boosts to framerates in particular. Paired with the improved DLSS technology, the RTX 4090 is best way to experience 4K gaming.
Key Facts: CUDA Cores: 16384 // RT Cores: 191 // TDP: 450W
Whilst there are plenty of RTX 4090 SKUs on the market, we’ve stuck to Nvidia’s very own Founders Edition for one main reason: size. While other variations tend to offer a slight boost to performance, they do so by beefing up clock speeds and cooling, something which may be physically too large for the compact Mini-ITX chassis selected for this build.
Buy the Nvidia RTX 4090 Founders Edition on:

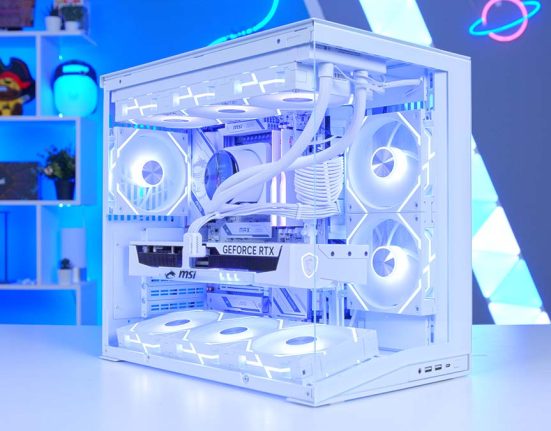
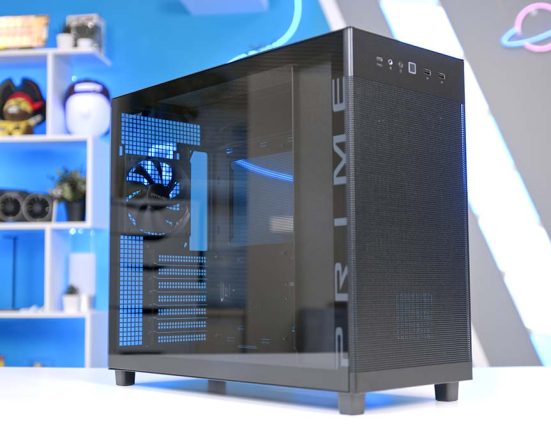
Case: Thermaltake The Tower 100
To house all of the components for this build, we’ve picked out Thermaltake’s The Tower 100, a Mini-ITX case that can somehow fit an RTX 4090! When we were told that this case could accommodate 4000 series graphics cards, it left us feeling just a little sceptical over the logistics and any performance repercussions. However, the 4090 fits in surprisingly well, and the vertical design provides a chimney effect for optimal airflow.
Key Facts: Form Factor: Mini-ITX // Fan Support: 4 x 120mm // Motherboard Support: Mini-ITX
Whilst the smaller form factor does come with some sacrifices such as a limited selection of components, it is a great way of reducing desk space. Most cases which have space for 4000 series graphics cards are huge, and simply too large to be atop a desk. While the black colorway was our design of choice, Thermaltake also offer this design in multiple colours such as turquoise, racing green, and metallic gold.
Buy the Thermaltake The Tower 100 on:

PSU: Thermaltake ToughPower GF3 1350W
Keeping the Thermaltake trend going, we have the ToughPower GF3 as our power supply of choice. We haven’t just picked the ToughPower GF3 to line up with other components, we picked it because it packs a punch. One hell of a punch in fact. This 1350W PSU will give us more than enough power to handle all the firepower of the latest high-end components. It also provides plenty of scope for future GPUs with the next-gen ATX 3.0 technology supported and a small form factor PCI-E Gen5 cable included as standard.
Key Facts: Wattage: 1350W // Modular: Yes // Efficiency: 80+ Gold
This unit also boasts an 80+ Gold efficiency rating, reducing the amount of heat lost whilst generating power, saving you some cash at the wall socket. In addition, the ToughPower GF3 is fully modular, which allows to pick and choose how you connect it to other components. This will be extremely welcome in this build, as it leaves room for adaptation and improvements to cable management in the tight space.
Buy the Thermaltake ToughPower GF3 1350W on:

Fans: Thermaltake SWAFAN 12 RGB
We have a bonus item that will add a nice boost to both the performance and aesthetics of this build. Thermaltake’s SWAFAN 12 RGB fans are designed as a versatile upgrade that will improve airflow and add a splash of colour. These fans are easy to install and include swappable fan blades, allowing you to dictate airflow without having to sacrifice aesthetics.
The SWAFAN 12 RGB comes with 3 120mm fans, which fits perfectly into our build. The Tower 100 comes with 2 fans included and the TH120 cooler takes up one of the additional fan spaces, which leaves 3 slots for our SWAFAN pack to fit into. These fans will add some much needed RGB to the build whilst also providing support for the smaller liquid cooler.
Buy the Thermaltake SWAFAN 12 RGB on:
High-End Wireless Peripherals
Whenever we build a new gaming PC, people ask us what peripherals are best matched. For this build guide we’re recommending a suite of exclusively-wireless peripherals, something which will remove the need for unnecessary cables and contribute to a cleaner gaming setup. With high-end peripherals in particular, wireless options offer similar performance benefits to their wired counterparts, so no need to worry about choosing between functionality or performance. Hear our recommendations for some high-end wireless peripherals.
Razer Viper V2 Pro Wireless Mouse

Razer‘s Viper V2 Pro is designed with professional gamers in mind. The ambidextrous design makes this wireless mouse perfect for all gamers, with the slender shape being suitable for most grips. Performance-wise, the Viper V2 Pro is one of the best options on the market thanks to the 30K DPI sensor and Hyperspeed wireless technology. And with up to 80 hours battery life, this mouse is perfect for all-day gaming sessions on the most competitive titles.
Buy the Razer V2 Pro Wireless Mouse on:
Logitech G915 Wireless Keyboard

For our wireless keyboard of choice, we’ve gone for the Logitech G915. This full-size low profile keyboard is extremely thin, which makes it look sleek on top of any desk. The thinner design also helps to improve the reaction times during competitive play, which is supported by the fast 1ms response time of Logitech’s lightspeed wireless technology. With the option to connect multiple devices via USB or Bluetooth, the G915 is a great portable option.
Buy the Logitech G915 Wireless Keyboard on:
SteelSeries Arctis 9 Wireless Headset

Last but not least, we have the SteelSeries Arctis 9. This wireless headset makes use of the award-winning sound that SteelSeries are known for, letting you hear all the details required to pinpoint an enemies location. The 2.4GHz wireless connection ensures that audio remains clear and leg-free, allowing conversations to flow without interruptions. With at least 20 hours battery life, this headset is perfect for long gaming sessions with friends.
Buy the Steelseries Arctis 9 Wireless on:
Gallery


Benchmarks
Much like all of our other articles, we want to provide as much context as we can relating to how this build will perform. We’ve provided a benchmarking video featuring the brand new hit title – Spiderman Miles Morales! You can find all of our full benchmarking runs testing out a variety of other components using the latest and most popular gaming titles on our YouTube channel – ‘Benched’.