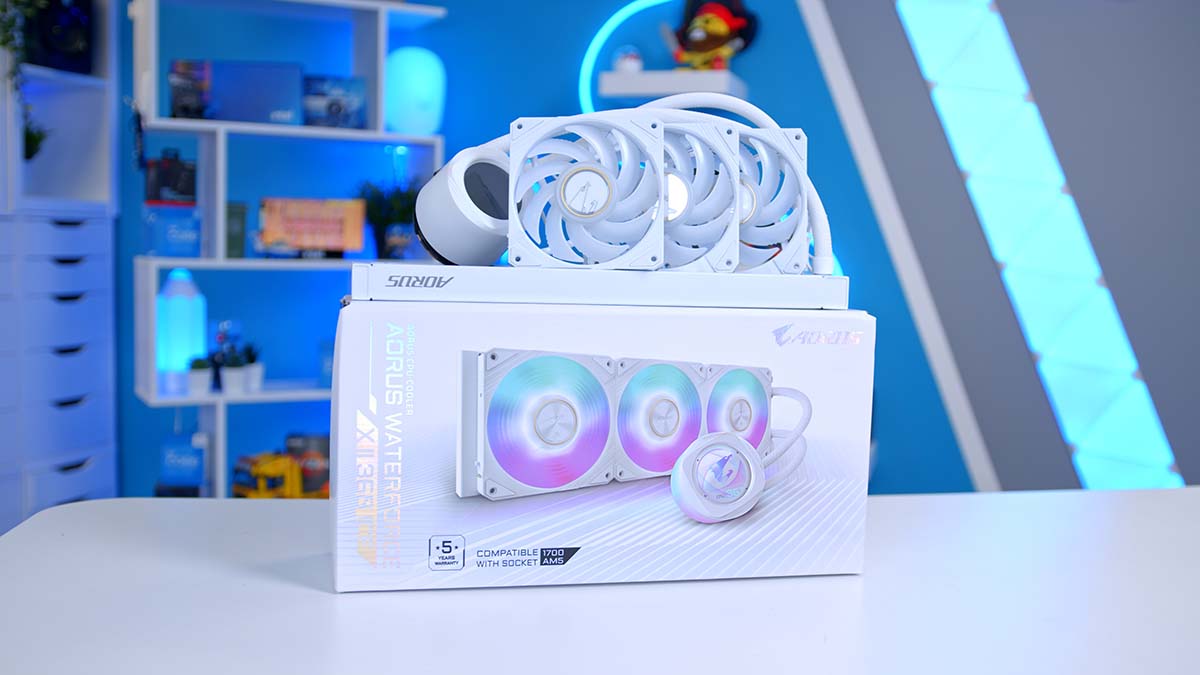
Gigabyte is primarily known for its motherboards and graphics cards. It provides high-quality component choices that cater to a range of different budgets and use cases. However, Gigabyte is looking to target the top-end liquid CPU cooler space with their AORUS WATERFORCE X II 360 ICE, which competes against other brands, such as Corsair and Cooler Master, that have long since dominated the market with strong-performing AIOs.
With a revised and upgraded design versus their previous AORUS WATERFORCE coolers, the Gigabyte AORUS WATERFORCE X II aims to provide efficient thermal regulation while making the PC build process much smoother thanks to the simplified radiator and fan design. But how does the AORUS WATERFORCE X II 360 ICE fare in comparison to alternative 360mm cooling solutions?
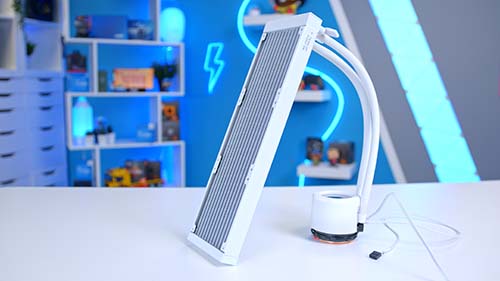
To determine this, we’ve tested the Gigabyte AORUS WATERFORCE X II 360 ICE in various benchmarks to assess its performance. This comes alongside a complete analysis of the specs, design, installation process, and features to determine what kind of value proposition this liquid CPU cooler offers.
Buy the Gigabyte AORUS WATERFORCE X II 360 ICE on:
Specification
The GIGABYTE AORUS WATERFORCE X II 360 ICE is a 360mm radiator with three 120mm fluid dynamic bearing fans. The fan design ensures that the AORUS WATERFORCE cooler can efficiently move heat away while maintaining low noise levels. Each fan is rated for a max speed of 2400RPM (rotations per minute), while the pump is rated for 3000RPM.
The pump for this AIO cooler has received an 8% size increase and a 44% pump flow rate increase compared to the previous generation AORUS WATERFORCE X cooler, significantly improving heat dissipation. The AORUS WATERFORCE X II 360 ICE offers strong support for a wide range of CPU sockets, including Intel LGA 1700, 1200 and LGA 115X, alongside AMD AM4, AM5, and TR4/sTR5 for those with Threadripper-based systems.
| Key Specs | Gigabyte AORUS WATERFORCE X II 360 ICE |
|---|---|
| Radiator Size | 360mm |
| Radiator Dimensions (L x W x H) | 394mm x 119mm x 27mm |
| Number of Fans | 3 |
| Max Fan Speed | 2400RPM |
| Bearing Type | FDB |
| Max Pump Speed | 3000RPM |
| Pump Connector | N/A |
| Socket Compatibility | Intel – LGA 1700, 1200, 115X AMD – AM5, AM4, TR4, sTR5 |
We’ve noted the connector type as ‘N/A’ because the AORUS WATERFORCE X II 360 ICE doesn’t use a traditional DC or PWM header. We’ll touch upon this later, but due to the proprietary EZ-Chain Mag cabling design, this AIO uses a USB 2.0 header to control the cooler and a SATA header for power. While this won’t be an issue for most, the lack of traditional headers means there is no direct control through the BIOS, so the Gigabyte Control Center is the only way to configure and customise this cooler.
Compared to other coolers on the market, such as the Corsair iCUE LINK H150i and the Lian Li Galahad II Trinity, the AORUS WATERFORCE X II 360 ICE offers similar specs. 2400RPM seems to be a relatively universal standard for fan speeds, with Corsair offering the same rated RPM, while the Lian Li Galahad II Trinity offers a 50RPM increase up to 2450RPM. Pump speeds share a similar story, which indicates that the AORUS WATERFORCE X II ICE has its work cut out for it when it comes to thermal performance.
Suggested Article: Corsair A115 Review & Benchmarks
Gigabyte AORUS WATERFORCE X II 360 ICE Design
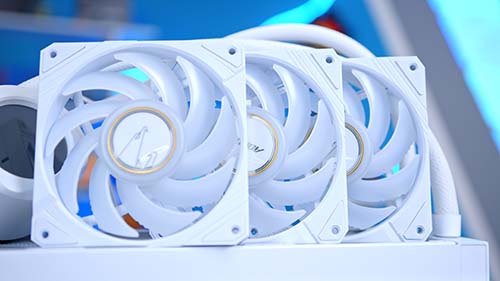
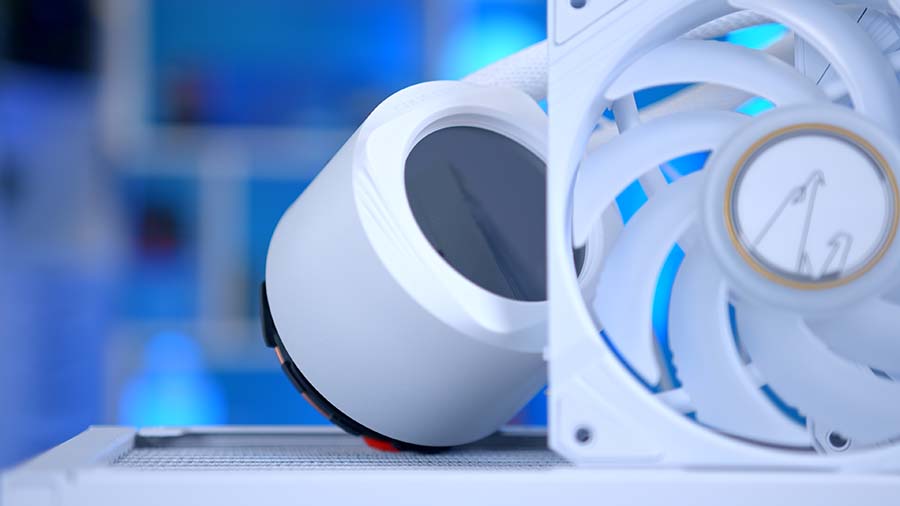
With the AORUS WATERFORCE X II 360 ICE being a premium cooler targeted at high-end PC builds, it is no wonder that this AIO offers a sophisticated and sleek design. With a white finish across the fans, radiator, tubing, and CPU pump block, the AORUS WATERFORCE X II 360 ICE will easily slot into a vast range of lighter-themed PC builds with no problems.
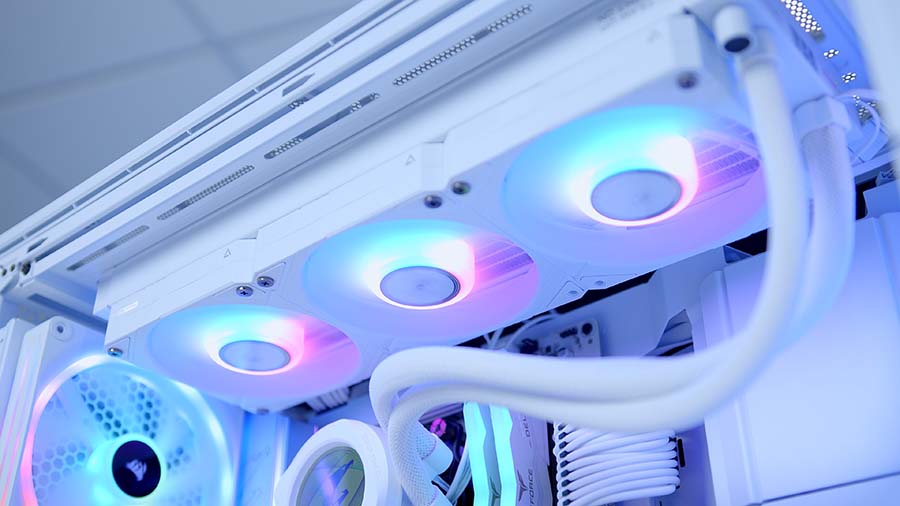
Furthermore, Gigabyte has gone the extra mile to ensure this cooler looks as elegant as possible by using white cables that match the vibrant and bright aesthetic of the individual parts. The only design element preventing this cooler from being entirely white is the use of black radiator screws. This isn’t a dealbreaker for us, but this small attention to detail would continue to elevate the sophisticated aesthetic.
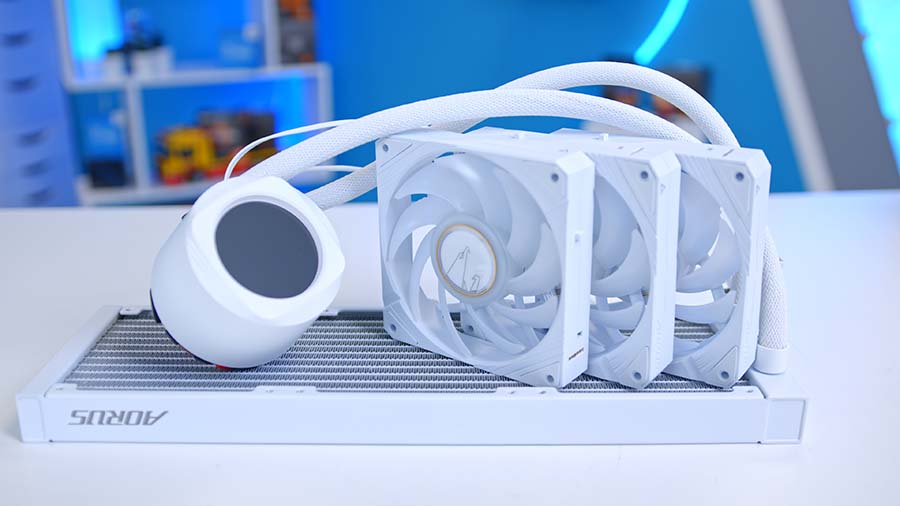
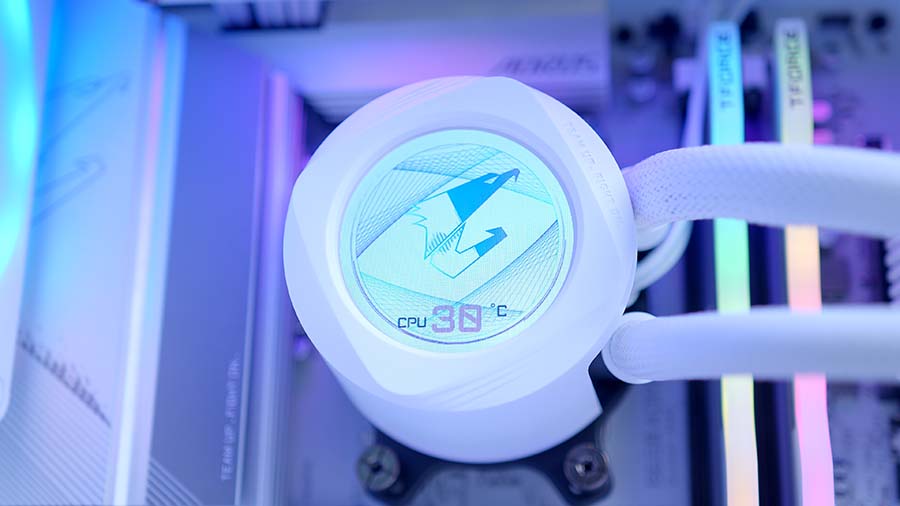
The standout design feature of the AORUS WATERFORCE X II 360 ICE is the integrated 2.3″ LCD on the CPU pump, which provides several customisable display choices. The Edge View display can monitor CPU clock frequencies, utilisation, temperatures, fan RPM, pump RPM, and more through the Gigabyte Control Center.
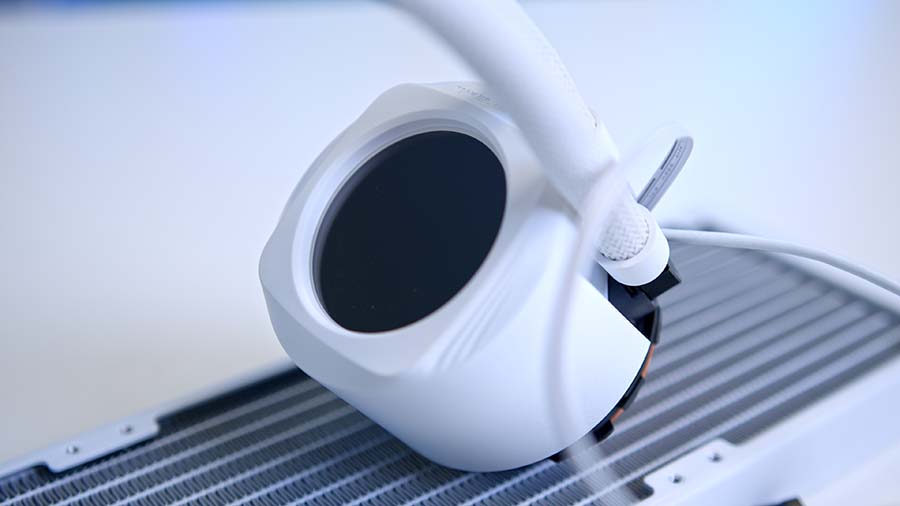
The LCD offers full personalisation and has 40MB of integrated storage capacity to save your favourite GIFs and videos. The AORUS WATERFORCE X II 360 ICE display can be re-oriented through the Gigabyte software, allowing 360 degrees of rotation.
Aesthetic aside, the AORUS WATERFORCE X II 360 ICE cooler also features Gigabyte’s DIY-friendly fan EZ-Chain Mag design. The EZ-Chain Mag technology incorporates a magnetic interlocking mechanism for the fans and a daisy-chain setup that enables transmitting power and data without additional wiring. Each of the 120mm RGB fans locks together, saving time during the installation process.
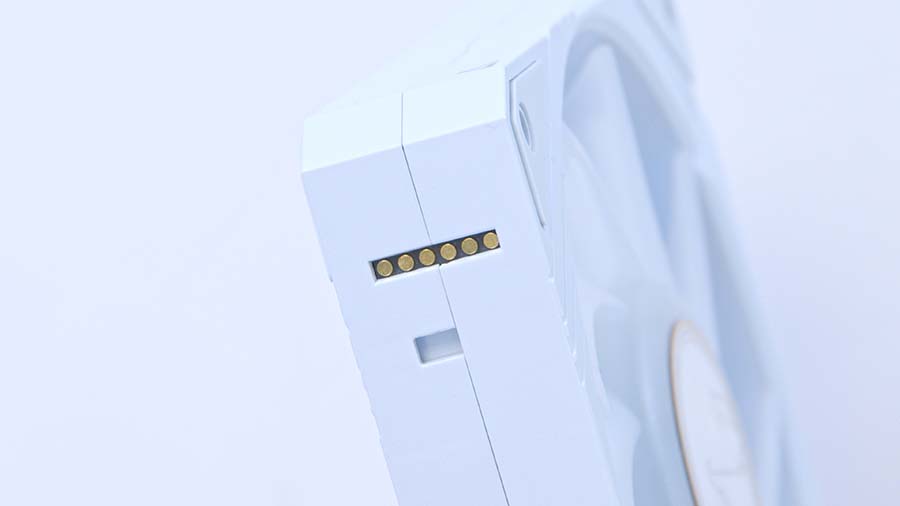
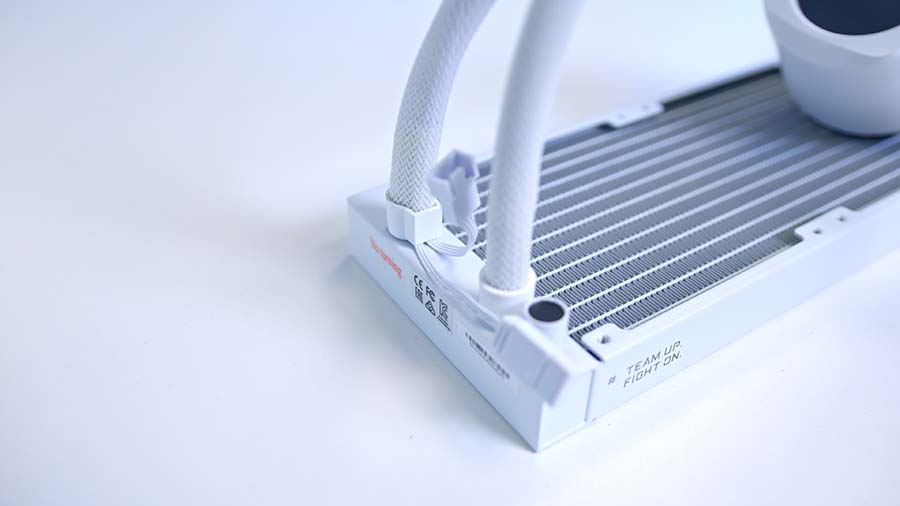
The cooler’s wires are enclosed in the tubing, simplifying organisation. The daisy-chain power connector at the fans’ end connects to the PWM and RGB header. These cables move up through the pump sleeving towards the CPU block, where data and power are provided through the USB 2.0 and SATA headers.
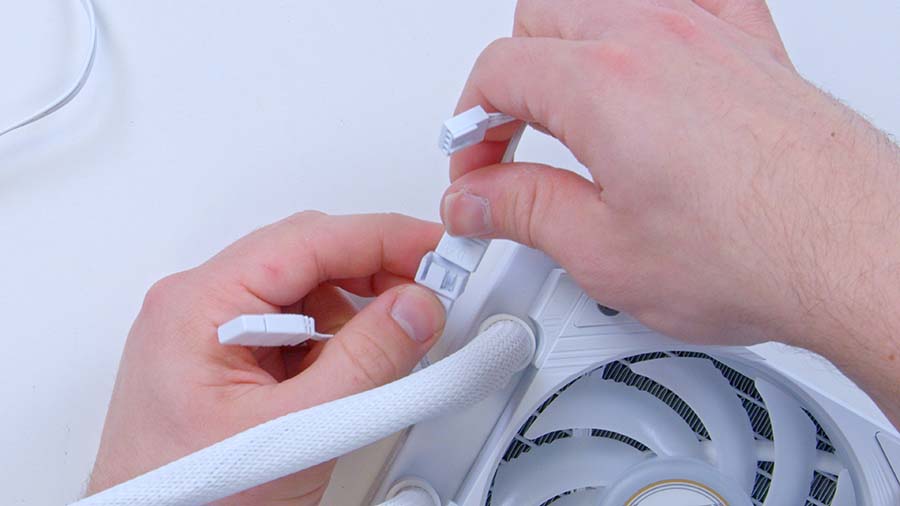
While this simplifies cable management, the cooler’s nontraditional design means that the AORUS WATERFORCE X II 360 ICE can only be controlled through the Gigabyte Control Center. While this software has come a long way over the years, removing configuration through the BIOS will be a point of contention for some. I like the change, but the Gigabyte software doesn’t entirely simplify customisation, as this application can be challenging to use.
Installation Process
Thanks to its DIY-friendly design, installing the AORUS WATERFORCE X II 360 ICE into a PC build is relatively seamless. Installing a CPU cooler is often quite convoluted and can involve several time-consuming steps that are generally made worse with larger liquid coolers, so any attempt to slim down this process is appreciated.
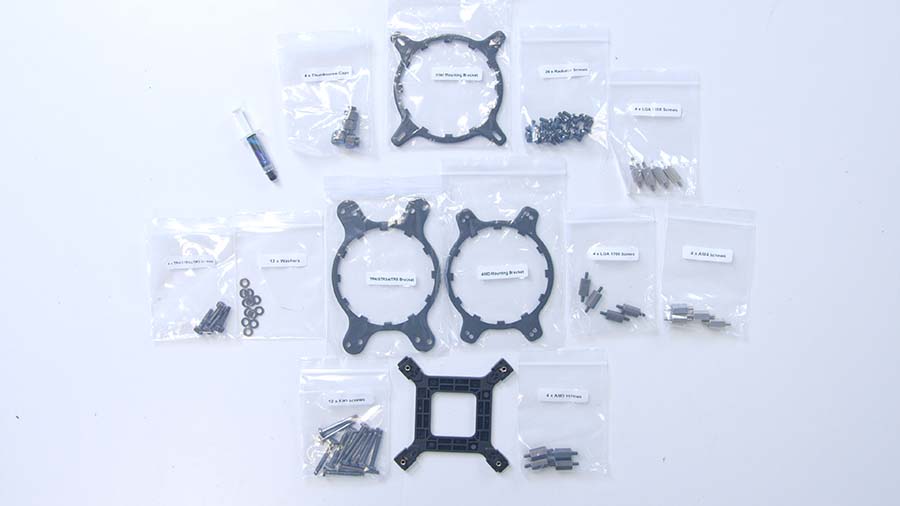
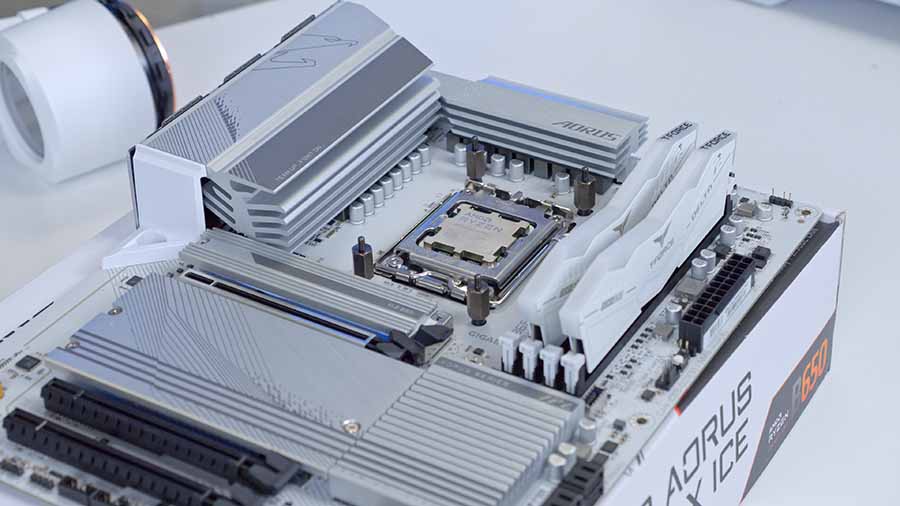
We set up this cooler in an AMD system to showcase the building process. For AMD mounting, you’ll need to pick out the circular AMD mounting bracket along with the ‘4 x AM5 screws’ bag and the ‘4 x thumbscrews’ bag. AM5 motherboards don’t require a backplate, so the AM5 screws can be secured in the four screw posts situated in the corners around the CPU socket.
We recommend only tightening these with thumbs, as any additional torque could thread the screw post, which will make removal very hard. However, if the screw posts are loose, pliers can be used to tighten them further with caution.
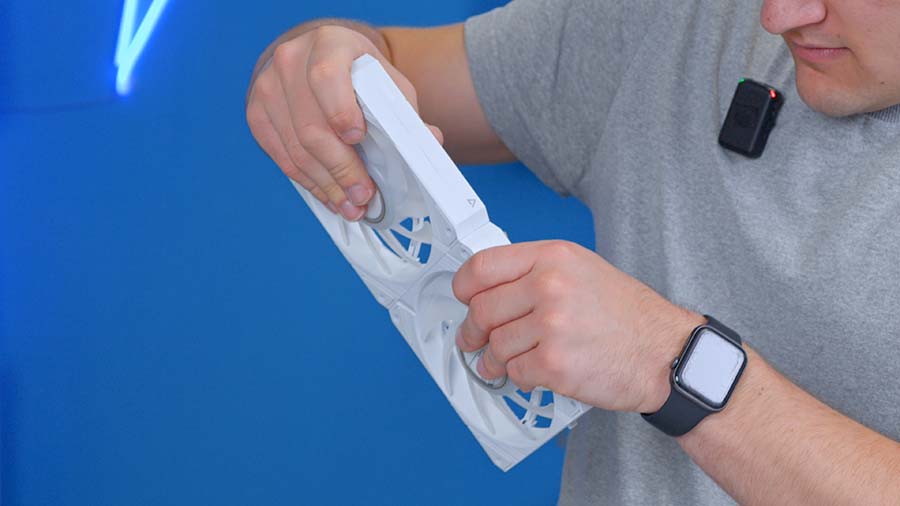
Next is radiator mounting. Firstly, connect all 120mm RGB fans by simply clicking them into place. The EZ-Chain Mag mechanism makes this process relatively easy. The fans click together, forming a singular 360mm unit.
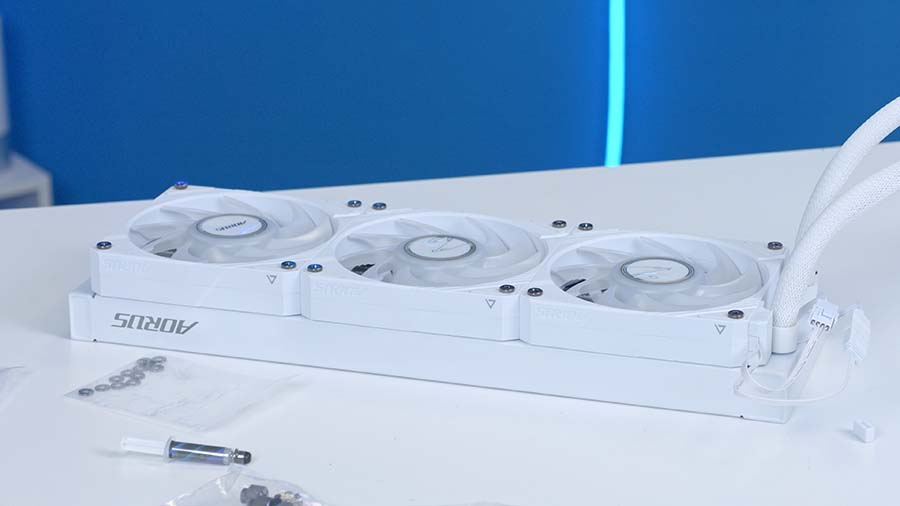
These fans can then be placed on top of the radiator and secured using the included fan screws. These need to be tightened with a screwdriver, but make sure not to overtighten, as this could damage or pierce the radiator.
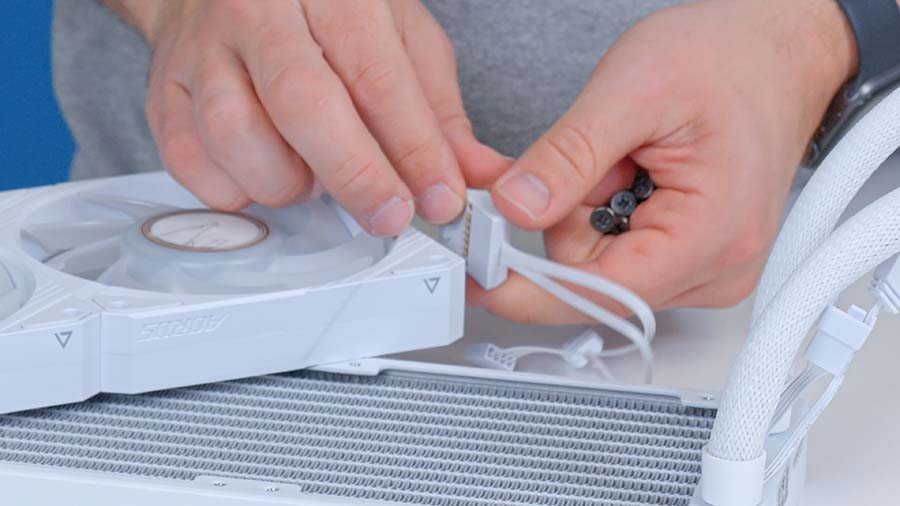
Before installing the radiator inside the case, connect the PWM and RGB headers to the daisy-chain connector, which is located inside the box. The daisy-chain connector wires up the cables inside the tube sleeving.
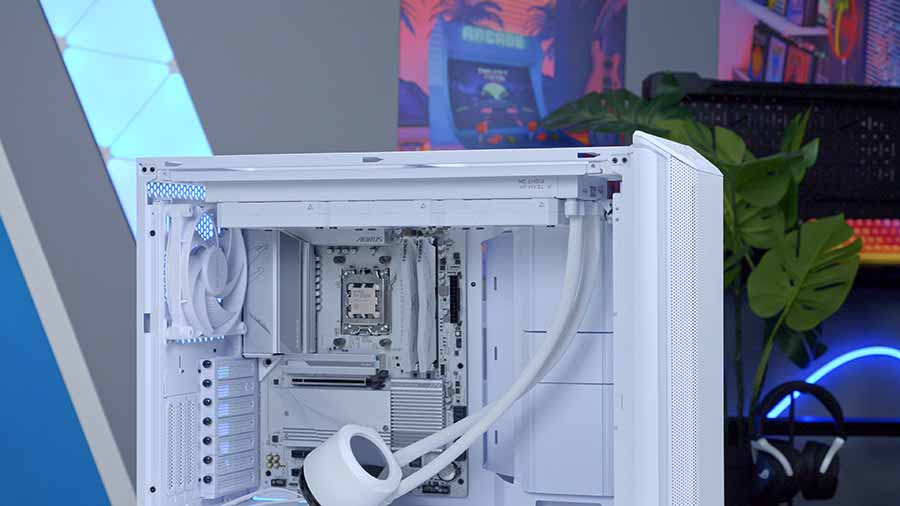
For the next step, we mounted the radiator to the case. We used the bequiet! Dark Base 701 case, which has a removable top panel mount for fans and liquid coolers. Those with traditional cases that don’t have a removable top panel may need an extra pair of hands to get the radiator mounted, as 360mm units can be quite finicky.
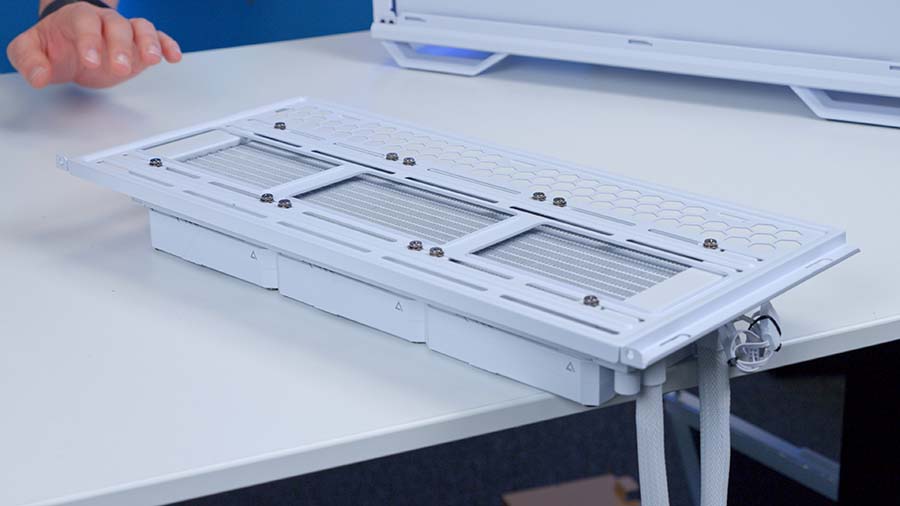
Fortunately, the removable top panel made installing the AORUS WATERFORCE X II 360 ICE into the case very easy, as it can be slid back into the PC build once the radiator was secured.
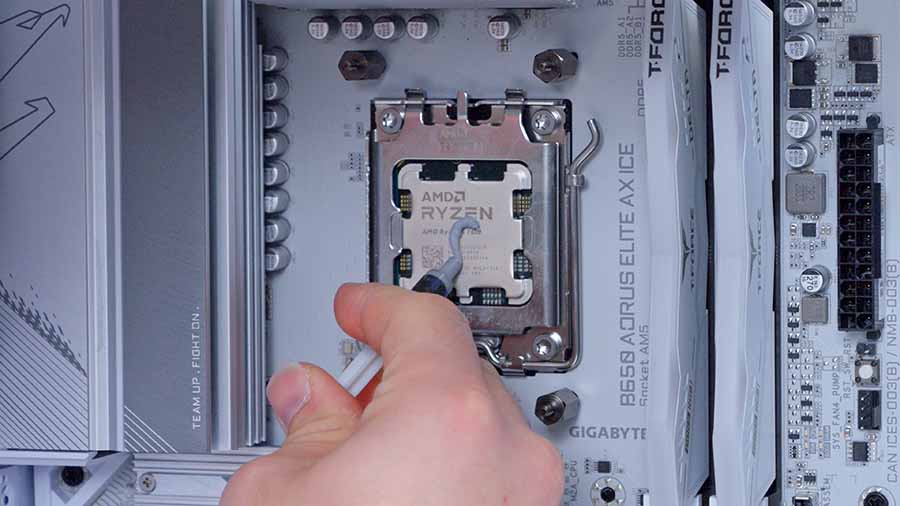
It is worth noting that the CPU pump block does not come with any pre-applied thermal paste, so some will need to be applied to the CPU’s IHS (internal headspreader) beforehand.
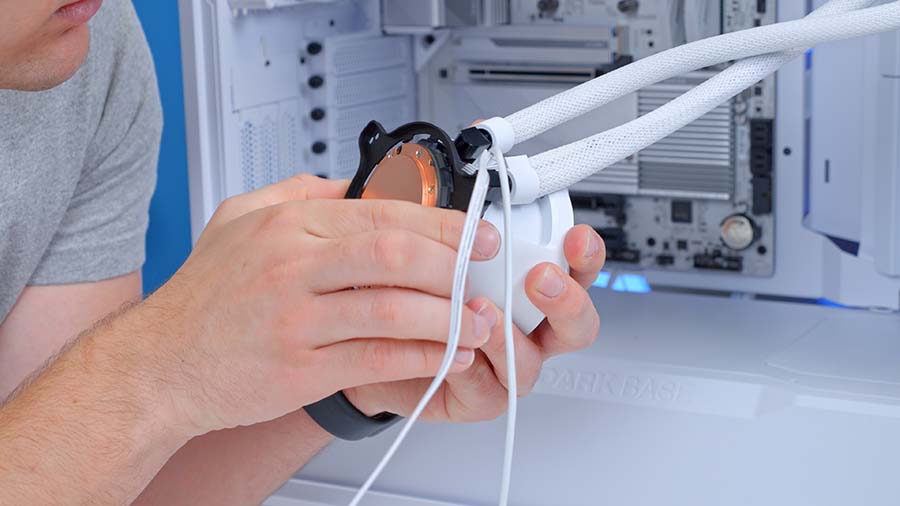
Next, the AMD mounting bracket must be secured to the CPU pump block. The mounting bracket needs to be lined up with the slots on the block and then rotated clockwise to secure it.
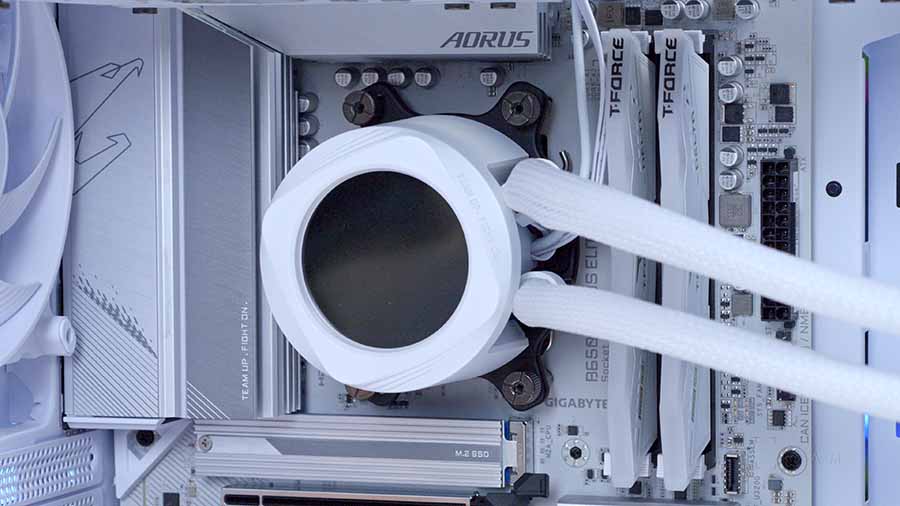
Finally, line up the mounting bracket with the screws that were secured in place earlier, and tighten the thumbscrews on top to keep the CPU block in place. These thumbscrews should be torqued in a star pattern to apply even pressure to the motherboard and CPU. Thumb strength is usually enough, but a screwdriver can be used if the CPU block isn’t secure enough. The USB and SATA headers must also be plugged in to control power and data.
Gigabyte AORUS WATERFORCE X II 360 ICE Performance
We’ve put this AIO through its paces within many synthetic benchmarks to determine how the AORUS WATERFORCE X II 360 ICE performs. Our testing system uses an Intel Core i7-14700K and additional fans to maximise airflow. All the benchmarks were run with different thread configurations, specifically four and eight, which are representative of gaming and workstation loads. The results we’ve provided are from two synthetic workload applications: Cinebench R23 and CPU-Z.
Cinebench R23 – 4 Threads
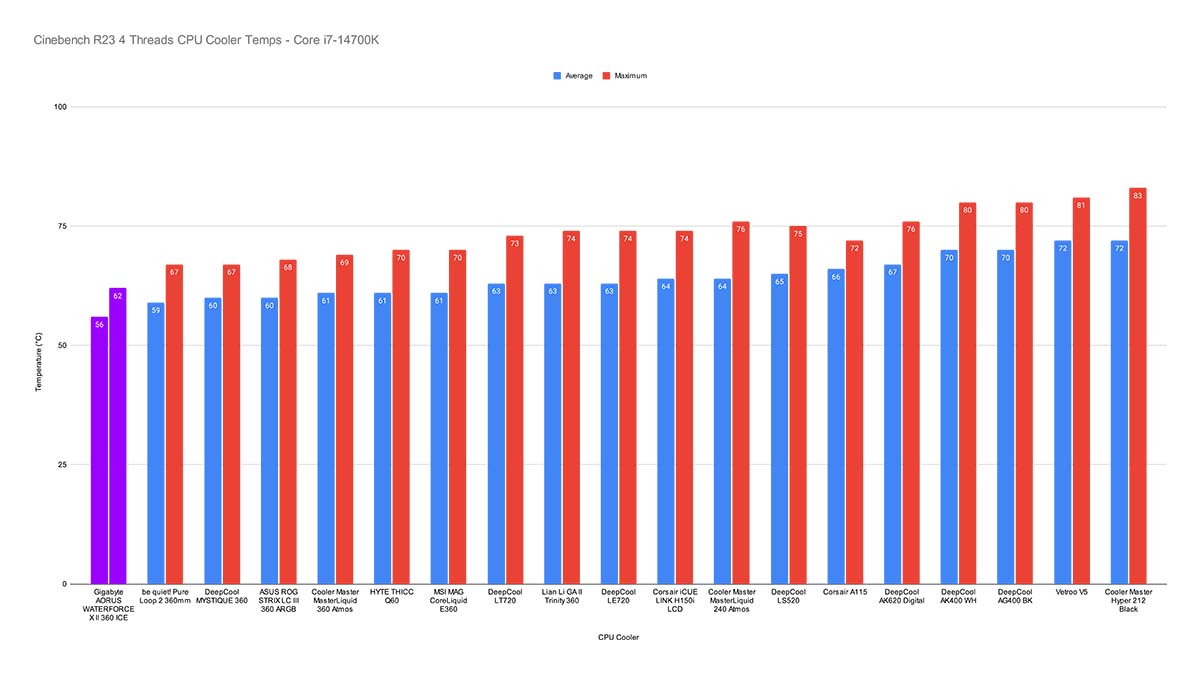
In Cinebench R23 at four threads, the AORUS WATERFORCE X II 360 ICE kept temperatures around 56 degrees Celsius on average. This is typical of a gaming workload, but the GIGABYTE AORUS WATERFORCE X II 360 ICE kept thermals at a very reasonable level.
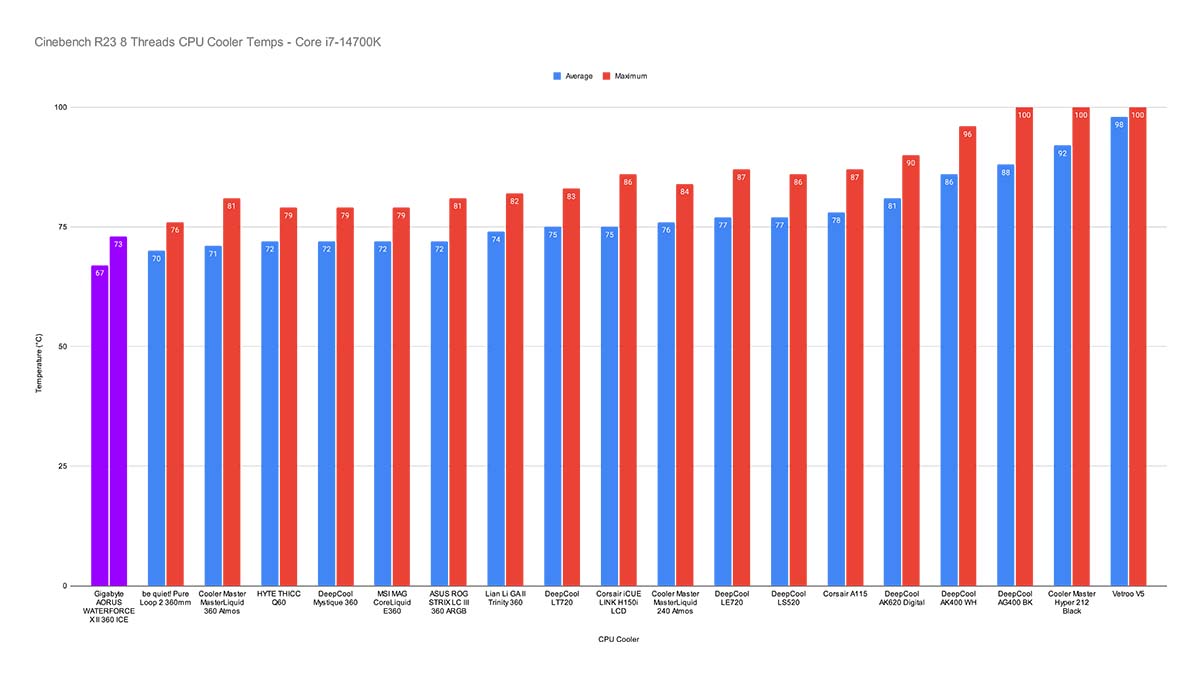
At eight threads, the temperature increased by around twelve degrees, up to 67. Cinebench R23 pushes CPUs quite heavily, so it was great that the AORUS WATERFORCE X II 360 ICE held temperatures below the 70-degree mark. This eight-thread benchmark is indicative of a content creation workload, hence why more power is being drawn, resulting in higher thermals.
CPU-Z
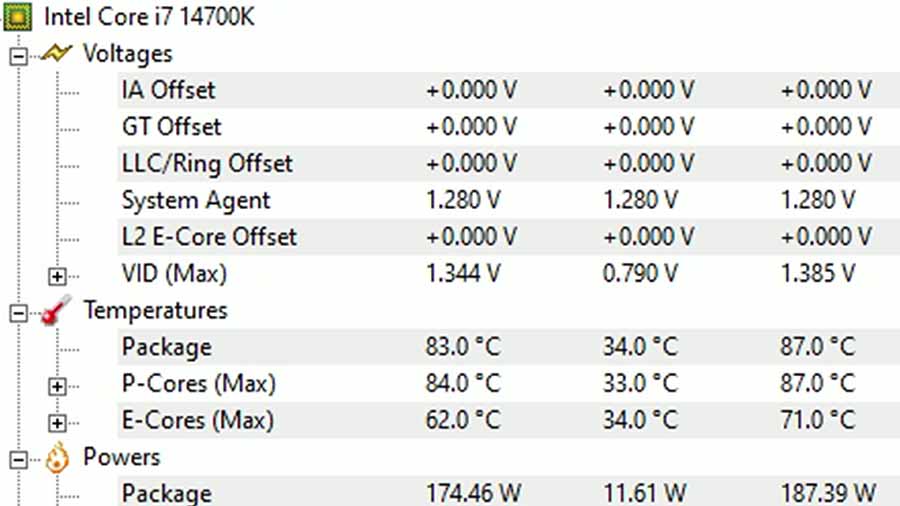
After dialling the thread count up to eight, the AORUS WATERFORCE X II 360 ICE kept the Core i7-14700K at an average of around 83 degrees. CPU-Z is an intense benchmark, resulting in high power draw and, by proxy, elevated thermals. The AORUS WATERFORCE X II 360 ICE held up very well despite this. Eighty-three degrees is quite high for eight threads, but we had no concerns during this benchmark that the Core i7-14700K would reach dangerous temperatures.
Features We Like
Streamlined Cables
The daisy-chain design, combined with the cables hidden within the tube sleeving, makes the AORUS WATERFORCE X II 360 ICE a sleek and hassle-free liquid cooler. This AIO requires minimal cable management while maintaining a clean aesthetic. We appreciate the lengths that Gigabyte has gone to make building with the AORUS WATERFORCE X II 360 ICE easy.
Customisable LCD
The AORUS WATERFORCE X II 360 ICE cooler’s customisable LCD is a standout feature, making this AIO a highly premium model. The LCD comes with various meticulously crafted animations, stat monitoring settings, and personalisation through GIFs, images, and videos. The screen can also be re-oriented through the Gigabyte Control Center software, which saves uninstalling the CPU block and rotating the head.
Features We Don’t Like
Entirely Software Controlled
Due to the daisy-chain cable configuration, Gigabyte has opted to restrict configuration of the AORUS WATERFORCE X II 360 ICE entirely to the Gigabyte Control Center application. While this may benefit some, Gigabyte Control Center is not as refined as other CPU cooler software, making it complicated to use.
Furthermore, it is disappointing that Gigabyte has not mentioned that the CPU fan header monitoring needs to be disabled in the BIOS to avoid booting error messages. While I imagine the software-only method of controlling this liquid cooler will appeal to some, the Gigabyte Control Center software needs more refinement before we’re willing to sacrifice BIOS control entirely.
Conclusion
Gigabyte AORUS WATERFORCE X II 360 ICE
Product Name: AORUS WATERFORCE X II 360 ICE
Brand: Gigabyte
-
Features
-
Design
-
Performance
-
Value For Money
Summary
The Gigabyte AORUS WATERFORCE X II 360 ICE is an excellent all-in-one liquid CPU cooler that offers solid thermal performance alongside a streamlined design that makes the installation process of this model particularly easy. The daisy-chain design and hidden cables ensure this CPU cooler looks extremely clean and simplifies one of the more convoluted parts of a PC build. The sleek white aesthetic across the radiator, fans, and CPU block head looks highly sophisticated and is an excellent addition to any white-themed system.
The only major weakness of the AORUS WATERFORCE X II 360 ICE is that it can only be configured and controlled through the Gigabyte Control Center. While the Gigabyte software has come quite far, it doesn’t compare well to industry-leading applications such as Corsair iCUE or NZXT CAM, where the setup and customisation options are intuitive. Furthermore, the lack of an option to change fan curves through the BIOS will be a point of contention for some, as you’re effectively forced to use the software with no alternative.
Pros
✅ Streamlined cable management
✅ Thermal performance
✅ Installation process
Cons
❌ No control through BIOS
❌ Control Center software
❌ No pre-applied thermal paste


