One of the things we pride ourselves on is our in-depth product testing, conducted by our team of in-house product reviewers and subject matter experts. We also pride ourselves on transparency, which is why we have compiled detailed documentation on how we test all of the components that we receive through our doors at the GeekaWhat offices. In this article we’ll be delving into how we test CPUs here at GeekaWhat. CPUs are perhaps one of the the most important products to test properly, being one of the most crucial part choices in any PC build, for gaming, productivity or otherwise!
We also think sharing our processes is important so that our audience can better understand how we reached our results, and replicate our testing methodologies at home. It also allows our readers with an existing PC build to test their own CPUs as reference points when comparing against our data, better informing any decisions about potential processor upgrades.


Our Testing Rig
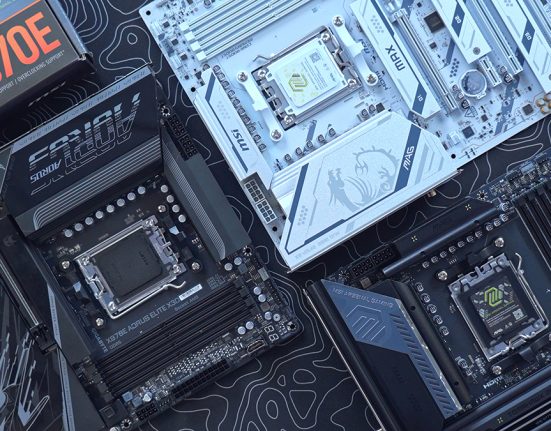
Unlike other components, such as graphics cards (GPUs), our CPU test rig needs to change depending on what CPU it is we are testing. This is because CPUs are socket dependent, with a different motherboard needing to be used for different CPU manufactures (AMD and Intel) and, more granularly, different processor generations. For example, a Ryzen 5000 series processor needs to use a different socket than a more up-to-date Ryzen 7000 chip.
There are still measures we take in our test rigs to keep things fair, despite the changing motherboard options on a CPU by CPU basis. We employ the following rules when selecting an appropriate motherboard, in order to keep things fair:
- We will always select a motherboard on the highest chipset (for Intel this is presently Z790, for AMD this is presently X670E)
- We will always opt to go for a DDR5 motherboard where supported by the CPU choice. This keeps memory pairings fair.
- We retain the use of the same cooler in all of our testing, irrespective of CPU model.
- All CPUs are tested at factory clock speeds, with no overclocking (unless the test is specifically intended to measure overclocking performance).
Generally speaking, our motherboards comprise of some of the highest end boards possible, to alleviate any bottlenecks originating from the motherboard.
We update our testing rig regularly, primarily to ensure no CPU or memory bottlenecks, and a change in our testing rig will always lead to us running new data for all data points in our tests. In basic terms, this means that every time our test rig sees a hardware change, we retest each and every graphics card to garner fresh results.
| Component | Name |
|---|---|
| CPU | Intel Core i9 13900K |
| CPU Cooler | Deepcool LS720 360mm AIO |
| Motherboard (Intel 12th Gen & 13th Gen) | ASUS ROG Maximus Z790 Hero |
| Motherboard (Ryzen 7000) | MSI X670E ACE |
| Motherboard (Ryzen 5000) | Gigabyte AORUS X570 Master |
| RAM (Ryzen 7000, Intel 12th Gen & 13th Gen) | G.Skill Trident Z NEO 32GB 6000MT/s CL32 |
| RAM (Ryzen 5000) | Corsair Vengeance RGB SL 32GB 2600MH CL36 |
| SSD | Seagate Firecuda 530 2TB |
| Case | Open Frame Test Case |
| PSU | Thermaltake Toughpower 1350W |
How Often We Update Our Results
Much like our GPU testing, we set regular time intervals for data re-testing, instead reviewing results based on a number of factors:
- Driver releases: These bring optimisations which can increase performance.
- RAM improvements: The ever-changing memory landscape is bringing every quicker and lower latency DDR5 to market, significant changes here will cause us to re-test our results.
- Recency: If no other factors have triggered a retest, and we believe it has been too long since our data was tested, we will look to retest
- Viewer Feedback: While very uncommon, if our audience flag any of our data, we will look to retest and check the data is correct. In this instance, our findings may not change and the data will stay the same.
- Major hardware releases: With any new hardware release, we will look to ensure comparative data is both relevant and up to date.
Tools We Use to Test CPUs
We use a variety of software tools to facilitate and enhance our CPU testing. These are as follows:
- HW Monitor Pro: This general hardware monitoring tool allows for detailed load, clock speed and temperature monitoring on the CPU and its cores.
- CPU-Z: This tool is used to stress test a CPU for our temperature testing. It also allows us to see detailed CPU information.
- MSI Afterburner + RTSS: This is used to monitor CPU clock speeds and temperatures in an in-game environment.
- Windows Task Manager: We find the built in Windows Task Manager (Ctrl + Shift + Esc) to be one of the best ways to monitor thread load and clock speeds.
Our Synthetic Benchmark Tests
We use a number of synthetic benchmarks when evaluating the performance of CPUs. These include 3D Mark Firestrike and 3D Mark Timespy, both of which evaluate system wide graphics and physics performance. The physics performance score is the one we are most interested in when evaluating CPU performance.
Additionally, we also use the Cinebench R23 Single and Multi-Thread CPU tests. The single thread test evaluates the performance of a single CPU thread, while the Multi-Thread test is best for evaluating realistic video rendering performance. Cinebench was created by Maxon, developers of the industry standard Maxon Cinema 4D rendering software.
We also run temperature stress tests, by loading up the CPU with the CPU-Z ‘CPU Stress’ mode. This pushes the processor to 100% load on all cores, simulating a worst case scenario for temperatures. Our thermal test lasts for 15 minutes, and is run 3 times with a 15 minute cool down period between each test.
Our Gaming Benchmark Tests
When it comes to gaming, our CPU test set is similar to that of the way we test GPUs. This means the gaming benchmark runs are of identical lengths, and use identical settings. The only difference is that our CPU testing covers a smaller number of games, designed to evaluate titles htat are both single and multi-thread heavy by nature. The settings for our CPU gaming benchmark tests are below:
| Game | Resolution | Settings |
|---|---|---|
| Hogwarts Legacy | 1440p | Settings: Effects High, Material High, Fog High,Sky High, Foliage High, Post Process High, Shadows High, Textures High, View Distance High, Population High DLSS/FSR & Raytracing Optionally Used |
| Cyberpunk 2077 | 4K | Settings: Texture Quality High, FOV 100, Chromatic Aberration On, Lens Flare on, Motion Blur off, Contact Shadows On, Improved Facial Geometry On, Anisotropy 8x, All Texture Settings High DLSS/FSR & Raytracing Optionally Used |
| COD Warzone 2 | 1080p 1440p | 1080p High, Upscaling/Sharpening FSR 2.1 Quality, Texture Resolution Normal, Texture Filter Anisotropic High, Level of Detail High |
| Apex Legends | 1080p | FOV 110, Anti-aliasing TSAA, Texture Filtering 8X, Model Detail High, VSync Disabled, Effects High, Ambient Occlusion Quality High |
| Fortnite | 1080p | Anti-aliasing & Super Resolution TSR High, Temporal Super Resolution Performance, View Distance Far, Textures Low |
You may notice different resolutions in our above testing. For intense AAA titles we centre our CPU testing around 1440p and 4K, as this is where we anticipate most users will be playing as far as resolution is concerned. We test fast-paced FPS titles, such as Fortnite and Apex Legends, at 1080p to simulate the frame-rate heavy environments most people prefer in these competitive titles.
Why You Can Trust Us
We know that trust is one of the most important things, which is why we’re building out a detailed library of all of our testing methodologies. Our team of writers are hardware geeks whose sole remit is to recommend only the best products to our audience of readers and viewers across our platforms. No one in our editorial team is incentivised to recommend any singular product. You can read our full editorial policy to learn more about our team, core principles and how we make money.



![FI_[DM86] Montech King 45 Pro + RX 9070](https://geekawhat.com/wp-content/uploads/2026/01/FI_DM86-Montech-King-45-Pro-RX-9070-551x431.jpg)
