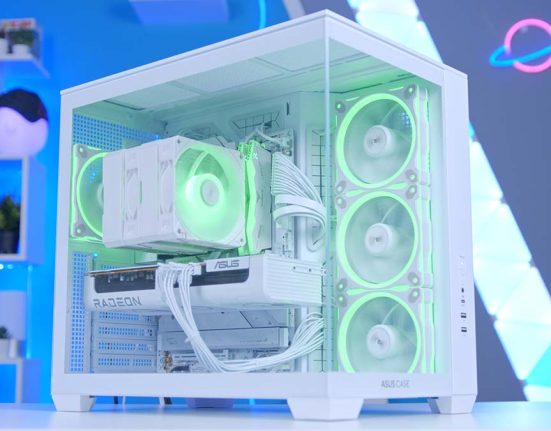
For anyone who has picked up or built a brand-new gaming PC, one of the best ways to gain an understanding of the performance you can expect, as well as the reliability of your components, is to conduct a series of stress tests. These tests are designed to put one or more components under extreme workloads for a defined period, giving you a glimpse at how your PC will perform when pushed to its limit. Stress testing a gaming PC not only provides a clear performance benchmark for your system, but it can also identify the weaker aspects of your current build or showcase any instabilities.
At GeekaWhat, we regularly conduct stress tests of builds for guides here on the website, and for our YouTube channel. In this piece, we’ll be walking through our methodology of testing gaming PCs, and how you can it for yourself.
GPU Testing: FurMark
When it comes to stress testing your GPU, FurMark is one of the easiest pieces of software to use. This software is primarily focussed on putting your GPU through the wringer, but also includes ways to monitor your GPU and stress test your CPU. After downloading FurMark, set the resolution to match the output of your display and select ‘GPU stress test’ button. This will begin the testing process.

Once the stress test has started, it will push your GPU until the test is stopped. Whilst FurMark will provide indicators of key statistics such as GPU temperatures and loads during the stress test, we prefer to track the results with a dedicated system monitoring software such as CPUID Hardware Monitor PRO, as it provides a more detailed look at the GPU’s performance.
Alternatively, you can run a more conclusive benchmark that focuses on running a specific resolution preset for a set amount of time. To do this, simply select one of the presets found in the ‘GPU benchmarks’ section. Settings such as the allocated testing time can be adjusted before conducting the test. Once the test has been completed, you’ll be greeted with a results window that shows the key stats from the benchmarking run. The key nuggets of information to look out for include the framerates, max GPU temp, and GPU clock speeds.

These results will provide an indication of the performance parameters of your gaming PC and graphics card at a particular resolution. On top of this, it will provide information on how the GPU and other components react to extremely demanding conditions. Whilst the expected results for framerate and clock speeds will depend on the equipped GPU, most graphics cards should not be exceeding much more than 90°C (185°F).
CPU Testing: CPU-Z
To stress test CPUs, the software we suggest is CPU-Z. This software allows users to monitor the hardware information and reports on the CPU and other components, as well as provide a number of ways to test single and multi-threaded performance. CPU-Z can be downloaded via the CPUID website, where you can also find custom versions of the software to coincide with specific motherboard manufacturers.
To run the CPU stress test, open the CPU-Z window and head to the ‘Bench’ tab. Here, you’ll find the settings needed to run a number of CPU benchmarks, including the stress test. For gaming, CPUs tend to use at least 4 threads to run modern games. However, the number of threads required tends to vary on how demanding the game in question is. As a result, we’d recommend testing your CPU at a range of thread counts. To change the thread count, tick the ‘Threads’ box in the ‘CPU Multi Thread’ section, then use the drop-down menu to select the number of threads enabled.
After deciding the thread count, click ‘Stress CPU’ and the test will begin. In a similar fashion to the GPU stress test, we’d suggest having a monitoring software like CPUID’s own Hardware Monitor PRO open while running the test, as this will make it easier to track real-time performance, leading to a better understanding of how a high CPU load will affect your gaming PC.

Whilst the primary objective of a CPU stress test is to find out whether the processor can perform under pressure, it is also useful for testing the effectiveness of a CPU cooler. By tracking the CPU temperatures under such extreme conditions, it is easy to gauge whether your build needs a more powerful cooling solution.
System Monitoring: CPUID Hardware Monitor PRO
CPUID Hardware Monitor PRO (HWMonitor Pro) is an extremely detailed but easy-to-use software that monitors the real-time performance of all of the components within a gaming PC. When this hardware monitoring software is running, users receive a complete overview of their PCs performance, making it one of the best ways to gauge how your system responds to various tasks or scenarios.
Because of this, we always recommend having HWMonitor Pro running in the background when conducting stress tests or benchmarks, as it provides greater insight into your PC’s behaviour, along with an external reference point. Additionally, it is worth looking at this software while running your favourite games to see how the game affects performance. That being said, there are some better ways of tracking the performance of your system without interrupting your gaming sessions.

To the untrained eye, the statistics shown on HWMonitor Pro can be quite overwhelming, appearing as lots of random numbers on the page. However, with a little research and analysis, these numbers can be incredibly useful way of detecting problems or weak spots within your gaming PC, which can then be solved to regain optimal performance.
Each component is separated into their own sections, all of which include various subcategories that relate to specific measurements. For most gamers, the key measurements you want to be aware of are the overall temperature, utilisation, speed, and power of each component. This is more than enough information to gain knowledge on how your system deals with various circumstances.
Benchmarking Modes in Games
If you want to find out how your gaming PC will perform in action, gaming benchmarks are undoubtedly the best testing method. After all, there’s no better way of testing gaming performance than actually running the games themselves. Plenty of game developers have acknowledged this and provided ways of testing your system within the game itself via dedicated benchmarking modes.
This means you don’t have to rely on any external software to test the game, as these modes will run all the necessary tests for you. What makes in-game benchmarking even better is that most games will allow you to run these tests with free reign over the in-game settings, allowing you to gain an accurate and personalised reading of in-game performance.
We would recommend running another gaming-oriented benchmarking software such as MSI Afterburner or NVIDIA FrameView in tandem with the in-game benchmarking mode, as some of these modes can hide important details. Plus, it removes any speculation gamers may have about the validity of results from an in-game testing method.
Generally, in-game benchmarking runs put a heavy focus on the framerates and temperatures, as these are considered the most important factors that can influence the gaming experience. However, the amount of detail shown and how they are displayed will vary based on the title.
Unfortunately, lots of games don’t include an integrated benchmarking mode. These modes are often reserved for simulation titles such as racing games, along with AAA blockbusters looking to show off their performance capabilities. If you are interested in putting your gaming PC through its paces with ease, here is a list of the games we’ve used to benchmark our PC builds that come with a dedicated benchmarking mode:
- F1 2023
- Hogwarts Legacy
- Cyberpunk 2077
- COD MW3
- Forza Horizon 5
- GTA V
- Watch Dogs Legion
- Rainbow Six Seige
- Guardians of the Galaxy
MSI Afterburner & RivaTuner Statistics Server (RTSS)
If none of the games within your gaming library have a benchmarking mode, then never fear, as MSI Afterburner can be used to monitor the performance of any game, and allow you to tweak effectively. With the help of RivaTuner Statistics Server (RTSS), this software provides real-time feedback on a wide range of factors that can affect the performance of a gaming PC.
To get started, download the MSI Afterburner from the official landing page. This will trigger both MSI Afterburner and RTSS to install automatically, which will then work together to monitor the performance of your gaming PC. As soon as the installation process has finished, the MSI Afterburner window will pop up, allowing you to make changes to performance settings, as well as toggle which measurements are monitored and displayed on-screen.

Whilst tweaking the performance parameters and enabling overclocking can help you realise the full potential of a gaming PC, the main reason we suggest utilising this software is for the extensive and customisable OSD it provides for gaming benchmarks. Using this software with any title at high or max settings will provide a strong indication of the gaming performance you can expect when your system is put under intense loads. On top of this, the UI is simple and easy to read, which makes it easy to read the real-time statistics without getting too distracted from the game you’re playing.

Suggested Article: Best CPU Coolers to Buy for Overclocking
The ability to run benchmarks in any game in such a personalised and user-friendly way is great, but the detailed nature of MSI Afterburner and RTSS can make adjustments to settings quite complicated, especially for less tech-savvy gamers. Because of this, it is worth getting to grips with the MSI Afterburner software before conducting any tests with the software.