Introduction
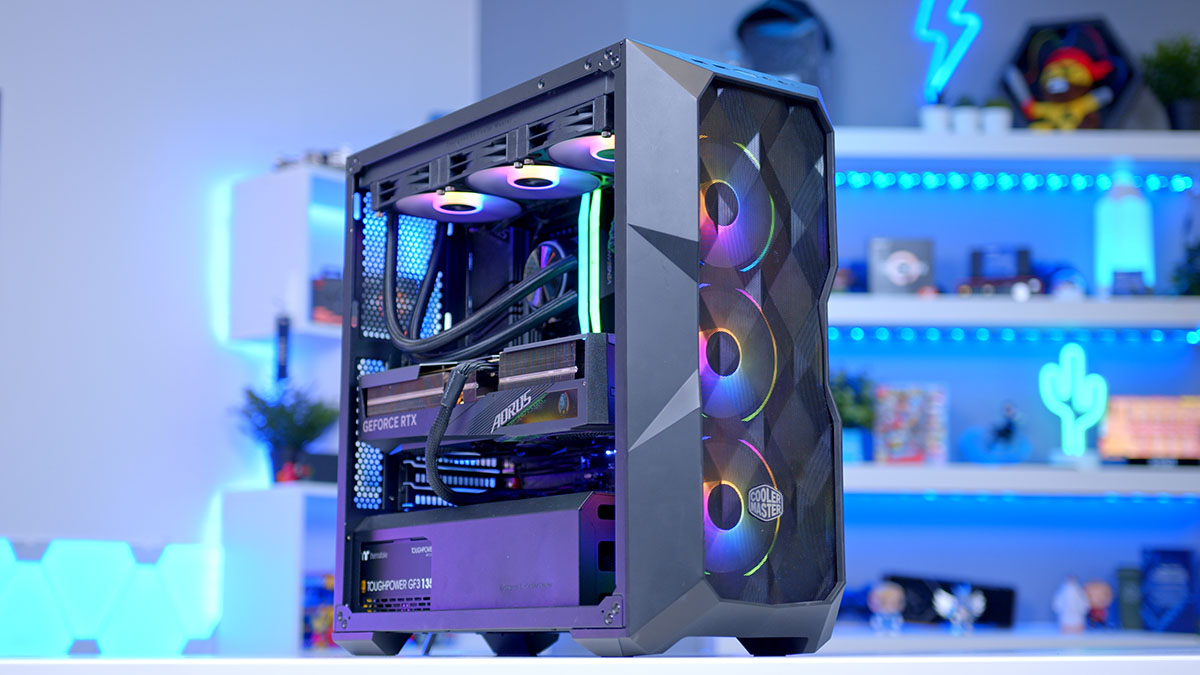
Nvidia’s RTX 4080 graphics cards are finally here, and with them comes a plethora of questions around just which components are best to pair them up with. In this piece, we’ll be covering off the best RTX 4080 Gaming PC you can build right now using the Gigabyte AORUS RTX 4080 Master design.
Launching just one month after the release of the 4090, this slightly more affordable RTX 4080, 4000 series GPU has been shown to delivery very strong performance for those willing to pay for it. Despite the lower price point, the 4080 still has more than enough power to provide avid gamers with an incredible 4K experience.
In this article, we’ll be going through all the components that we picked to build an elite 4K Gaming PC which doesn’t break the bank (or at least break it quite as much as other configs!). We’ll also be recommending the best peripherals for a build that like this, and covering off performance in a detailed set of gaming benchmarks.
Main Components

GPU: Gigabyte AORUS Master RTX 4080
Starting things off with our crown jewel for this build, the Gigabyte AORUS Master RTX 4080. Gigabyte‘s AORUS Master has one of the more striking designs in the new range of GPUs, and is bound to look great in any build. But beware, the shape and size of this graphics card is very similar to the RTX 4090 version, which means this card is big, broad, and bulky.
Key Facts: Base Clock: 2.2GHz // Boost Clock: 2.5GHz // CUDA Cores: 9728 // TDP: 320W // RT Cores: 76
In terms of performance, the 4080 is an impressive unit that will satisfy the needs of most gamers out there. Compared to the previous generation of Nvidia graphics cards, the Ada Lovelace architecture in the new cards provides a major boost in performance. And when paired up with the newest DLSS 3 technology, there isn’t a better way to play games right now.
Whilst the AORUS Master RTX 4080 is one of the more expensive 4080 cards on the market, it still provides a cheaper alternative to the RTX 4090, and moves 4000 series one step closer to the upper mid-range market. If you are interested in learning more about this card, then you can read our full AORUS RTX 4090 review, which includes an in-depth look at the specs, design, and performance.
Buy the Gigabyte AORUS Master RTX 4080 on:

CPU: Intel Core i5 13600K
After spending more money on the graphics card, we’ve decided to save some cash with our CPU. Intel’s latest generation of processors have impressed us since launch, with the i5 13600K being the pick of the bunch in terms of price-to-performance. It seems strange to suggest pairing an i5 chip with a high-end GPU, but intel’s latest CPU has plenty of firepower to support 4K gaming, making it the perfect choice for our build.
Key Facts: Base Clock Speed: 3.5GHz // Boost Clock Speed: 5.1GHz // Core Count: 14 // Thread Count: 20
With a boost clock speed over 5GHz, the i5 13600K competes with the performance of the top-tier 12th gen CPUs, making it the best budget option to pair with the 4080. And with it being compatible with 12th gen motherboards and DDR4 RAM, there are plenty of ways to cut down the cost of a 4080 gaming PC. There is no denying that a more powerful CPU will reduce the chances of bottlenecking while providing increased performance, this mid-range option shouldn’t be overlooked.
If you are looking for a more powerful CPU to use in your build, have a look at our breakdown of the best CPUs for Nvidia RTX 4080 that includes both Intel and AMD options.
Buy the Intel Core i5 13600K on:

CPU Cooler: Cooler Master LIQUID PL360 FLUX
To keep our system cool, we’ve selected Cooler Master‘s LIQUID PL360 FLUX. We’ve featured this cooler in our PC build guides previously, due to it’s efficient water cooling capabilities and sleek design. With the performance that the 4080 provides, it needs a lot of power to generate the desired outcome, leading to quite a lot of heat loss. This is why a large cooler like the PL360 is needed to avoid any major issues.
Key Facts: Radiator Size: 360mm // Included Fans: 3 // RGB: Yes
The three-fan layout on the 360mm radiator manipulates the flow of air to keep it from getting too hot, even during the most demanding tasks. On top of this, the dual channel pump keeps the liquid flowing for improved efficiency in the heat exchange. The premium performance is matched by a sleek and luxurious aesthetic that blends in perfectly with the interior of our build. Despite the subtle design, there is still plenty of RGB that will shine some light onto our GPU centrepeice.
Buy the Cooler Master LIQUID PL360 FLUX on:

Motherboard: Gigabyte AORUS Z790 Elite AX
Our motherboard of choice for this build is the Gigabyte AORUS Z790 Elite AX. As the AORUS name suggests, the design of this motherboard will compliment the GPU nicely, whilst providing perfect compatibility with the 13th Gen CPU. Z790 motherboards have been specifically designed with Intel 13th gen processors in mind, making it the best option for optimal performance.
Key Facts: Form Factor: ATX // Built-in IO Shield: Yes // Max Memory: 128GB
The AORUS Elite is one of the cheaper motherboards to include both DDR5 memory and PCIe Gen 5 comparability, making it a great option for those looking to get a cheaper board that won’t become outdated within a few years. Connectivity wise, this board includes 7 USB Type A ports, and 2 USB-C ports, which provides plenty of options when connecting peripherals to our build.
Buy the Gigabyte AORUS Elite AX on:

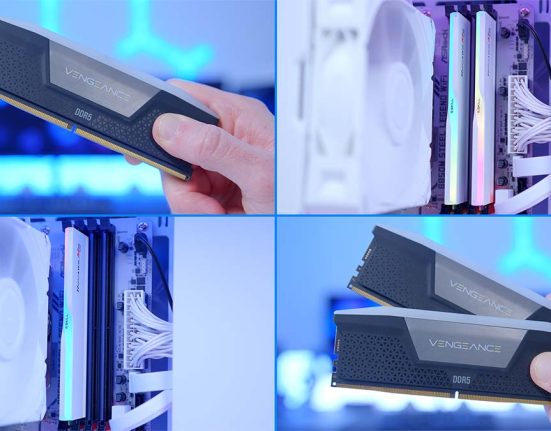
RAM: Corsair Vengeance RGB DDR5
For the memory in this build, we’ve picked Corsair’s Vengeance RGB DDR5. We’re taking advantage of the DDR5 support from our motherboard to boost speeds and unlock the potential of our the RTX 4080. Also, putting DDR5 RAM into our build now will save us from having to upgrade in the future.
Key Facts: Capacity: 32GB // Clock Speed: 5600MHz // CAS Latency: 36-36-36-76
The Corsair Vengeance RGB DDR5 is one of our favourites in the office due to its reliable performance and pleasing design. With a boost clock speed of 5600MHz and CL36 latency, this 32GB kit will make even the most demanding games feel smooth and fast. It’s always nice to have RGB on components that don’t necessarily need it, and the design of Corsair‘s memory looks great. On top of this, the compatibility with their iCUE software offers plenty of custom lighting effects.
Buy the Corsair Vengeance RGB DDR5 on:

SSD: Seagate Firecuda 530
We’ve gone with another reliable choice for the SSD option, the Seagate Firecuda 530. After using this SSD in a number of different builds, we’ve been impressed with the performance of Seagate’s M.2 storage options. With gen5 SSDs still yet to be released, the Firecuda 530 is your best chance at matching the performance of Nvidia’s 4000 series GPUs.
Key Facts: Capacity: 2TB // Read Speeds: 7300MB/s // Write Speeds: 6900MB/s // Interface: PCIe Gen4 x4
Game file sizes have continued to grow in recent years, but the 1TB capacity on the 530 will let you store a wide range of titles without any issues. And with read speeds over 7GB/s, along with write speeds just under that, there is no need to switch games in and out of the external storage in order to achieve the best in-game performance possible. Whilst the Firecuda 530 is a little expensive for an SSD, the performance and capacity makes it a worthwhile investment that is bound to improve your gaming experience for years to come.
Buy the Seagate Firecuda 530 2TB on:

Case: Cooler Master MasterBox TD500 Mesh
For this build, we’ve placed all of the components inside Cooler Master’s MasterBox TD500 Mesh. Saying that the new RTX 4000 series are big seems like a bit of an understatement, which makes finding a smaller case that can fit these behemoths a challenge. However, Cooler Master’s TD500 is one of the best mid-tower cases that can accommodate our 4080 with some room to spare.
Key Facts: Form Factor: Mid-Tower // Fan Support: 7 x 120mm // Motherboard Support: Mini-ITX, Micro-ATX, ATX, SSI-CEB, E-ATX
For a reasonable price, this case has a unique aesthetic that is designed to improve airflow and provide necessary installation and connectivity features. The polygonal structure on the mesh front panel makes this case stand out in any setup, and looks even better when the three addressable RGB fans are shining through it. The design also provides a practical purpose, as the mesh material improves airflow and dust filtration, which can be enhanced by installing up to 7 120mm fans.
Buy the Cooler Master MasterBox TD500 on:

PSU: Corsair HX1000i
To round things off, we’ve picked the Corsair H1000i as our power supply for this build. With the performance enhancements provided by Nvidia’s latest generation of graphics cards, it’s important to provide them with enough power to perform efficiently. That’s why we have opted for a 1000W PSU for this build.
Key Facts: Wattage: 1000W // Modular: Fully // Efficiency: 80+ Platinum
Corsair’s new HX1000i power supply provides plenty of juice in an extremely efficient manner, reducing any power lost as heat or noise. Awarded with an 80+ Platinum efficiency rating, this PSU is guaranteed to keep your system running optimally. The HX1000i is also fully modular, allowing you to choose which cables to use when connecting it up to rest of the build.
Buy the Corsair HX1000i on:
Peripherals
To keep with the theme of this build, we’ve also rounded up the best, high-quality peripherals that provide great performance compared to average component, but are not ludicrously expensive to buy.
Logitech G Pro Wireless Mouse

Logitech‘s G series provides a range of high-quality peripherals at various price points. We would recommend most of their mice, but we’ve highlighted the G Pro wireless for this build. This mouse is specifically designed for Esports, offering elite performance with a few bells and whistles for extra convenience. Equipped with Logitech’s HERO 25K DPI sensor, LIGHTSPEED wireless connectivity, and up to 60 hours battery life, the G Pro is the ideal choice for those wanting an elite gaming experience at a reduced price.
Buy the Logitech G Pro Wireless on:
ASUS ROG Strix Scope TKL Deluxe Keyboard

We’ve previously covered ASUS’ high-end optical mechanical keyboard in our full review of the ASUS ROG Strix Scope TKL, but this cheaper wired option is a great way of sparing some change. The TKL layout reduces the impact on desk space while giving you all the inputs required for day-to-day use, making it ideal for those using their keyboard for a combination of gaming and productivity tasks. The Strix Scope looks and feels amazing thanks to the sleek frame, Cherry MX Red switches, and Aura Sync RGB lighting.
Buy the ASUS ROG Strix Scope TKL on:
Logitech G733 Wireless Headset

For our headset, we’ve recommended another product from the Logitech G lineup. This wireless headset provides premium sound quality with 7.1 surround sound, allowing you to hear all the details when gaming. The built-in microphone provides similar performance to the speakers, with the Blue Vo!ce controls letting you adjust sound-quality for clearer communication.
If you would like to learn more about Logitech’s G733 headset, check out our full review.
Buy the Logitech G733 Headset on:
Benchmarks
After looking at the components in this build individually, it’s time to see how they perform together with some benchmarks. We’ve pushed the new RTX 4080 to its limits by testing it out in all the latest AAA and Esports titles. As expected, the RTX 4080 sits between the more expensive RTX 4090 and RTX 3090Ti in most titles. However, it does concede loose out to AMD’s 6950XT in some performance setting. The AORUS Master 4080 produces a few additional frames compared to its Founders Edition counterpart, slightly bridging the gap to the 4090 models. If you would like to see more detailed benchmarks comparisons, check out our very own ‘Benched’ YouTube channel.
Gallery


![FI_[DM87] HAVN BF & RTX 5090 Build](https://geekawhat.com/wp-content/uploads/2026/01/FI_DM87-HAVN-BF-RTX-5090-Build-551x431.jpg)

![FI_[DM86] Montech King 45 Pro + RX 9070](https://geekawhat.com/wp-content/uploads/2026/01/FI_DM86-Montech-King-45-Pro-RX-9070-551x431.jpg)