Building the ultimate racing sim rig PC is no easy task. You need to find a balance of the right components that provide the solid performance you need to enjoy a smooth driving experience at high fidelity. That’s why we’ve put together this excellent guide, which showcases some of the best parts to pick out and the installation process from start to finish.
This build uses the Intel Core i5-14600K and the Palit Gaming Pro RTX 4080 SUPER, which provide all the performance we need for some sim rig gaming.
These are housed inside the Thermaltake CTE E550 TG, a fish-tank-style case with plenty of room for varied component configurations.
This article was written alongside a dedicated video explaining the process in more depth and covers the additional sim rig parts we used to enjoy some realistic driving!
Build Process
Step 1: Socketing the CPU
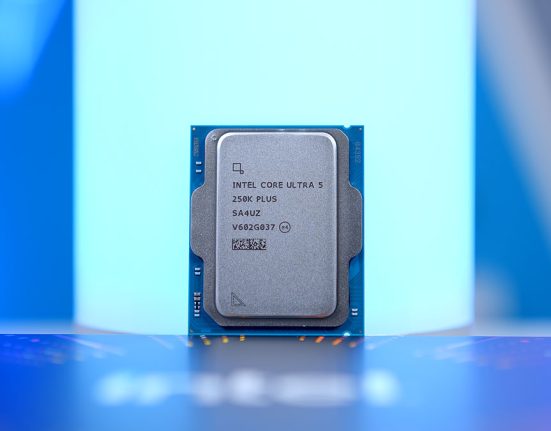
As the brains of this system, we’ve picked out the Intel Core i5-14600K CPU. Racing sim systems need a solid CPU to handle the complex calculations that make racing feel more realistic, so the Core i5-14600K acts as a solid pairing for this specific reason. This processor has fourteen cores and twenty threads, enough to handle the demand of realistic racing sim games like F1 or iRacing.

The Core i5-14600K can reach a maximum speed of 5.3GHz, making it ideal for gaming at 1440p and 4K. With 15th-Gen slated for a potential release towards the end of 2024, the price of the Core i5-14600K will likely drop, further increasing its value proposition.
To install this CPU correctly, first remove the motherboard from its box. We always do this first, as motherboard boxes provide a smooth and stable surface to work on that won’t damage any connections on the PCB’s underside. Unhook the metal retention arm next to the CPU socket and lift the socket cover to expose the pins underneath.

Now, locate the golden triangle on the CPU. For Intel processors, this is typically at the bottom left. Find the matching arrow on the motherboard. This indicates the correct orientation for the Core i5-14600K. Once you’ve lined up these arrows, slowly lower the CPU into the socket until it neatly drops into place. If the arrows are lined up correctly, there isn’t any force required to get it to sit snugly.

Finally, place the metal cover back on the CPU and push the arm until it sits underneath the hook. While this happens, the CPU socket’s pressure will cause the plastic protector to pop off. Keep this in case it is needed for a future RMA or repair.

The motherboard we’ve just installed the CPU into is the NZXT N7 Z790. NZXT motherboards tend to go under the radar compared to the big four brands (ASUS, Gigabyte, MSI, and ASRock). However, their boards are excellent compared to the rest of the market. Much like most other NZXT components, the design is immaculate, with the vast majority of the board being covered by tool-less heatinks.
| Key Specs | NZXT N7 Z790 |
|---|---|
| Form Factor | ATX |
| Supported Memory | 192GB DDR5 7200MT/s |
| PCI-E x16 Slots | 1 x PCI-E 5.0 2 x PCI-E 4.0 |
| PCI-E x4 Slots | 3 x PCI-E 4.0 |
| Front IO | 2 x USB 2.0 1 x USB 3.2 Gen1 Type-A 1 x USB 3.2 Gen2x2 Type-A |
| Rear IO | 2 x USB 2.0 1 x USB 3.2 Gen2x2 Type-C 2 x USB 3.2 Gen2 Type-A 3 x USB 3.2 Gen1 Type-A |
| Audio | 5 x Audio Jacks 1 x Optical S/PDIF |
| Networking | WiFi 6E 2.5 Gigabit LAN |
Regarding the specs, the NZXT N7 Z790 has a Gen5 x16 slot ready for the latest generation of graphics cards. Unfortunately, this motherboard does not support Gen5 SSDs, but it does have three Gen4 SSD slots, which is ample for this build, as we don’t need any Gen5 drives for gaming. The rear IO has eight ports: two USB 2.0, one USB 3.2 Gen2x2 Type-C, two USB 3.2 Gen2 Type-A ports, and three USB 3.2 Gen1 Type-A ports. The N7 Z790 also supports WIFi 6E and offers 2.5 Gigabit LAN for high-speed wired networking.

Step 2: Slotting in the RAM
The next component we need to install is the RAM. We’ve chosen the Thermaltake ToughRAM XG RGB D5 kit for this build. These DIMMs offer a 6000MT/s speed with a latency of CL36. Ultimately, the performance of these DIMMs isn’t ideal for more challenging multi-core workloads, but as this sim rig system is primarily aimed at gaming, they’re more than ample.

On the design front, the TOUGHRAM XG RGB D5 fits in with the darker aesthetic that we’ve gone for, offering primarily black shrouding. This blends nicely with our build, and the RGB strips on top of the heatspreader add customisable lighting.
Installing RAM is pretty straightforward. First, push down the tabs at the top and bottom of slots two and four. We’re using these slots because this is the most efficient configuration when you only have two RAM sticks.

Grab one of the RAM DIMMs and line it up with the slot. The RAM sticks have a small notch in the middle, which indicates which way the RAM must be oriented. Apply firm pressure to both sides of the RAM stick and push it down into the slot until you hear a click. The click sound shows that the RAM is seated correctly, and the push tabs lock it in place. Do the same again for the second RAM stick.

Step 3: Securing the SSD
We’ve picked out the Samsung 980 Pro 1TB SSD for storage. We’ve picked out a slightly older Gen4 drive for a couple of reasons. The first is performance. Modern games don’t require insane speeds, and because many titles still haven’t properly integrated DirectStorage, Gen3 and low Gen4 speeds are fine.

Additionally, we’ve chosen the Samsung 980 Pro to save some cash for other components. This build has a specific purpose: to provide excellent gameplay in sim-based applications. This means we have to spend a bit more on the graphics card, so anywhere we can save costs is worth it. This drive offers reads and writes up to 7000MB/s and 5000MB/s, respectively, which is ample for this sim rig PC build.
First, remove the metal faceplate cover on top of the main heatsink underneath the CPU. Removing this will reveal two screws which need to be loosened so that we can remove the SSD heatsink. Once these screws are loose, place the heatsink aside.

Push the Samsung 980 Pro into the SSD slot, which will poke out at a 45-degree angle. Make sure you remove the tape around any of the thermal pads so they can dissipate heat coming from the drive. Screw the SSD down, place the heatsink back on top of the drive and secure it in place. Attach the metal face plate, and it will magnetise to the board.

Step 3.5: Attach the CPU Cooler Mounting Hardware
Before placing the motherboard inside the case, we need to finish installing the rest of the hardware while we’ve got plenty of free space. As this is an Intel PC build, we must pick the Intel hardware from the CPU cooler box. This includes the backplate that attaches to the board and the double-ended threads that screw into the plate.

Attach the backplate to the back of the motherboard and hold it still using the small side of the double-ended threads, which need to be screwed in. Using your fingers, tighten these screws. No additional tools are required.

Step 4: Place the Motherboard Inside the Case
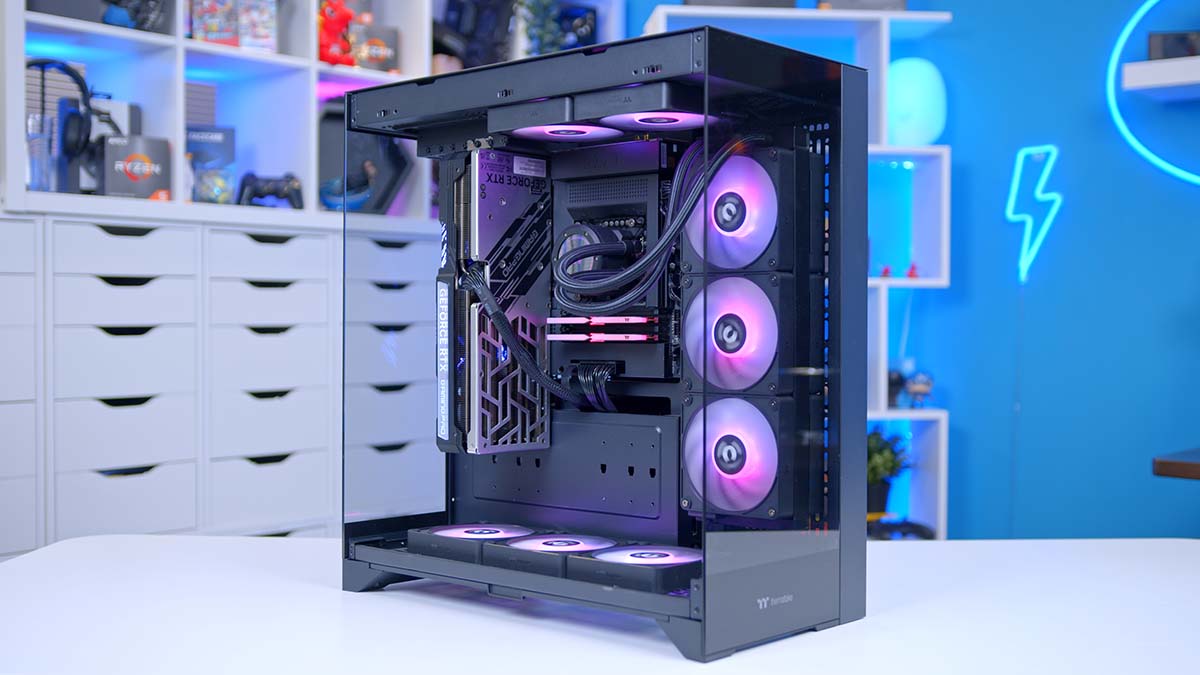
Next, we’ll place the motherboard inside the case. The chassis we’ve opted for in this build is the Thermaltake CTE E550 TG. This mid-tower chassis uses a familiar fish tank design with triple tempered glass panels (front, side, and rear). The CTE E550 TG is spacious, offering considerable room for different component configurations, including space for E-ATX motherboards, graphics cards up to 443mm long, and 166mm of clearance for CPU air coolers.
We were also particularly fond of this case due to its design. The glass provides an unhindered window into the build, but the radiator rails and vents are also similar to the grilles of a car, fitting in with the racing sim theme.

It can also house 420mm radiators on the bottom and side panels, while the top has space for a 240mm AIO (all-in-one). For fans, the CTE E550 TG has space for eight in total: three 140mm fans on the side and bottom panels and two 120mm fans at the top. Overall, the CTE E550 TG has a well-rounded and customisable design that blends with our chosen theme for this build.
| Key Specs | Thermaltake CTE E550 TG |
|---|---|
| Form Factor | Mid-Tower |
| Motherboard Support | Mini-ITX, Micro-ATX, ATX, E-ATX |
| Case Dimensions (L x W x H) | 513mm x 270mm x 558mm |
| Front IO | 2 x USB 3.0 Type-A 1 x USB Type-C 1 x 3.5mm Combo Jack |
| PCI-E Slots | 7 |
| Colour | Black White Gravel Sand Matcha Green |
| Max Clearance | 166mm Cooler Height 443mm GPU Length 220mm PSU Length |
| Drive Support | Up to 2 x 2.5 inch Up to 2 x 3.5 inch |
| Fan Support | Top: 2 x 120mm Side: 3 x 140mm Bottom: 3 x 140mm |
| Radiator Support | Top: Up to 240mm Side: Up to 420mm Bottom: Up to 420mm |
| Pre-Installed Fans | 0 |
We recommend removing the panels and laying the chassis flat to install the motherboard in this case. This will make installing the motherboard much more accessible and minimise the risk of dropping the board. The CTE E550 TG is pre-configured to support ATX boards, so we don’t need to move any standoffs around.
We’ve stuck with the traditional mounting in this system, so you can push the board up to the rear IO cutout and line the holes up with the standoffs.

Once the board is correctly in place, use the screws found in the accessory box to secure the board to the case. Don’t overtighten these screws, as we don’t want to risk damaging the standoffs, which can make future upgrades quite tricky.

Step 5: Mounting the CPU Cooler
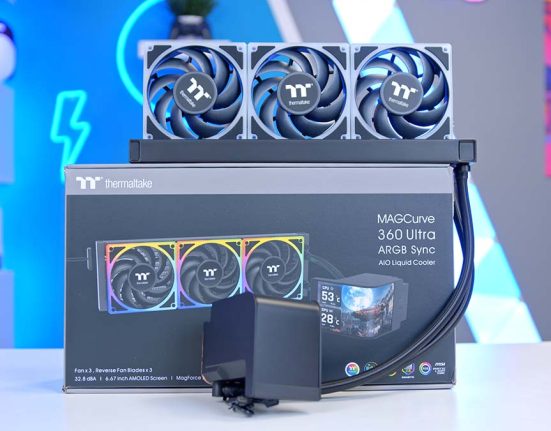
Now that the motherboard is in the case, we can secure the CPU cooler. We’ll install the Thermaltake ToughLiquid 360 EX Pro ARGB Sync for this build. This 360mm liquid cooler uses magnetic fans and is designed to streamline the building process. This design saves time and minimises the cabling required to power and control the cooler.

The fans are relatively plain, but Thermaltake has included an infinity mirror on the CPU blockhead, offering additional flair for this build. This AIO is easy to assemble and is enough to keep the Core i5-14600K nice and cool.
We’ve gone for a slightly non-traditional airflow configuration with this build, so follow the next steps closely. First, clip the reverse CT120 EX ARGB Sync fans together. These are magnetised, so they snap together easily. Attach these to the radiator on the side where the tubing is located.

Next, clip the regular CT120 EX ARGB Sync fans together. Then push the fans and the back of the radiator (the side without the tubing) up to the side panel, and using the long screws, secure both the radiator and the fans.

With one hand, hold onto the radiator, and with your other hand, start to screw in the radiator, securing it to the side of the chassis. Once the screws are holding the weight of the cooler (about four in this case), you can let go of the radiator and continue to screw it in.

Attach the Intel mounting bracket to the CPU blockhead. This slides onto the blockhead through the notches on the sides and sits in place. The Intel bracket doesn’t use any eyelets to attach to the CPU, so it should be easy to pick out in the mounting hardware.
Finally, apply a rice-sized grain of thermal paste to the CPU’s IHS (internal heatspreader). The ToughLiquid EX Pro doesn’t come with any, so we’ve had to supply our own for this system.

Finally, place the CPU blockhead on top of the CPU and secure it using the spring-loaded thumbscrews. We recommend using finger strength first and following up with a Phillips head screwdriver, torquing the screws in a star pattern.

Step 5.5: Adding in Some Case Fans
Because the Thermaltake CTE E550 TG doesn’t come with fans, we’ve had to pick up our own fans for this case. We’ve opted for the Thermaltake CT120 EX ARGB Sync range, with the bottom panel acting as intake and the top for exhaust.

For the bottom panel, remove the bracket and attach three of the reverse model fans using the supplied screws. Then, place the bracket back inside the case and wire the fans appropriately.

Because of where the GPU is mounted, there’s only space for two fans on the top panel. Again, using the standard CT120 EX ARGB fans, screw these in at the top of the case, and wire them up using the headers on the motherboard.

Step 6: Installing the Graphics Card
As mentioned in the introduction, the graphics card in this build is hefty and designed to offer smooth framerates at 1440p and 4K. The RTX 4080 SUPER handles all of this system’s graphical horsepower. It’s a GPU that’s reviewed well across our testing and is our go-to recommendation for those building a high-end PC. While sim-racing isn’t mainly GPU-heavy, our card choice allows us to enjoy incredibly smooth framerates across the board.

The particular version we’ve opted for is the Palit RTX 4080 SUPER Gaming Pro OC. This is an interesting-looking model with a contrasting black and white triple fan shroud. There are a few strips of RGB lighting towards the centre of the graphics card, which can be customised using the Palit software. This card is ample for this sim rig system, and its three-fan design will keep the card nice and cool during more demanding workloads.
| Key Specs | Palit RTX 4080 SUPER Gaming Pro OC |
|---|---|
| Video Memory | 16GB GDDR6X |
| Memory Bus | 256-bit |
| Core Clock Speed | 2.34GHz |
| Boost Clock Speed | 2.67GHz |
| CUDA Cores | 10240 |
| RT Cores | 80 |
| Tensor Cores | 320 |
| Power Consumption | 320W |
| GPU Length | 328mm |
Getting this card installed inside the CTE E550 TG case is pretty simple. First, we must remove the PCI-E covers at the top of the chassis. The Palit Gaming Pro OC card is a 3-slot GPU, so we must remove covers 1-3 from right to left.

Then, line up the RTX 4080 SUPER with the graphics card slot, aligning the IO with the top of the chassis. Give the graphics card a firm push into the case until you hear a click. Much like the RAM, this indicates the card is seated correctly.

Finally, use the screws removed from the covers to secure the GPU in place. Make sure to use the same screws, as we don’t want to damage the threads.

Step 7: Secure the Power Supply
The last component we need to install is the power supply. Fitting in with the Thermaltake theme, the ToughPower GF A3 1050W unit powers all our components. Although we don’t need this much wattage, this will ensure we don’t hit over-power protection with any transient spikes. Additionally, it offers room for potential upgrades if the RTX 4080 SUPER isn’t holding up in a couple of years.

The ToughPower GF A3 1050W offers an 80 Plus Gold efficiency, ensuring minimal power is lost as heat or noise. It utilises the ATX 3.0 standard and a 12VHPWR cable, so we don’t need an adapter for the graphics card. It also comes with a ten-year warranty, which is an excellent value add.
Before installing the power supply in the case, we must choose the cables for this system. This is a fully modular unit, so we only need to pick the required cables for the build. For this sim rig build, we need a 24-pin motherboard power cable, an 8-pin and 4-pin set of EPS CPU connectors, and 12VHPWR for the graphics card.

Once all of the cables have been plugged in, slide the power supply into the back of the case, and using the hexagonal screws, secure it to the chassis.

Now, we can start wiring up the PC build. We’ll begin with motherboard power first. This has the biggest connector and can only be plugged in one way. The header is typically found on the right side of the motherboard.

The NZXT N7 Z790 uses an 8-pin and 4-pin EPS connector. While the second connector isn’t always required, we recommend plugging it, as it’s good practice and can improve power distribution and thermals.

The RTX 4080 SUPER in this build features a 12VHPWR connector designed to draw more power through a single cable, up to 600W at the maximum. Firmly push this cable into the graphics card’s header.

Step 8: Front Panel Cables & Switch On
The last steps of any PC build involve plugging in the front panel cables and switching everything on. We recommend cable management as you go because this will save time. However, if you’ve left cable management until now, we recommend doing this before plugging in all front panel wires.
Plugging in front panel cables is pretty simple. Most modern cases tend to have universal headers, which saves having to fiddle with some individual pins. Start with JFP1 (front panel power) first. This needs to be plugged in to use the power button at the front of the case. Give the header a firm push and make sure it is oriented correctly by checking you can see the text.
After all the front panel cables are plugged in, put the panels on and plug in the power. You can use this time to attach the racing sim framework, such as the wheel, pedals, etc. Then, plug in a monitor and some peripherals, and switch on the build!
Performance
Framerates reached 81FPS in Hogwarts Legacy and surged past 71FPS in Alan Wake II at 4K high settings. Alan Wake II was particularly impressive as we switched on RTX to high. The benchmarks show that the RTX 4080 SUPER can handle almost anything, so 4K at high settings is a breeze.
The strong performance continued through to the Esports games. Fortnite and Apex Legends saw insane framerates, surpassing the 144Hz sweet spot with 315FPS and 205FPS, respectively.
Gallery


![FI_[SR190] HYTE X50 Ryzen 5 9600X & MSI RTX 5070 Ti](https://geekawhat.com/wp-content/uploads/2026/01/FI_SR190-HYTE-X50-Ryzen-5-9600X-MSI-RTX-5070-Ti-551x431.jpg)