Building a high-end white gaming PC can be quite a hassle. Procuring the right white components can be a complicated process, and due to the popularity of lighter-themed parts, securing these components is difficult when they’re readily available.
That’s why we’ve decided to put together this excellent top-end white gaming PC, showcasing some of the best white components on the market. At the centre of this build is the Zotac Trinity OC White variant of the RTX 4080 SUPER, paired alongside the Ryzen 7 7800X3D, housed inside the gorgeous DeepCool CH560 white case.
In this PC building guide, we’ll walk you through the entire process step-by-step, from the CPU installation to the cables and wiring at the end. We’ll also discuss our component choices and briefly examine the performance metrics. This article also has a dedicated video, which we recommend watching for a more in-depth explanation of the entire process.
Build Process
Step 1: CPU Install
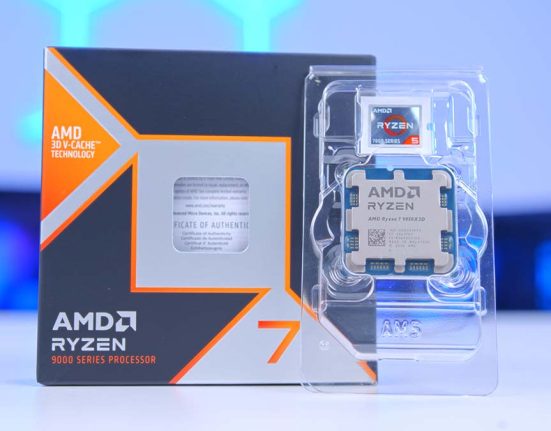
The first part of any PC build is the CPU install. While this step can be somewhat scary, it’s one of the most manageable parts of the build. The CPU we’ll install in this build is the renowned AMD Ryzen 7 7800X3D. We’ve used the Ryzen 7 7800X3D in a range of our top-end builds because it’s one of the best options for a gaming-focused system.

The reason why the Ryzen 7 7800X3D is such a solid performer within games comes down to the proprietary 3D V-Cache stacked on top of the CPU. This cache acts as blazing-fast storage for CPU instructions, which increases framerates compared to CPUs without it. Furthermore, the Ryzen 7 7800X3D is one of the best-priced options, which allows us to spend a little bit more cash on other components such as the graphics card and motherboard.
First, take the B650 AORUS Elite AX ICE motherboard out of the box and place it on top to get this CPU installed. This provides a soft but stable work surface so that we can get components mounted or secured without damaging any of the pins or parts of the board.

Unhook the metal retention arm next to the CPU socket and lift the metal cover, exposing the pins. Next, find the golden arrow on the CPU, usually at the top left, when the text on the IHS (integrated heat spreader) is upright. Find the same golden arrow on the motherboard that indicates the orientation of the CPU so it can be socketed.

Then, slowly lower the CPU into the socket, and it should drop into place. No force or extra movement is required to get the CPU to sit correctly; it should be nice and snug if lined up accurately. Finally, lower the socket cover and push down the retention arm until it sits underneath the metal hook. While you’re doing this, the plastic protector will likely pop off. Keep this inside the motherboard box if needed for a future RMA or return.

Speaking of which, the motherboard that we’ve picked out for this PC build is the Gigabyte B650 AORUS Elite AX ICE. This board is a standout option because it fully adheres to a white aesthetic. This means the heatsinks are silver and white, and the PCB is also white, which is an additional step that Gigabyte have taken to ensure this board is the perfect option for light-themed setups.
| Specification | Gigabyte B650 AORUS Elite AX ICE |
|---|---|
| Form Factor | ATX |
| Supported Memory | 192GB DDR5 8000MT/s |
| PCI-E x16 Slots | 1 x PCI-E 4.0 |
| PCI-E x4 Slots | 1 x PCI-E 5.0 2 x PCI-E 4.0 |
| Front IO | 1 x USB 3.2 Gen2x2 Type-C 1 x USB 3.2 Gen1 2 x USB 2.0 |
| Rear IO | 1 x USB 3.2 Gen2 Type-C 2 x USB 3.2 Gen2 Type-A 5 x USB 3.2 Gen1 Type-A 4 x USB 2.0 |
| Audio | 3 x Audio Jacks |
| Networking | WiFi 6E 2.5 Gigabit LAN |
Additionally, this board offers a great set of features, which includes up to 8000MT/s overclocking on the RAM, WiFi 6E and 2.5 Gigabit LAN support, alongside eleven USB ports, mostly comprised of USB 3.2 Gen1 ports. This board also offers a Gen5 SSD slot, perfect for picking up blazing-fast storage.

Step 2: Slot in the RAM DIMMs
Next, we’ll get the RAM correctly installed. The memory we’ve picked for this white PC build is the Lexar Ares DDR5 RGB kit. These DIMMs are RGB, offering some additional flair for this build, and they also fit in with the white theme we’ve opted for. Performance-wise, this RAM kit provides speeds up to 6400MT/s with a latency of CL32. While we could have picked out a more powerful kit, as the board we’ve chosen supports up to 8000MT/s, these specs are more than ample for gaming. We’ll easily be able to hit high framerates using this kit with no issues.

Firstly, push down both clips on slots two and four, exposing both RAM DIMM slots. We’re using slots two and four because this is the best-performing configuration for a two-DIMM kit.

After this, line up both RAM sticks with the slots on the board and firmly push each DIMM into their slots. Apply even pressure on both the left and right sides of the DIMMs to ensure they go into the board straight.

Step 3: Secure the SSD in the Motherboard
For this PC build, we’ve opted to install a Gen4 SSD. While the motherboard in this system offers a Gen5 SSD slot, the speeds these drives offer aren’t necessary for gaming. Furthermore, because Gen5 SSDs are priced relatively high, it makes more sense to pick up a solid Gen4 drive with plenty of space and save some cash, which provides room to upgrade later on.

The drive we’ve chosen is the Samsung 990 Pro, one of the best-performing PCI-E 4.0 M.2 drives on the market. This SSD can reach up to 7450MB/s on the reads and 6900MB/s on the writes, which is ample for top-end gaming.
First, we’ll remove the primary heatsink to get this SSD into the motherboard. Use a small Phillips screwdriver and loosen the screw so that the heatsink can be removed from the board.

Then, place the drive into the M.2 slot; it will be poking out at a 45-degree angle. Push the drive down into the EZ-latch, which will secure it in place without any additional screws required. Place the heatsink back onto the board and screw it down. If your motherboard has any tape or plastic on top of the heatsink thermal pads, make sure to remove these before screwing the heatsink back down.

Step 3.5: Install the Motherboard in the Case
We’ll get the motherboard mounted to the case for the next part of this build. Because this is an AMD build, there’s no additional backplate required for the CPU cooler, so we can skip this step entirely and get the board screwed into the case.

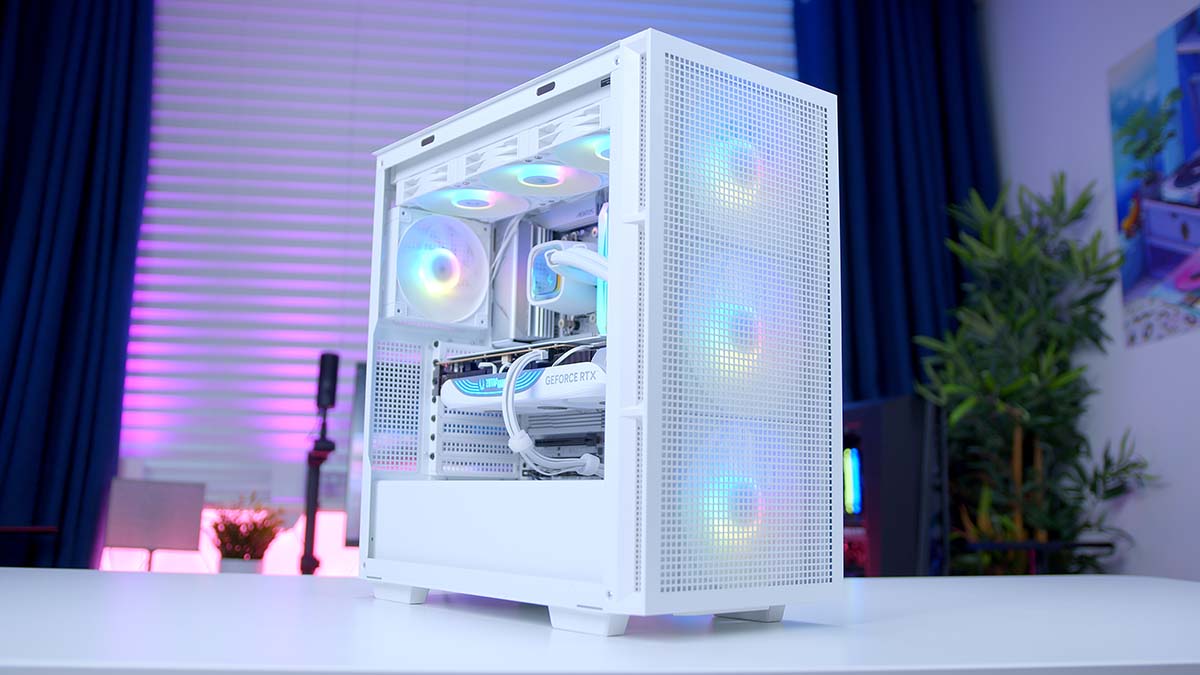
Remove the side panel from the CH560 and lay the case flat on your work surface. Then, place the motherboard into the case, ensuring the IO lines up with the large rectangular cutout on the top left side of the chassis. Then take the small motherboard screws that come with the case, and secure the board in place, don’t overtighten so as not to damage the standoffs.
It’s worth noting that while the image we’ve provided doesn’t show the case laid flat, this is what we recommend you do! James is a veteran of building PCs, so it’s easy for him to install the board inside the case without moving it around as much.

As mentioned previously, the case we’ve picked out to house all of our components in this PC build is the DeepCool CH560. This is an ATX mid-tower case that prioritises airflow. With ventilation around the entire case, including the side panel, the CH560 is designed to assist thermals by pushing as much hot air out of the case as possible. This is why the side panel has been split in two so that there’s additional room for air to flow.

The DeepCool CH560 also comes with four pre-installed RGB fans (three 140mm fans and one 120mm fan), can accommodate graphics cards up to 380mm long, and supports 360mm liquid coolers on the front and top panels. This case is also straightforward to disassemble, simplifying the building process.
| Specification | DeepCool CH560 |
|---|---|
| Form Factor | Mid-Tower |
| Motherboard Support | Mini-ITX, Micro-ATX, ATX, E-ATX |
| Case Dimensions (L x W x H) | 458mm x 230mm x 471mm |
| Front IO | 1 x USB 3.0 Type-A 1 x USB Type-C 1 x 3.5mm Combo Jack |
| PCI-E Slots | 7 |
| Colour | Black White |
| Max Clearance | 175mm Cooler Height 380mm GPU Length 170mm PSU Length |
| Drive Support | Up to 3 x 2.5 inch Up to 2 x 3.5 inch |
| Fan Support | Front : 3 x 140mm Top: 3 x 120mm Rear: 1 x 140mm PSU Shroud: 2 x 120mm |
| Radiator Support | Front: Up to 360mm Top: Up to 360mm Rear: Up to 140mm |
| Pre-Installed Fans | 3 x 140mm, 1 x 120mm |
| MSRP | $109.99 |
Step 4: Liquid CPU Cooler Install
Installing liquid coolers can be daunting, but we’ll walk you through each part step-by-step. Before delving into the process, it’s worth looking at the cooler we’ve chosen, the DeepCool LS720 WH. We’ve selected the white variant as it fits in with the overall theme of the build, but the LS720 is a powerful cooler.

This AIO (all-in-one) comes with three 120mm fans and a high-performance water pump designed to efficiently shift heat away from the CPU so that thermals remain low. The CPU blockhead of the LS720 also comes with an infinity mirror cap design, which provides a nice look to the system we’re building.
To get this cooler installed, firstly, remove the AMD plastic mounting clips from the motherboard by loosening the screws. Then, screw down the AMD mounting threads to the four exposed posts around the CPU socket. These threads are silver on the bottom and black on the top, so there’s no mistaking them for other screws in the accessories bag.

After this, remove the radiator and fans from the packaging and place them on your work surface. We must locate the AMD mounting brackets to secure them to the CPU blockhead. These brackets point at 90-degree angles instead of the 45 degrees found on Intel’s mounting hardware. Once you’ve found these, remove the four screws from the corners around the CPU blockhead and then secure both parts of the mounting hardware.

Now, we’ll need to secure the fans to the radiator. This step is pretty simple, locate the long screws and secure the three 120mm fans to the radiator. As an additional step, make sure the fan cables are pointing towards you when installing them, as when you flip the radiator back up to install it inside the CH560 case, they can be threaded out through the cutouts to be cable managed.

Then, we can secure the radiator to the case’s top panel. Remove the dust filter from the top of the case, exposing the radiator mounting rails. Grab the radiator screws, hold up the cooler to the rails and screw it in, securing it to the case.
We advise doing a couple of the corner screws while still holding onto the radiator and then doing the rest of the screws once it’s secured properly. It’s also worth not tightening all of the screws fully so you can adjust the radiator left or right if there’s not enough clearance.

Finally, line up the CPU blockhead with the threads on the motherboard and use the thumbscrews to secure the CPU cooler in place. We recommend tightening these screws with your fingers initially and then using a screwdriver to torque them fully. Now that the cooler is installed, it can be worth starting the cable management process, but this can also be saved later.
Step 5: Mount the Graphics Card
The star of this PC build is the RTX 4080 SUPER, which is driving the graphical power of this system. The RTX 4080 SUPER is a heavy hitter in terms of performance and is one of the most powerful cards on the market, offering exceptional metrics at 4K even with ray tracing enabled. While this GPU is pricey compared to some AMD alternatives, the achievable framerates are worth the extra cost.

The Zotac Gaming Trinity OC White variant of the RTX 4080 SUPER stood out as the best pick for this PC build. This card offers a gorgeous white chassis, illuminated by plenty of RGB lighting around the card. With three fans, this Zotac RTX 4080 SUPER offers great thermals, ensuring temperatures and noise levels remain low during gaming and intense workloads.
| Specification | Zotac Gaming RTX 4080 SUPER Trinity OC White |
|---|---|
| Video Memory | 16GB GDDR6X |
| Memory Bus | 256-bit |
| Base Clock Speed | 2.29GHz |
| Boost Clock Speed | 2.56GHz |
| CUDA Cores | 10240 |
| RT Cores | 80 |
| Power Consumption | 320W |
| GPU Length | 306mm |
Before placing this card into the case, we must remove the PCI-E covers at the back. The Zotac Trinity OC White version of the RTX 4080 SUPER is a 2.5-slot graphics card, so we’ll need to free up two slots.

Line up the RTX 4080 SUPER with the graphics card slot on the motherboard, and push the card into the slot until you hear a click. Then secure the card in the slot by using the screws that we removed to free up the PCI-E slots.

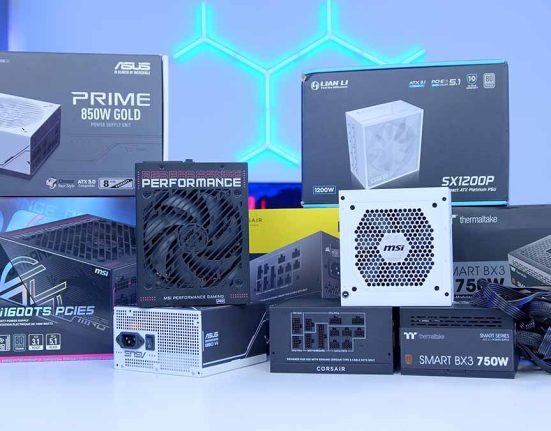
Step 6: Power Supply Install & Cabling
The last component we must install in this system is the DeepCool PX1000G WH power supply. Fitting in with the white theme, the DeepCool PX1000G is an entirely white unit with an 80 Plus Gold efficiency rating while supporting ATX 3.0 cabling for NVIDIA’s RTX 4000 graphics cards. This power supply is fully modular, allowing you to pick and choose cables as you need them, and it features a zero-RPM mode to turn off the fan once utilisation reaches a certain threshold.

We recommend plugging the cables into the power supply first, making the installation very simple. For this build, we need a CPU EPS cable, a 24-pin motherboard cable, the 12VHPWR graphics card cable, and a SATA power cable for the fans and CPU cooler.

Get all of these plugged into the PX1000G, remove the case’s opposing side panel, and slide the power supply up to the back of the chassis. Then use the four hexagonal screws that come with the case to secure the PX1000G in place.

The first cable that we’ll get plugged in is motherboard power. This cable has a large rectangular header and needs to be installed on the right side of the motherboard. It’s worth noting that all the cables we’re plugging in can only go in one way, making installing everything easier. Ensure that the clip at the top of the header is fully engaged; this shows you that the cable has been plugged in correctly.

Next is CPU power. This header is located at the top left of the motherboard, so we suggest threading the cable through the cutouts at the top of the case. Again, double-check that the clip at the top of the header is engaged fully.
The graphics card power cable is pretty recognisable as it’s the only header that has a wattage written on it. This cable only goes in one way: get this plugged into the graphics card.

The last power cable we need to plug in is the SATA power. This will be used to power the fans and pump of the LS720. Thread the fan and pump cables through to the base of the case, plug in the SATA adapter that comes with the cooler, and plug this adapter into the SATA power cable.
Step 7: Cable Management & Front Panel Wiring
The final steps of any PC build are front panel wiring and cable management. These are often left as the last thing to do because it’s much easier to plug in all the cables once we know how much clearance we have. Starting with front panel wires, you’ll need the JFP1 header (or front panel power); this is required to turn your case on. We also need HD audio, a USB 3.0 cable, and a USB type-C cable to use the audio and USB ports at the front of the case.

Additionally, it’s an excellent opportunity to take the time to get any cables properly organised and tidy. The DeepCool CH560 has ample channels and space to get your cables out of sight. Once this has been done, put the case panels back on, plug in any necessary peripherals, and turn on the build!
Performance
![]()
4K, High Settings
Avg: 202FPS
Preset: High
V-Sync: Off
Anti Aliasing: TSAA
Texture Filtering: 8x
Ambient Occlusion: High
Volumetric Lighting: High
Dynamic Shadows: Enabled
Model Detail: High
![]()
1080p, Comp. Settings
Avg: 328FPS
Preset: Low
V-Sync: Off
Render Distance: Far
TSR: Off
Global Illumination: Off
Ray Tracing: Off
Effects: Low
Post Processing: Low
![]()
4K, High Settings
Avg: 133FPS
Preset: High
V-Sync: Off
DLSS: Performance
Textures: High
Particle Quality: High
Tessellation: Near
Shaders: High
![]() 4K, High Settings
4K, High Settings
Avg: 85FPS
Preset: Recommended
V-Sync: Off
Anti-Aliasing: TAA High
Effects Quality: High
Texture Quality: High
Shadow Quality: High
Motion Blur: Off
From our benchmarking data, the AMD Ryzen 7 7800X3D and Zotac Gaming RTX 4080 Trinity OC Whtie perform exceptionally well at 4K, offering exceptional framerates in games like Apex Legends, Hogwarts Legacy and COD Warzone. This excellent top-end white system can meet the demands of 4K gaming, with outstanding performance across Esports and modern titles and the ability to handle ray tracing.
Gallery


![FI_[SR190] HYTE X50 Ryzen 5 9600X & MSI RTX 5070 Ti](https://geekawhat.com/wp-content/uploads/2026/01/FI_SR190-HYTE-X50-Ryzen-5-9600X-MSI-RTX-5070-Ti-551x431.jpg)
![FI_[DP064] ASUS Prime AP303 + 9070XT](https://geekawhat.com/wp-content/uploads/2026/03/FI_DP064-ASUS-Prime-AP303-9070XT-551x431.jpg)
![FI_[DM93] Corsair 3200D Launch](https://geekawhat.com/wp-content/uploads/2026/03/FI_DM93-Corsair-3200D-LAUNCH-551x431.jpg)
![FI_[DM89] Phanteks Evolv + AORUS 5090 9850X3D Gallery (8)](https://geekawhat.com/wp-content/uploads/2026/02/FI_DM89-Phanteks-Evolv-AORUS-5090-9850X3D-Gallery-8-551x431.jpg)