With the market shifting towards cable-free PC building, component options are increasing daily. For this reason, there is a considerable amount of variety on the market, so picking out the right components can be difficult for the average PC builder.
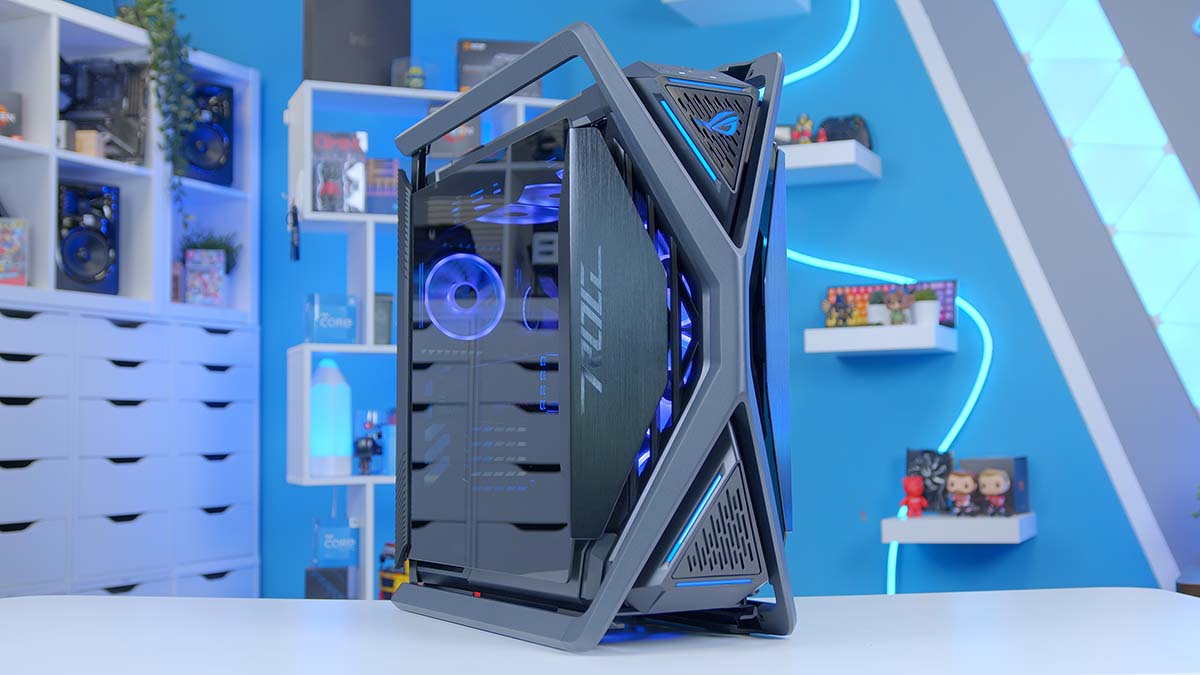
We’ve compiled this guide to help you pick the best parts for a top-end, no-cable system. The stand-out components of this build are the ROG Hyperion GR701 BTF case and the ROG STRIX BTF 4090, designed to hide any cable mess and provide a clean, no-compromise aesthetic.
In this guide, we’ll talk you through the entire building process from start to finish, along with why we chose each part, cables and wiring, and the expected performance. We’ve also put together a full build video on YouTube where James explains the process in more depth.
Build Process
Step 1: Install the CPU
While this is a BTF (back-to-front) cable build, we can carefully install a few components on the motherboard before we get it into the case. This essentially means that all of the power connectors and headers have been shifted to the back of the motherboard, resulting in a cable-free approach that makes the front of your PC clean and tidy. BTF components are part of an initiative to tackle cable management, with ASUS BTF boards offering the cleanest approach compared to MSI’s PROJECT ZERO range.
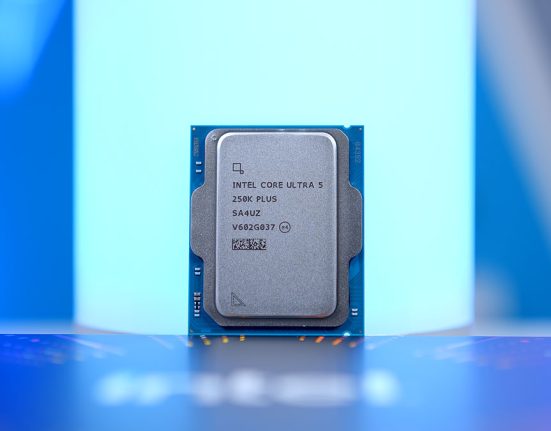
As always, we advise caution to avoid damaging the range of headers and power connectors on the back of BTF boards. The CPU we’ll be installing in this PC build is the Intel Core i9-14900K. This titan of a CPU is one of the best-performing processors on the market, reaching 6GHz boost clock speeds while offering a whopping 24 cores and 32 threads.

While the 14th-Gen range wasn’t initially received well, the Core i9-14900K is still one of the best processors on the market for a multifaceted PC build, as it is one of the few CPUs that can surpass the 6GHz mark straight out of the box. For this reason, the Core i9-14900K is excellent for high-resolution 4K gaming and doubles as a superb workstation option.
To install this CPU, we first need to lift the retention arm that holds the CPU socket cover in place and then lift the cover to expose the pins on the socket. Grab the CPU around the sides and locate the golden triangle (typically found at the bottom left of the CPU). Find the same triangle on the ROG MAXIMUS Z790 HERO BTF motherboard and slowly lower the processor into the socket.

No force is required to get the CPU in the socket. It should sit correctly if you’ve lined up the arrows. Now, lower the CPU socket cover on top of the CPU and push down the metal retention arm until it sits underneath the small hook. If you must apply a lot of force to get the arm down, don’t worry; this is normal. While the retention arm is being pushed down, the plastic plate on the CPU cover will pop off. Keep this in the motherboard box in case it’s needed in the future.

The motherboard we’ve chosen for this high-end zero-cables PC build is the ROG MAXIMUS Z790 Hero BTF. The ROG MAXIMUS Z790 Hero BTF is a high-end E-ATX motherboard offering a solid range of connectivity and expansion options. This board offers up to 8000MT/s RAM overclocking alongside a 20+1+2 VRM power phase design for a solid CPU overclock.

This board also has dual PCI-E 5.0 slots for a Gen5 graphics card and SSD. Prospective buyers also have access to four additional Gen4 M.2 slots for future storage upgrades. On the rear IO, the ROG MAXIMUS Z790 HERO BTF offers two Thunderbolt 4 ports, rated at 40Gbps, alongside six USB 3.2 Gen2 ports and four USB 3.2 Gen1 ports. ASUS has also adapted this BTF edition to feature WiFi 7, which offers blazing-fast wireless networking speeds.
| Specification | ASUS ROG MAXIMUS Z790 HERO BTF |
|---|---|
| Form Factor | E-ATX |
| Supported Memory | 192GB DDR5 8000MT/s |
| PCI-E x16 Slots | 1 x PCI-E 5.0 |
| PCI-E x4 Slots | 1 x PCI-E 5.0 4 x PCI-E 4.0 |
| Front IO | 1 x USB 3.2 Gen2x2 Type-C 1 x USB 3.2 Gen1 2 x USB 2.0 |
| Rear IO | 2 x Thunderbolt 4 Type-C 1 x USB 3.2 Gen2 Type-C 5 x USB 3.2 Gen2 Type-A 4 x USB 3.2 Gen1 Type-A |
| Audio | Optical S/PDIF 5 x Audio Jacks |
| Networking | WiFi 7 2.5 Gigabit LAN |

We’ve picked out this motherboard because it is one of the few high-end BTF motherboards on the market. Many manufacturers have been pushing for a zero-cables approach for quite a while, such as Corsair and Lian Li with their daisy-chain style coolers. However, motherboards and graphics cards have only recently seen this change, with BTF boards being introduced towards the start of 2024. For this reason, the Z790 MAXIMUS HERO BTF is unique because very few similar motherboards take the same approach regarding headers and power connectors.
Step 2: Slot in the RAM
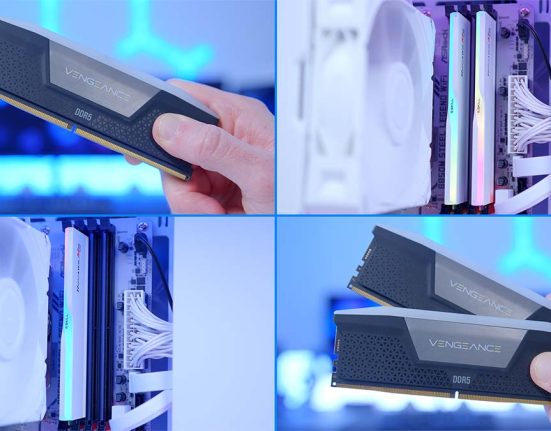
The RAM we’ve chosen for this PC build is the Corsair Vengeance DDR5 RGB kit. This set of DIMMs comes in a 64GB capacity rated at 6200MT/s speeds, with a latency of CL32. This is one of the best-performing kits on the market right now and can easily handle the demands of top-end 4K gaming.

Corsair Vengeance RGB also looks excellent, with this particular RAM donning a black heatsink with an RGB strip on top and individually controlled LEDs that can be customised within Corsair’s iCUE software. To install this RAM kit, we first need to prime the RAM slots by pushing down the clips on all of the slots; as this is a 64GB kit, it comes with four individual DIMMs.

After pushing down the clips, line up each RAM stick with the slot, apply even pressure on both sides and push down. You should push until you hear a firm click, which indicates that the RAM is seated correctly.

Step 3: Mount the SSD
The primary SSD slot of the ROG MAXIMUS Z790 HERO BTF is Gen5 compatible, so we’ve paired up this board with a high-speed PCI-E 5.0 drive, which offers exceptional speeds. The Corsair MP700 Pro SE is one of the speediest M.2 SSDs to release in 2024, with reads capable of reaching 14000MB/s and writes up to 12000MB/s. Additionally, the MP700 Pro SE doesn’t have a heatsink, which makes it incredibly easy to install underneath a motherboard heatsink, which is precisely what we will do!

Firstly, grab a small screwdriver and loosen the screws holding the large heatsink towards the top of the motherboard. Remove the heatsink, which will expose the Gen5 M.2 slot.

Push the Corsair MP700 Pro SE into the slot, push it down into the M.2 Q-Latch and twist the latch clockwise, securing the M.2 drive in place. Usually, we’d have to screw down the SSD here, so it’s nice to see that ASUS has saved us some time by providing a latch to hold the SSD in place. Finally, place the SSD heatsink back on top of the drive and screw it back down.
If your Z790 HERO BTF is brand new, remove the plastic stickers covering the M.2 strips on the heatsink and underneath the drive. These strips help dissipate heat efficiently, so remove the plastic stickers to help the MP700 Pro SE stay cool.

Step 4: Motherboard Install & CPU Cooler Backplate
Now, we can get the motherboard into the case. But before we do, we recommend mounting the CPU cooler backplate, which will save some time later. We’ll touch on the finer details of the CPU cooler that we’ve chosen later on, but from the box, you’ll need to find the LGA1700 backplate. This backplate typically has a square centre and four diagonal prongs which house the threads that we’ll need to screw into. Grab this backplate and push it into the back of the board.

Next, find the LGA 1700 threads. These screws are double-sided, but either side can be screwed into the threads on the backplate. Take these screws and tighten them with your thumbs until all four are stiff.

Now, we can get the motherboard installed in the case. As the introduction mentions, the chassis housing all our components is the ROG Hyperion GR701 BTF edition. The ROG Hyperion is one of ASUS’ most feature-rich cases, providing space for large parts, such as 420mm radiators and graphics cards up to 460mm long. This case can also house up to ten fans if the optional ROG-themed side panel is removed.
| Specification | ASUS ROG Hyperion GR701 BTF Edition |
|---|---|
| Form Factor | Full Tower |
| Motherboard Support | Mini-ITX, Micro-ATX, ATX, E-ATX |
| Case Dimensions (L x W x H) | 639mm x 268mm x 659mm |
| Front IO | 4 x USB 3.2 Gen1 Type-A 1 x USB 3.2 Gen2 Type-C 1 x USB 4.0 Type-C or 1 x USB 3.2 Gen2x2 Type-C 1 x 3.5mm Combo Jack |
| PCI-E Slots | 9 + 3 (vertical) |
| Colour | Black White Red |
| Max Clearance | 190mm Cooler Height 460mm GPU Length 240mm PSU Length |
| Drive Support | Up to 5 x 2.5 inch Up to 2 x 3.5 inch |
| Fan Support | Front: 3 x 140mm Top: 3 x 140mm Rear: 1 x 140mm Side (optional): 3 x 120mm |
| Radiator Support | Front: Up to 420mm Top: Up to 420mm Rear: Up to 140mm |
| Pre-Installed Fans | 4 x 140mm |
| MSRP | $499.99 |
The ROG Hyperion case offers ample space for cable management with 34mm of clearance between the motherboard tray and side panel. This chassis also has a built-in fan and RGB hub, so fan wiring can be streamlined further by plugging them all into one place. Front IO is excellent, with four USB 3.2 Gen1 Type-A ports, a USB 3.2 Gen2 Type-C port, and a secondary USB-C port, which doubles as USB 4 or USB 3.2 Gen2x2, depending on your motherboard.
To get our motherboard into the ROG Hyperion case, line up the headers and connectors on the rear of the motherboard with the cutouts and slots in the case. Push the headers through the cutouts and make minor adjustments until the motherboard holes hover over the standoffs.

Take the motherboard screws that come with the case and secure them in the standoffs, which will hold the motherboard in place. The ROG Hyperion case is configured to support E-ATX boards straight out of the box, so we don’t have to move any standoffs around to secure our chosen board.

Step 5: Corsair iCUE LINK Cooler Install
The next step for this PC build involves installing the Corsair iCUE LINK liquid cooler. While iCUE LINK is designed to simplify installation, it can be quite an involved process for first-time builders, so we’ll be walking through the entire process step-by-step. First, attach the Intel mounting brackets to the CPU blockhead. The brackets will be organised correctly in their bags, but if they aren’t, the brackets are angled, compared to the AMD mounting, which is straight around the edges.

Next, we’ll mount the fans to the radiator. The Corsair iCUE LINK H170i 420mm radiator comes with three 140mm iCUE LINK QX140 fans, which are daisy-chained. This means that data and power are transferred through a small connector on the side of the fan, minimising the use of cables. Connect up each of the three fans and then screw them to the radiator using the tall screws found in the box.
The iCUE LINK H170i is one of the most robust CPU coolers on the market, offering exceptional thermals and near-silent noise levels even while under load. The daisy-chain approach to wiring provides a hassle-free experience, all of which is controlled through the Corsair iCUE software, allowing you to control RGB configurations and thermal settings seamlessly.

After this, we can mount the radiator to the case. Take off the case’s top panel, exposing all of the mounting rails we’ll need to attach to the radiator. With one hand, hold the radiator up to the top panel on the inside, ensuring that the screw holes on the radiator line up with the rails. Then, take the mounting screws found in the box and screw in the radiator corner to corner.
I find it’s easier to get one corner screw in to free up your hand. And then tighten the rest of the screws one by one. I recommend not tightening the screws fully, as the radiator can be slid left or right if there’s not enough room for fan headers once the radiator has been fully installed.

We’ll be moving onto the CPU blockhead next. Fortunately, the iCUE LINK H170i comes with Corsair XTM70 thermal paste pre-applied, so we don’t need to add any thermal paste of our own. Grab the CPU blockhead and line up the brackets with the screws that we secured earlier when we installed the motherboard. Take the four thumb nuts and start screwing them onto the threads.
As always, we recommend securing these in a star pattern. Start in one corner, go to the next, move up or down, and then go to the next corner. Keep doing this until all of the thumb nuts are nice and tight. A screwdriver can be used at the end to make sure that all of the screws are properly torqued, but don’t overtighten them.

Step 5.5: Extra Fans & Cabling
In this step, we’ll quickly install all of the iCUE LINK cables and some additional iCUE LINK fans. The iCUE LINK cabling is self-explanatory; ensure all iCUE LINK hub cables, including those attached to the radiator, are plugged in correctly.
Next, we can install all of the fans. We used four additional QX fans, three QX 120 fans, and one QX 140 fan for this build. QX fans come with screws, so it was simply a case of unscrewing the included ASUS fans and replacing them with the QX fans.

Then, we connected the iCUE LINK fans to the system hub, providing a way to control the speed and RGB settings through the iCUE software. It’s worth noting that the front panel needs to be removed from the inside of the case, which allows you to swap out the fans.

Step 6: Secure the Graphics Card
Getting the graphics card secured is one of the most straightforward steps of this PC build. The GPU we’ve picked for this system is the ASUS ROG STRIX RTX 4090 BTF edition. This GPU is one of the most powerful options on the market, offering unrivalled performance at 4K, but this particular ROG STRIX version also features the ASUS high power finger near the PCI-E slot, so there are no cables visible on this card, apart from on the underside of the motherboard.

The RTX 4090 is one of the strongest cards we’ve seen in the past couple of years and can easily handle the demands of maxed-out 4K gaming with ray tracing enabled. While this card is somewhat expensive compared to other models, the ROG STRIX 4090 offers excellent cooling performance, and the benefit of having no visible cables at the front of the PC enhances the entire build aesthetic.
| Specification | ASUS ROG STRIX RTX 4090 BTF |
|---|---|
| Video Memory | 24GB GDDR6X |
| Memory Bus | 384-bit |
| Base Clock Speed | 2.23GHz |
| Boost Clock Speed | 2.55GHz |
| CUDA Cores | 16384 |
| RT Cores | 128 |
| Power Consumption | 450W |
| GPU Length | 357mm |
First, remove three PCI-E covers from the back of the case. Then, line up the graphics card with the motherboard, ensuring that the PCI-E lanes and high-power fingers hover over their slots, and push the card firmly into the motherboard. Make sure not to push too hard, as this could damage the card or the motherboard.

We recommend at this point, using the integrated GPU support bracket to alleviate any sag. This can be done by unscrewing it slightly, which allows it to be adjusted up or down depending on the height of the graphics card being used. Once the correct height has been found, screw it back into place, and extend the arm out to help with GPU sag. Then, use the same screws that were removed from the PCI-E covers to secure the ROG STRIX 4090 BTF to the case.
Step 7: Power Supply & Cabling
Admittedly, we found that the power supply installation for this case was quite convoluted, so we recommend reading these steps carefully to ensure the PSU is installed correctly. Before we get into the steps, it’s worth briefly looking at the power supply we’ve picked for this cable-free system, the Corsair RM1000e.
This is a 1000W power supply offering fully modular cabling alongside an 80 Plus Gold efficiency rating, designed to minimise any power lost as heat or noise. The RM1000e is one of the more budget units that Corsair provides, but it is designed to keep noise levels low while offering reliable power and efficiency during high usage. The RM1000e comes with a seven-year warranty and has been independently rated by Cybenetics with an A- rating for noise, and platinum for power consumption, indicating that this PSU is a great choice for a top-end system.

First, we recommend picking out the cables needed for this build before installing the PSU. For this build, you’ll need a 12VHPWR cable for the graphics card and a PCI-E connector for the iCUE LINK hub. This system also needs two 8-pin EPS CPU headers, a motherboard power connector, and a SATA power cable for the fan and ARGB hub. Fortunately, because the RM1000e is fully modular, we can plug in all these cables and manage them as necessary. Get these cables plugged in and move the RM1000e off to the side.

To access the PSU chamber, we first need to remove three pieces: the drawer assembly, the glass cover, and the metal shrouding. Removing these in this order will provide you access to the chamber, which then allows a power supply to be screwed in and secured. This is quite convoluted and does add extra time to the build, but once it’s done, it does look quite nice and hides away all of the cable mess.

Next, we can wire up all of the individual headers on the back of the motherboard. The PSU cables easily thread through to the back of the case, keeping them out of sight. We recommend plugging in the motherboard power first, as this is the biggest header. The cable only goes in one way and will firmly click in place once seated correctly.

CPU power is next, and two headers need to be plugged in. Again, these cables only go in one way, but ensure the header’s plastic clips are properly engaged.

Finally, we can plug in the graphics card cable and any additional cables. The 12VHPWR cable is easily recognisable as it is the only cable with a wattage written on the power connector. This cable can be a bit finicky to get in, but applying some force should get the header properly engaged. The last two cables are SATA power for the fan and ARGB hub and PCI-E for the iCUE LINK hub. Plug these in and all of your power cables are done!

Step 8: Cable Management & Power On
This final step can be done as you build to save time, but we understand that many builders like to leave cable management to the end. The ROG Hyperion has ample room for cable management, so getting everything hidden in the channels at the back of the case should be easy.

Additionally, all of the front power cables should be plugged in during this step, including front panel power, USB ports and HD audio. Double check all of the power cables and headers are sitting snugly in their ports and headers, and once you’re happy, start putting the panels of the case on and switch on the power!
Performance
![]()
4K, High Settings
Avg: 242FPS
Preset: High
V-Sync: Off
Anti Aliasing: TSAA
Texture Filtering: 8x
Ambient Occlusion: High
Volumetric Lighting: High
Dynamic Shadows: Enabled
Model Detail: High
![]()
1080p, Comp. Settings
Avg: 348FPS
Preset: Low
V-Sync: Off
Render Distance: Far
TSR: Off
Global Illumination: Off
Ray Tracing: Off
Effects: Low
Post Processing: Low
![]()
4K, High Settings
Avg: 178FPS
Preset: High
V-Sync: Off
DLSS: Performance
Textures: High
Particle Quality: High
Tessellation: Near
Shaders: High
![]() 4K, High Settings
4K, High Settings
Avg: 99FPS
Preset: Recommended
V-Sync: Off
Anti-Aliasing: TAA High
Effects Quality: High
Texture Quality: High
Shadow Quality: High
Motion Blur: Off
From our benchmarking data, the ASUS ROG STRIX RTX 4090 BTF and Intel Core i9-14900K perform exceptionally well at 4K, beating out every other GPU that we’ve tested across games like Apex Legends, Hogwarts Legacy and COD Warzone. This excellent top-end system is capable of meeting the demands of 4K gaming, offering smooth frame rates across many modern titles.
Gallery


![FI_[SR190] HYTE X50 Ryzen 5 9600X & MSI RTX 5070 Ti](https://geekawhat.com/wp-content/uploads/2026/01/FI_SR190-HYTE-X50-Ryzen-5-9600X-MSI-RTX-5070-Ti-551x431.jpg)

![FI_[DP064] ASUS Prime AP303 + 9070XT](https://geekawhat.com/wp-content/uploads/2026/03/FI_DP064-ASUS-Prime-AP303-9070XT-551x431.jpg)
![FI_[DM93] Corsair 3200D Launch](https://geekawhat.com/wp-content/uploads/2026/03/FI_DM93-Corsair-3200D-LAUNCH-551x431.jpg)