Building a stunning 1440p gaming PC for under $1300 isn’t the most straightforward task.
There’s a tremendous amount of component variety on the market, so finding parts that offer excellent value without exceeding the $1300 price point can be difficult.
To simplify this, we’ve put together an incredible $1300 gaming PC designed to handle 1440p gaming with ease. Pairing up the AMD Radeon RX 7900 GRE with the AMD Ryzen 7 9700X, this combo can easily handle modern gaming.
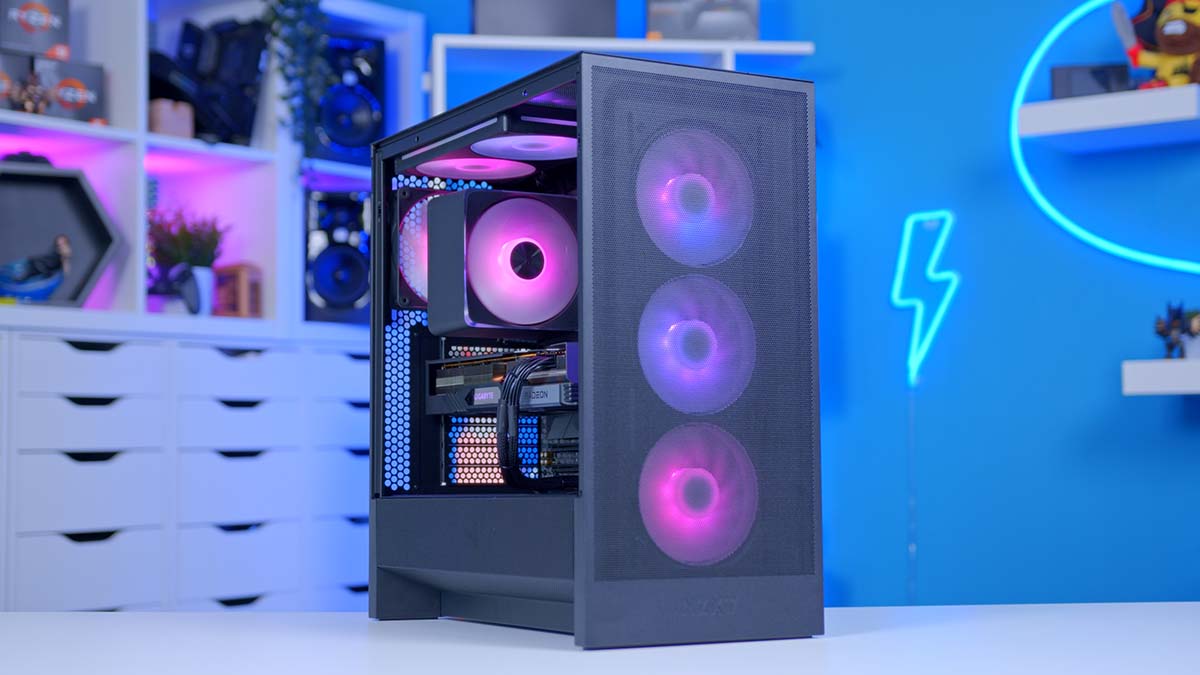
This system houses all components inside the NZXT H5 Flow RGB chassis, a compact case with a sophisticated minimalist design. It also has plenty of RGB fans to keep things cool while offering additional flair.
Like all of our PC build guides, this article covers the entire assembly process from start to finish. We’ve delved into how each part fits together and discussed the performance and specs. It’s worth watching the dedicated YouTube video alongside this write-up, as it is an excellent visual guide.
Build Process
Step 1: Socket the CPU
The first component that we’ll be installing is the CPU. Generally, we recommend installing as many components as possible outside of the case to minimise clearance issues or finicky steps. Fortunately, getting the CPU socketed is one of these steps that can be done while the motherboard is loose.
Note: The board’s BIOS must be updated before the Ryzen 9000 CPU can be installed. Ensure the BIOS is up to date, as it won’t boot if it isn’t.

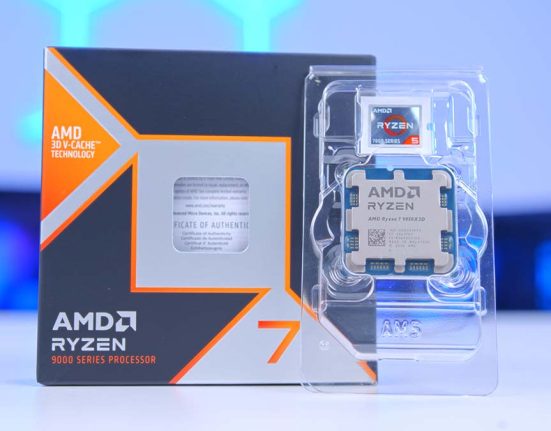
As we alluded to in the introduction, this build uses the AMD Ryzen 5 9600X CPU. Due to lacklustre performance metrics, AMD has come under fire with its initial Ryzen 9000 launch. After a Windows update rollout that improved the processors’ handling of a technology known as “branch prediction,” performance saw significant uplifts.
The hardware specifications have remained primarily the same across generations. The Ryzen 5 9600X now offers a 5.4GHz boost clock speed instead of 5.3GHz, and the power draw has dropped to 65W from 105W. However, the core and thread counts haven’t changed, and the amount of available cache is also very similar.

To get this CPU socketed, release the metal retention arm from the hook on the motherboard. This loosens the socket cover, which needs to be raised, exposing the pins on the CPU socket underneath.
Locate the golden arrow on the Ryzen 5 9600X CPU. For AMD processors, this arrow is usually located at the top left. There is a matching arrow on the motherboard; line these up. This indicates the correct orientation for the CPU to slot into the socket.

Grab the CPU by the sides and lower it into the socket. Once the Ryzen 5 9600X is in the socket, it should drop into place. No additional movement or force is required. Place the metal socket cover on top of the CPU and start to push the arm back underneath the hook. This locks the cover and requires some pressure to sit correctly underneath the hook.

While this happens, the plastic protector on the metal cover will pop off as the metal retention arm is pushed down. Keep this and place it inside the motherboard box for any potential RMAs.

The motherboard in this system is the Gigabyte B650 Gaming X AX. There are a couple of reasons as to why we’ve chosen this particular board. First is the price. We don’t need a particularly powerful motherboard to pair up with the AMD Ryzen 5 9600X, so it makes sense to pick a slightly cheaper option that fits within our $1300 budget. The black and grey aesthetic fits nicely with the build’s darker theme.
| Specification | Gigabyte B650 Gaming X AX |
|---|---|
| Form Factor | ATX |
| Supported Memory | 256GB DDR5 8000MT/s |
| PCI-E x16 Slots | 1 x PCI-E 4.0 |
| PCI-E x4 Slots | 1 x PCI-E 5.0 2 x PCI-E 4.0 |
| Front IO | 1 x USB 3.2 Gen2x2 Type-C 1 x USB 3.2 Gen1 Type-A 2 x USB 2.0 |
| Rear IO | 1 x USB 3.2 Gen 2 Type-C 1 x USB 3.2 Gen2 Type-A 3 x USB 3.2 Gen1 Type-A 3 x USB 2.0 |
| Audio | 3 x Audio Jacks |
| Networking | WiFi 6E 2.5 Gigabit LAN |
Features-wise, the Gigabyte B650 Gaming X AX supports RAM overclocking up to 8000MT/s on a 256GB kit. This board has four Gen4 M.2 SSD slots, with plenty of room for future storage upgrades. On the rear IO, there are eight ports: three USB 3.2 Gen 1 ports, three USB 3.0 ports, and two USB 3.2 Gen2 ports (one Type-A and one Type-C). Networking also offers support for WiFi 6E and 2.5 Gigabit LAN.

Step 2: Slot in the RAM
The next part to install in this PC build is our RAM, of which we’ve chosen the G.Skill Trident Z5 NEO EXPO kit. EXPO memory is designed for AMD PC builds, as the particular onboard profile optimises performance, increasing the speeds where possible and lowering latency. Specifically, this G.Skill Trident Z5 NEO EXPO offers a speed of 6000MT/s while latency sits around CL30, which is solid for this gaming PC build.
This G.Skill kit is also one of the cheaper options on the market. DDR5 RAM has seen some major price drops within the past year or so, so EXPO kits aren’t as pricey as they were. This allows us to easily keep within our $1300 budget.

Aesthetically, the G.Skill Trident Z5 NEO EXPO is a fantastic-looking kit. The black heat spreader looks sophisticated and works well with the other black parts in the build. Each DIMM has a small strip of RGB that can be synced up to other parts using various applications.
To install this RAM, push down the tabs at the top and bottom of the second and fourth slots. These hold the RAM in place. We’re using the second and fourth slots because this configuration provides the best efficiency when a PC build only has two sticks of RAM.

Line up one of the RAM DIMMs with the second slot; it can only go in one way. Apply even pressure to both sides of the RAM DIMM and then push it into the slot. You’ll hear a slight click, indicating the RAM is secured. Do this again for the second stick.

Step 3: Mounting the SSD
For storage, we’ve chosen the TeamGroup MP44L Gen4 SSD. This affordable M.2 drive has been used consistently across our mid-range and budget PC builds because of its inexpensive price point and robust performance. It offers speeds up to 5000MB/s on the reads and 4500MB/s on the writes, making it a solid pickup for gaming, which is where drive speeds don’t necessarily matter as much.

We’ve opted for the 1TB version in this system to save some cash. While 2TB is generally the sweet spot for space, 1TB allows builders to store a few big games alongside additional applications and game launchers.
Unscrew the SSD heatsink from the primary slot underneath the CPU socket. Once the screw is loose, lift the heatsink off the slot and remove the tape from the thermal pads (on the heatsink and underneath the drive slot).

Place the TeamGroup MP44L 1TB into the SSD slot, which will poke out at a 45-degree angle. Take the M.2 screw that comes with the drive and secure it to the standoff on the motherboard. Then place the heatsink back on top of the drive and screw it down.

Step 4: Secure the CPU Cooler
The CPU cooler is the final component we can install outside the case. We’ve opted for an air cooler in this configuration, specifically the APNX AP1-V. This air tower cooler features a sophisticated design, with the heatsink encased in a smooth shroud, similar to the DeepCool Assassin IV. It also comes with an RGB fan, which can be customised and synced up to match the lighting of the other components in this build. At around $40 at the time of writing, the AP1-V is also incredibly affordable, saving us some money for other components.

The AP1-V has five heat pipes and uses a reliable hydro bearing for the fan, which ensures a smooth and quiet experience. This air cooler also features simple mounting hardware, making the installation straightforward across Intel and AMD systems.
First, remove the plastic AMD clips around the socket to get this CPU cooler installed. Loosen the four screws, and place the clips inside the motherboard box, as some CPU cooler manufacturers use this style of mounting which can be helpful for a future upgrade.

Place the plastic spacers on top of the posts around the socket, and secure the AMD mounting bracket with the provided screws. The manual lists these as ‘H’, ‘C’, and ‘G’, respectively.

Apply a rice-sized grain of thermal paste to the CPU’s IHS (internal heat spreader), as the AP1-V doesn’t come with any pre-applied on the CPU block.

Remove the tape on the CPU blockhead, and place the AP1-V on the CPU, lining up the spring-loaded screws with the posts on the AMD bracket. Tighten down the cooler, applying some torque to one screw and then switching to the other.

This applies even pressure to the motherboard and CPU. Finally, plug the wires into their respective headers. We used ‘CPU_FAN’ and a free 3-pin ARGB header in this configuration.
Step 5: Place the Motherboard Inside the Case
The PC case housing this system’s parts is the NZXT H5 Flow RGB. We’ve previously reviewed this case and were impressed with the changes to the 2024 version. The H5 Flow has significantly improved compared to its older iterations, offering more internal space for larger coolers, motherboards, and graphics cards. Furthermore, the NZXT H7 Flow RGB is a reasonably priced case, making it a solid pickup for budget and mid-range builds.

Additionally, the NZXT H5 Flow RGB has removed the angled GPU fan, opening up the bottom of the case for two 120mm fans, which provide more airflow for the graphics card. This case has also retained its signature minimalist design with increased airflow thanks to improved ventilation around the chassis. Overall, the NZXT H5 Flow RGB is a solid pickup and, despite being a compact option, has more than enough room for the parts in this build.
| Specification | NZXT H5 Flow RGB |
|---|---|
| Form Factor | Mid-Tower |
| Motherboard Support | Mini-ITX, Micro-ATX, ATX, E-ATX |
| Case Dimensions (L x W x H) | 430mm x 225mm x 465mm |
| Front IO | 1 x USB 3.2 Type-A 1 x USB 3.2 Type-C 1 x 3.5mm Combo Jack |
| PCI-E Slots | 7 |
| Colour | Black White |
| Max Clearance | 170mm Cooler Height 410mm GPU Length 200mm PSU Length |
| Drive Support | Up to 2 x 2.5 inch Up to 1 x 3.5 inch |
| Fan Support | Front: 3 x 120mm Top: 2 x 140mm Bottom: 2 x 120mm Rear: 1 x 120mm |
| Radiator Support | Front: Up to 360mm Top: Up to 240mm (280mm with low-profile memory) |
| Pre-Installed Fans | 3 x 120mm |
Remove the side panel to insert the motherboard into the case. We recommend laying the chassis flat on your workstation, as this minimises the risk of dropping the board. The NZXT H5 Flow RGB is pre-configured to support ATX motherboards, so there’s also no reason to move any standoffs around.

Place the motherboard inside the case, lining up the IO shield with the cutout towards the top left and ensuring the holes also line up with the standoffs. Grab the motherboard screws from the accessories box and secure the board to the case. Make sure not to overtighten, as this could potentially damage the motherboard.

Step 5.5: Add Some Extra Fans
Unfortunately, the three pre-installed fans that the NZXT H5 Flow RGB comes with aren’t quite enough to provide decent airflow, so we’ve opted to add some additional fans. On the top panel, we installed an F240 RGB Core set of fans, which is a single unit. It’s effortless to get these secured. Remove the top panel, and using the provided screws, attach the fans to the chassis.

We decided to leave the fans at the front, but a single F120 RGB Core fan was secured to the rear of the case to exhaust hot air. Again, we used the screws that came with the fan to screw it down.

Step 6: Mount the Graphics Card
The graphics card used in this gaming PC build is the RX 7900 GRE. This card provides all of the gaming horsepower in this system. The RX 7900 GRE was a late entrant to the Radeon 7000 range, hitting the shelves towards the start of 2024. In the current stack of cards, the arrival of this GPU places it in between the RX 7800 XT and RX 7900 XT. At $50 more than the RX 7800 XT, this card is a no-brainer for those looking to leverage more graphical performance.

The RX 7900 GRE is incredibly capable at 1440p in modern titles and has decent legs in 4K. The Gigabyte Gaming OC version features a triple-fan shroud, which keeps thermals at bay. It’s also worth noting that this is an OC model, so the boost speed is slightly overclocked, bringing more performance.
| Specification | Gigabyte RX 7900 GRE Gaming OC |
|---|---|
| Video Memory | 16GB GDDR6 |
| Memory Bus | 256-Bit |
| Core Clock Speed | 1.28GHz |
| Boost Clock Speed | 2.39GHz |
| Stream Processors | 5120 |
| Ray Accelerators | 80 |
| Compute Units | 80 |
| Power Consumption | 260W |
| GPU Length | 302mm |
To get started, we must remove the PCI-E covers at the back of the case. The Gigabyte RX 7900 GRE Gaming OC is a 2.5-slot card, so we need to remove slots two and three to provide space for the GPU.

Once these are out, line up the graphics card with the main PCI-E slot on the motherboard and push it firmly into the slot. Much like the RAM installation, you’ll hear a slight click indicating that the GPU is secure.

Use the screws removed from the PCI-E covers to secure the card to the case. The NZXT H5 Flow RGB doesn’t have an integrated GPU support bracket, so ensure the card is properly secured.

Step 7: Power Supply Install & Cabling
The last part that needs to be installed is the NZXT C850 power supply. This unit offers 850W of power and has an 80 Plus Gold efficiency rating, ensuring that any extra power drawn isn’t lost as heat or noise. It utilises the ATX 3.1 standard, including a 12VHPWR cable alongside a set of regular cables for a PC build.

The NZXT C850 is also fully modular, allowing builders to pick and choose cables, providing a much cleaner build. In the configuration we’ve put together, you’ll need one 24-pin motherboard cable, an 8-pin and 4-pin EPS CPU power cable, and two 8-pin PCI-E graphics card cables. We recommend plugging these in before securing the power supply, as it will save time.

Slide the NZXT C850 power supply into the back of the case, and use the four hexagonal screws to secure it to the chassis. Ensure the correct screws are used, or else this could damage the threads.

Now, we can start wiring up the build. Starting with motherboard power, this cable has a large rectangular connector. When plugging this in, give the header a firm push into the motherboard to ensure the cable clips are correctly engaged.

The Gigabyte B650 Gaming X AX has two CPU connectors, one 8-pin and one 4-pin. While it isn’t always necessary to plug these in, we recommend doing so because it spreads power delivery much better across the VRMs.

Finally, the Gigabyte RX 7900 GRE Gaming OC graphics card uses two 8-pin PCI-E connectors. These can only go in one way, but make sure the clips are correctly engaged, as loose cables may cause a short or prevent the PC build from booting.

Step 8: Front Panel Cabling & Power On
The last significant step of any PC build is to cable manage all wires, plug in front panel connectors and switch on the build. It’s generally good practice to manage the wires during the assembly process, but it can be done at the end.

To use the IO on the case, the front panel wires need to be plugged in. This specific build uses JFP1 for the power button, HD Audio for the 3.5mm combo jack, one USB C header, and one USB 3 header for the ports at the front of the chassis. Plugging these in is relatively simple; all of the cables can only go in one way because they’re notched or have a blocked-out pin.

Get all of these wired up and manage cables appropriately. This can take some time, so we advise being patient. Once everything is wired up, put the side panels back on, grab some peripherals and a monitor, and switch on the build!
Performance
![]()
1440p, High Settings
Avg: 255FPS
Preset: High
V-Sync: Off
Anti Aliasing: TSAA
Texture Filtering: 8x
Ambient Occlusion: High
Volumetric Lighting: High
Dynamic Shadows: Enabled
Model Detail: High
![]()
1080p, Comp. Settings
Avg: 293FPS
Preset: Low
V-Sync: Off
Render Distance: Far
TSR: Off
Global Illumination: Off
Ray Tracing: Off
Effects: Low
Post Processing: Low
![]()
1440p, High Settings
Avg: 118FPS
Preset: Custom
Resolution Scaling: FSR
Texture Quality: High
Anisotropy: x8
Contact Shadows: On
Ambient Occlude: High
Frame Generation: On
![]() 1440p, High Settings
1440p, High Settings
Avg: 101FPS
Preset: Custom
Resolution Upscaling: FSR
Texture Res: High
Volumetric Light: High
Shadow Res: High
SSAO: On
Motion Blur: Off
Framerates reached 118FPS in Hogwarts Legacy and surged past 101FPS in Alan Wake II. The AMD Radeon RX 7900 GRE offers excellent rasterised gameplay, so we’re seeing smooth framerates across the board..
The strong performance continued through to the Esports games. Fortnite and Apex Legends saw great metrics, with 293FPS and 255FPS, respectively.
Gallery


![FI_[SR190] HYTE X50 Ryzen 5 9600X & MSI RTX 5070 Ti](https://geekawhat.com/wp-content/uploads/2026/01/FI_SR190-HYTE-X50-Ryzen-5-9600X-MSI-RTX-5070-Ti-551x431.jpg)
![FI_[DP064] ASUS Prime AP303 + 9070XT](https://geekawhat.com/wp-content/uploads/2026/03/FI_DP064-ASUS-Prime-AP303-9070XT-551x431.jpg)
![FI_[DM93] Corsair 3200D Launch](https://geekawhat.com/wp-content/uploads/2026/03/FI_DM93-Corsair-3200D-LAUNCH-551x431.jpg)
![FI_[DM89] Phanteks Evolv + AORUS 5090 9850X3D Gallery (8)](https://geekawhat.com/wp-content/uploads/2026/02/FI_DM89-Phanteks-Evolv-AORUS-5090-9850X3D-Gallery-8-551x431.jpg)