Building a cable-free gaming PC has never been easier with the arrival of MSI PROJECT ZERO components. Reverse connector motherboards shift all headers to the back of the PCB to keep them out of sight, while compatible cases allow you to do clean cable management at the rear of the chassis, further keeping the build tidy.
In this guide, we’ve configured a stunning cableless 4K gaming PC providing a great build aesthetic while offering top-end performance in modern AAA games and Esports titles. As always, with our build guides, we’ll go through the entire building process from start to finish, covering how to install everything, including cable management at the end.
While going through the installation steps, we’ve also highlighted our reasoning for each part choice and why they’re such a great option for this excellent cable-free gaming PC. We recommend watching the dedicated build video alongside this article, as this covers the assembly of this system in more depth.
Build Process
Step 1: Socketing the CPU
Before we install the CPU, it’s worth mentioning that until the motherboard is installed inside the case, all of these steps were done while the MSI Z790 PROJECT ZERO motherboard was still in the box. While you can take the leap and install the motherboard in the case first, it’s much easier to get the CPU, RAM, and SSD into the motherboard before, so we don’t damage any headers or connectors on the back of the PCB.
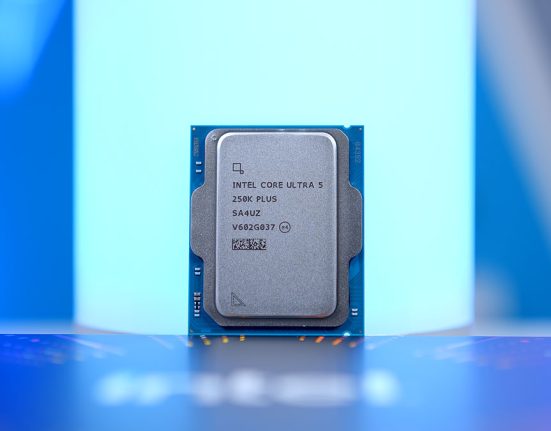
The CPU that’s going into this build is the Intel Core i5-14600K. We’ve been using the AMD Ryzen 5 7600 and 7600X a fair amount recently, and while these would be substantial for this build, the Core i5-14600K provides a bit more versatility due to its higher core count in comparison. The Core i5-14600K offers 14 cores and 20 threads and can reach a boost clock speed of 5.3GHz. Its solid price point is why this CPU stood out to us for this build, and it offers enthusiasts a bit more legroom for tasks other than 4K gaming.

To install the Core i5-14600K, open the motherboard box and leave the board inside; this will be our work surface for now. Unhook the metal retention arm and lift the CPU cover, exposing the pins in the socket. Now, line up the small arrow at the bottom left of the CPU with a similar arrow on the motherboard. Once these are parallel with one another, slowly lower the CPU into the socket until it sits snugly in place. No force is required to get the CPU to sit correctly; ensure the arrows are aligned.

Now, lower the metal socket cover to cover the CPU and push the metal retention arm back under its hook. It might feel wrong to do this, but keep going until the arm is hooked. This is often the scariest part of installing a CPU, but the socket needs to be secure, hence why there’s so much tension when the arm is being pushed down. While this is happening, the plastic protector will pop off. Keep this inside the motherboard box for a future RMA or repair.

As mentioned earlier, the motherboard we’ve picked out for this configuration is the Z790 PROJECT ZERO from MSI. PROJECT ZERO motherboards have become a staple across many of our cable-free systems because they offer an outstanding balance between features, pricing, and a clean aesthetic. While ASUS BTF may serve as a cleaner option, these boards are often pricier than MSI options and don’t quite match the aesthetic we’re going for.

Features-wise, the MSI Z790 PROJECT ZERO motherboard offers Gen5 graphics card support and has four Gen4 M.2 SSD slots. On the networking front, prospective buyers can choose between high-speed WiFi 7 or 2.5 Gigabit LAN. Rear IO is also pretty solid, with eight ports in total, half of which are USB 2.0, and the rest are USB 3.2 Gen1 or higher. Overall, the Z790 PROJECT ZERO is a solid mid-range board and offers a nice and clean aesthetic which synergises with this build.
| Specification | MSI Z790 PROJECT ZERO |
|---|---|
| Form Factor | ATX |
| Supported Memory | 256GB DDR5 7200MT/s |
| PCI-E x16 Slots | 1 x PCI-E 5.0 |
| PCI-E x4 Slots | 4 x PCI-E 4.0 |
| Front IO | 2 x USB 3.2 Gen1 1 x USB 3.2 Gen2 Type-C 2 x USB 2.0 |
| Rear IO | 4 x USB 2.0 2 x USB 3.2 Gen1 Type-A 1 x USB 3.2 Gen2 Type-C 1 x USB 3.2 Gen2x2 Type-C |
| Audio | 6 x Audio Jacks |
| Networking | WiFi 7 2.5 Gigabit LAN |

Step 2: Seating the RAM
Installing RAM is arguably one of the most manageable parts of any PC build. The RAM we’re installing in this cable-free PC is a Corsair Vengeance DDR5 RGB kit. This DDR5 memory comes in a capacity of 32GB with a rated speed of 6200MT/s and a latency of CL32. While the Z790 PROJECT ZERO motherboard can support up to 7200MT/s, these DIMMs are perfectly fine for the applications and games we’ll be playing.

Performance aside, this Corsair Vengeance RGB RAM looks excellent in this system. We’ve opted for a black kit, so both DIMMs will match the overall aesthetic of the build while providing some additional RGB lighting featured on the top of each RAM stick.
Before lining up the RAM, push down the tabs at the top and bottom of slots two and four. We’re using these slots because they are the most efficient configuration for a build with two DIMMs.

Afterwards, line up each stick with a slot. RAM can only go in one way, so ensure the DIMMs go in correctly. Then, apply even pressure to both sides of the stick, pushing down firmly until you hear a click. This click indicates that the RAM is seated correctly in its slot.

Step 3: Mount the SSD
Because the Z790 PROJECT ZERO motherboard doesn’t offer Gen5 compatibility for SSDs, we’ve stuck to a renowned Gen4 drive commonly used in our other high-end configurations. The Samsung 990 Pro 2TB Gen4 SSD is the storage we’ve put into this build. 2TB is the sweet spot for most gaming PC builds, as there’s ample room for a range of big games and extra applications.

The Samsung 990 Pro is one of the strongest Gen4 SSDs on the market, offering read speeds up to 7450MB/s and writes up to 6900MB/s. This powerful drive is worth considering if you’ve got some extra cash for high-performance storage.
First, we must remove the heatsink on top of the primary SSD slot to install this drive. To do this, take a small screwdriver and loosen both of the screws holding the heatsink in place. They won’t come out of the heatsink, so you don’t need to worry about losing them. Place the heatsink off to one side for the moment.

Remove the plastic strips from the heatsink pad both underneath and on the heatsink itself. Push the Samsung 990 Pro SSD into the slot, and it will poke out at a 45-degree angle; this is normal. Then place the heatsink back on top of the SSD and screw it down, holding the drive in place.
Step 3.5: Secure the CPU Cooler Backplate
We must secure the CPU cooler backplate before placing the motherboard into the case. Intel builds generally use a backplate, which will hold a set of standoffs for the blockhead to screw down onto. Firstly, push the small backplate through the four holes surrounding the CPU socket. The threads on the backplate are pretty small, so you’ll need to keep pushing on the backplate for the moment.

Then, screw the four LGA1700 threads that come with the mounting hardware for the CPU cooler into the backplate. Pliers don’t need to be used for this, just thumb strength. This will hold the backplate in place so the CPU cooler can be installed later.

Step 4: Place the Motherboard in the Case
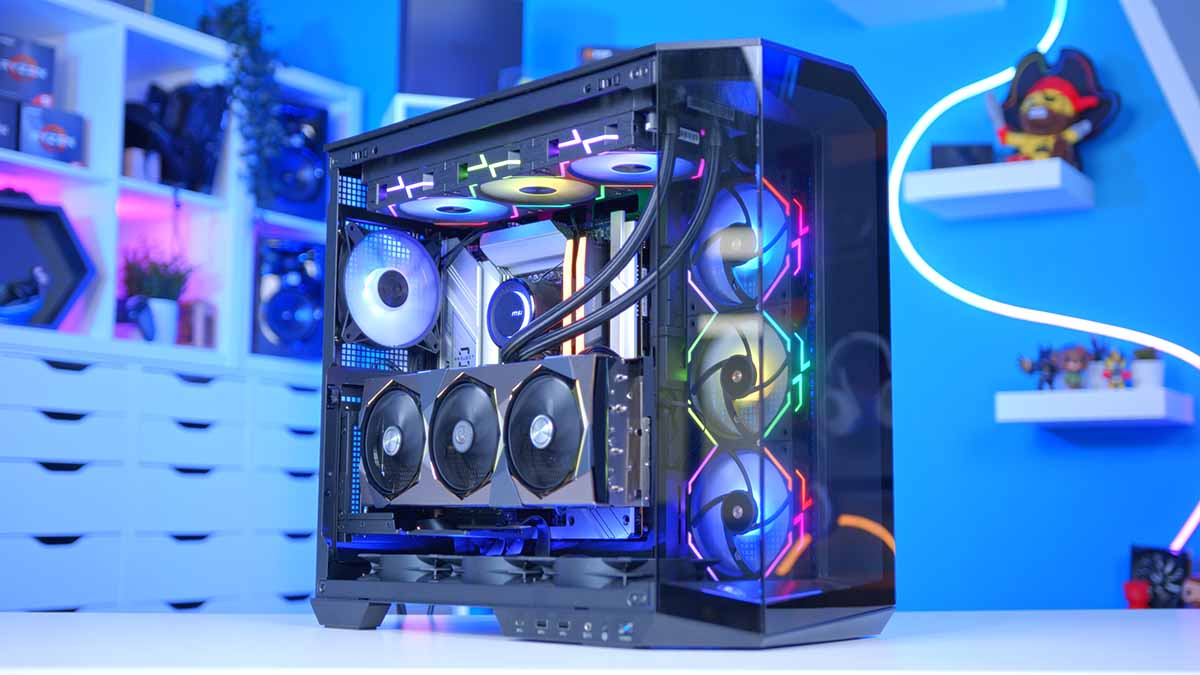
The case housing all of the components in this PC build is the MAG PANO 100L PZ from MSI. The MAG PANO 100L is another fish tank-style chassis but offers twists and turns to make it stand out compared to the vast selection of seamless tempered glass cases on the market. This case has a slightly angular design with two glass panels that can be easily removed to access the internals easily.

The internal layout is split into dual chambers. The front chamber accommodates all your main components, while the rear is for the power supply, SATA drives and any cabling. The top and side panels are heavily ventilated and have dust filters to assist airflow. The side mounting is also offset against the back of the case to provide extra space for fans if needed.
| Specification | MSI MAG PANO 100L PZ |
|---|---|
| Form Factor | Mid-Tower |
| Motherboard Support | Mini-ITX, Micro-ATX, ATX Back Connect: Micro-ATX, ATX |
| Case Dimensions (L x W x H) | 518mm x 290mm x 482mm |
| Front IO | 2 x USB 3.2 Gen2x2 Type-C 2 x USB 3.2 Gen1 Type-A 1 x 3.5mm Combo Jack |
| PCI-E Slots | 8 |
| Colour | Black White |
| Max Clearance | 166mm Cooler Height 380mm GPU Length 200mm PSU Length |
| Drive Support | Up to 3 x 2.5 inch Up to 2 x 3.5 inch |
| Fan Support | Top: 3 x 140mm Rear: 1 x 120mm Side: 3 x 120mm Bottom: 3 x 120mm |
| Radiator Support | Top: Up to 360mm Rear: Up to 120mm Side: Up to 360mm Bottom: Up to 360mm |
| Pre-Installed Fans | 0 |
| MSRP | $129.99 |
The MAG PANO 100L PZ has space for graphics cards up to 380mm long and 360mm CPU coolers on the side, top, and bottom panels. This chassis also has cutouts for PROJECT ZERO motherboards, so it’s a solid pick for this PC build.
This case is pre-configured out of the box for ATX motherboards, so there’s no reason to readjust or move any standoffs to different positions, saving us some time. To install the board inside the case, carefully push the headers through the cutouts in the motherboard tray, careful not to damage any. Doing this should correctly position the motherboard and line it up with the standoffs.

Once the motherboard is in place, use the included screws found in the accessory box to tighten the board down. Make sure not to overtighten, as this risks damaging the standoffs, which could make any future upgrades difficult.

Step 5: CPU Cooler Install & Bottom Fans
The CPU cooler we’re installing next is the MSI MAG CoreLiquid E360. This is one of the most affordable 360mm liquid coolers on the market, and after several tests we’ve conducted recently, the CoreLiquid E360 sits in the top ten bracket, making it a worthwhile consideration for a top-end PC that needs a bit more oomph when it comes to cooling.

Performance aside, the CoreLiquid E360 blends in with the black aesthetic we’ve chosen for this build while offering some RGB lighting on the CPU blockhead. It’s also straightforward to install, using relatively minimal hardware for AMD and Intel PC builds.
To get started, we will first mount the fans to the radiator. We decided to spice up the cooler with MSI’s EZ120 fans in this configuration. While the fans that come with the liquid cooler are excellent, the EZ120 fans are designed to keep cabling to a minimum, which fits in with the overall theme of the build. We’ll be repurposing the CPU cooler fans later.

The EZ120 fans use multiple daisy chain connectors, which sit flush inside a small divet to connect all of them. On both sides of the fans, use the longer connectors to hold all of the fans together, and at one end, make sure you use one of the connectors with a fan cable attached so they can be plugged in at the end. MSI has also included a set of decorative blocks which hide the contacts around the corners.

Next, place the radiator upside down with the pump tubes sitting towards the right-hand side. Place the fans on top and secure all of the fans using the provided radiator screws that come with the CoreLiquid E360.

Remove the top panel of the case, exposing the mounting rails. Grab the radiator and push it up towards the mounting rails so that the screw holes are visible. Ensure the radiator tubing is on your right, as this will make the cabling much more manageable to plug in. Finally, while pushing the radiator upwards, use the smaller screws to hold the radiator in place. We recommend starting with the corners and then moving inwards.

Now that the radiator is secure, we’ll attach the Intel mounting hardware to the CPU blockhead. The brackets are slightly angular and sit in their dedicated LGA1700 bag. Screw these in, ensuring they’re not wobbling or moving. Line up the brackets with the threads we installed on the motherboard and use the included thumbscrews to tighten down the blockhead on top of the CPU. Tighten down the screws initially using finger strength, and then use a screwdriver to tighten them down in a star pattern, moving from corner to corner.
We’ve applied our thermal paste in this build, but the CoreLiquid E360 comes with pre-applied thermal paste on the CPU blockhead, so there’s no reason to add any if your cooler is brand new.

Next, we’ll remove the bottom mounting panel from the case. Two small screws hold this in, and the panel then lifts out. Place the fans on the panel with the cables facing towards the back of the case. Then screw them in using the chunkier fan screws. Then put the panel back in the case and screw it down.

Step 5.5: Side-Mounted Fans & Hub
This build focuses on providing a clean and cable-free look, so it makes sense to add some more EZ120 fans to the side panel of the MAG PANO 100L PZ. Again, we’ll take the same steps to connect all the fans. Start using the longer blocks to hold the fans together like a 360mm unit.

Place the decorative blocks in to hide the connectors. We recommend placing the fan connector on the most accessible side so it will be easy to plug into the hub. This was the bottom for us, but putting the fan connector at the top may be better if you’ve moved the hub higher up.
Now is an excellent time to get the hub cables plugged in. Both sets of fans need to plug into a port on the hub; these ports are long and rectangular. We recommend using ports one and two. There are three extra cables that we need to plug in. The two easiest are SATA power, which we can do once the power supply has been installed, and USB. Get this plugged in, as this is how the fans will be controlled. The final cable must be plugged into an ARGB and SYS_Fan header, as this board doesn’t have a JAF_1 header.

Step 6: Power Supply & Cables
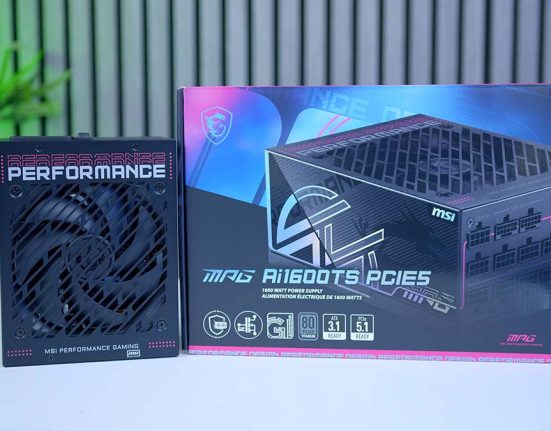
The PSU that we put in this build is the DeepCool PX1000G. We’ve used this power supply in many high-end builds primarily because it offers solid features while maintaining an affordable price point. Additionally, the PX1000G is ATX 3.0 compatible and comes with a 12VHPWR cable for NVIDIA RTX 4000 graphics cards, keeping the cabling clean and tidy.

To get our PSU installed first, plug in the necessary cables. We tend to opt for modular units for high-end systems, which makes installing the wires much easier because we can pick and choose what we want. For this particular build, you’ll need two 8-pin EPS CPU headers, a 24-pin motherboard cable, a 12VHPWR graphics card cable, and SATA power.

From the rear of the case, grab the power supply and push it towards the cutout near the top of the chassis. Use the four hexagonal screws to secure the PSU in place.

Starting with motherboard power. This long rectangular header can only go in one way and is the biggest power connector of the bunch. The header for this is located towards the left side of the board. Tug at the cable once it’s been plugged in to ensure it is seated properly.

CPU power is next. There are two 8-pin headers on this motherboard, which can be plugged in via one cable. Again, the headers are keyed, so they can only be plugged in one way.

We haven’t installed the graphics card yet, but we recommend threading this through the rubber grommets at the side of the case so that it can easily be installed once the GPU is in. The final cable is SATA power. This connector has a small notch, making it much easier to plug in. SATA cables are friction fit, so make sure the male and female parts fit together.
Step 7: Graphics Card Vertical Install
The MSI MAG PANO 100L PZ is configured to support vertical graphics cards out of the box. While the case doesn’t come with a riser cable, we’ve added one of our own to spice up the look of this build. The graphics card we’re installing is the MSI SUPRIM X variant of the RTX 4080 SUPER. SUPRIM X cards are highly sophisticated, offering an angular heatsink shroud with chevrons of RGB lighting surrounding each fan.

The RTX 4080 SUPER is also where the graphical horsepower comes from, providing excellent metrics at 4K and plenty of computing power for other intense tasks. The RTX 4080 SUPER is one of the best GPUs within the RTX 4000 range, and it can easily handle almost anything thrown at it, including more intense ray traced gameplay.
| Specification | MSI RTX 4080 SUPER SUPRIM X |
|---|---|
| Video Memory | 16GB GDDR6X |
| Memory Bus | 256-bit |
| Base Clock Speed | 2.29GHz |
| Boost Clock Speed | 2.65GHz |
| CUDA Cores | 10240 |
| RT Cores | 80 |
| Tensor Cores | 320 |
| Power Consumption | 320W |
| GPU Length | 336mm |
As always, we must remove the PCI-E covers to get this card into the case. However, the covers on this case are attached to a vertical piece that can pop out of the case. To save some hassle, we recommend unscrewing the module, taking it out to gain access to the covers, and then placing it back inside the case.

Place the Gen4 riser cable in the primary graphics card slot and plug the other end into the graphics card. The next part is quite demanding, so we recommend patience here. Secure the RTX 4080 SUPER to the riser module with a small Phillips screwdriver. This isn’t easy to do, and James required an extra pair of hands. Once the graphics card is secured to the case, plug in the 12VHPWR cable.

Step 8: Front Panel Cabling & Power!
The final step of any PC build involves organising and tidying all cables and plugging in any necessary front panel wires. Fortunately, because this build is a dual-chamber design, there’s no need to tidy everything up because it’s already out of view. However, we recommend spending some time to get the wires secured with Velcro ties so they don’t obstruct airflow.

Additionally, we’ll need to plug in front panel cables to power on the build and use the ports on the front IO. For this system, you’ll need to plug in the USB 3.0 header, USB-C header, HD audio, and JFP1 (front panel power). USB-C and USB 3.0 are notched, so they can only go one way. HD Audio has a pin blocked out, making it simple to plug in. The MAG PANO 100L PZ has a dedicated header for the JFP1 pins, which saves having to fiddle around with the small connectors.

Once you’re happy with the cabling, plug-in power, grab some peripherals and a monitor, switch on the power and press the power button. You’ve finished building this cable-free PC!
Performance
![]()
4K, High Settings
Avg: 205FPS
Preset: High
V-Sync: Off
Anti Aliasing: TSAA
Texture Filtering: 8x
Ambient Occlusion: High
Volumetric Lighting: High
Dynamic Shadows: Enabled
Model Detail: High
![]()
1080p, Comp. Settings
Avg: 301FPS
Preset: Low
V-Sync: Off
Render Distance: Far
TSR: Off
Global Illumination: Off
Ray Tracing: Off
Effects: Low
Post Processing: Low
![]()
4K, High Settings
Avg: 127FPS
Preset: High
V-Sync: Off
DLSS: Performance
Textures: High
Particle Quality: High
Tessellation: Near
Shaders: High
![]() 4K, High Settings
4K, High Settings
Avg: 125FPS
Preset: Recommended
V-Sync: Off
Anti-Aliasing: TAA High
Effects Quality: High
Texture Quality: High
Shadow Quality: High
Motion Blur: Off
After a range of tests and benchmarks, our results show that the NVIDIA RTX 4080 SUPER and Intel Core i5-14600K are an excellent pairing for 4K gaming across AAA and modern and Esports titles. We reached 125FPS in Hogwarts Legacy, while in Apex Legends, at 4K, frames surged up to 205FPS, which is an impressive metric.
Gallery


![FI_[SR190] HYTE X50 Ryzen 5 9600X & MSI RTX 5070 Ti](https://geekawhat.com/wp-content/uploads/2026/01/FI_SR190-HYTE-X50-Ryzen-5-9600X-MSI-RTX-5070-Ti-551x431.jpg)

![FI_[DP064] ASUS Prime AP303 + 9070XT](https://geekawhat.com/wp-content/uploads/2026/03/FI_DP064-ASUS-Prime-AP303-9070XT-551x431.jpg)