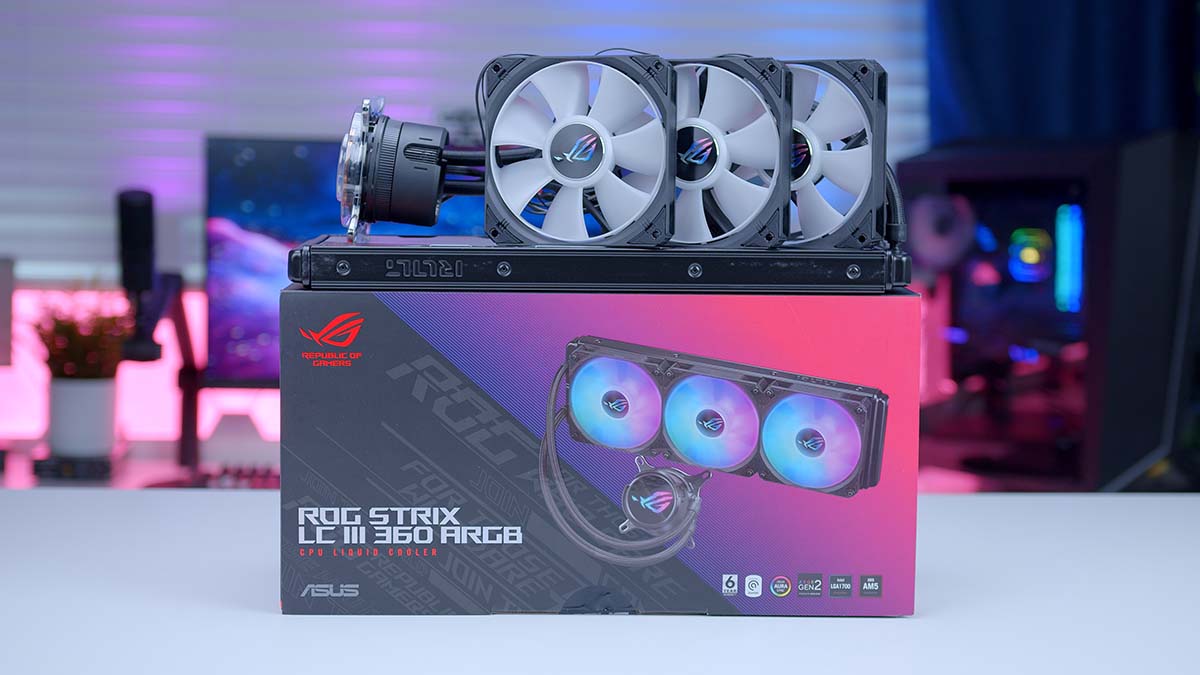
The ROG Strix LC III 360 ARGB is a premium liquid CPU cooler from ASUS designed to offer top-tier performance at a highly palatable price point. With an Asetek Gen7 V2 pump and three performance-focused 120mm fans, the ROG Strix LC III can move significant heat to keep your CPU cool. However, with so many liquid cooler options on the market, the ROG Strix LC III is up against some tough competition, so we’ve decided to test it in a series of benchmarks to see how it performs.
ASUS’ previous AIO ranges, such as the RYUO and RYUJIN coolers, have been notably expensive. While these CPU coolers are among the most robust options, the current generation of CPUs requires a beefy option to keep thermals low. This is where the ROG Strix LC III 360 hits a gap in the market, catering to those who need outstanding performance at a competitive price. In this review, we’ll examine the ROG Strix LC III 360 in great depth, analysing the specs, design, installation process, and thermal performance.
Buy the ASUS ROG Strix LC III 360 ARGB on:
Specification
The ASUS ROG Strix LC III 360 ARGB is a 360mm radiator utilising three 120mm fans. Its radiator measures 394mm long, 121mm wide, and 27mm tall, which is standard for most modern 360mm radiators. The ROG Strix LC III fans have received an upgrade compared to the previous LC II model. While the RPM has dropped to 2200 instead of 2500, as seen on the LC II, the design and chassis of the fan are much more refined.

Each corner features a rubber dampener to reduce noise levels. The fans automatically drop to 0RPM when your PC is at a low load level, ensuring your cooler stays quiet. Furthermore, the Fluid Dynamic Bearing on each fan provides minimal resistance, allowing them to spin effortlessly and last for a significant amount of time.
| Key Specs | ASUS ROG Strix LC III 360 ARGB |
|---|---|
| Radiator Size | 360mm |
| Radiator Dimensions (L x W x H) | 394mm x 121mm x 27mm |
| Number of Fans | 3 |
| Max Fan Speed | 2200RPM |
| Bearing Type | Fluid Dynamic Bearing |
| Max Pump Speed | 2800RPM |
| Pump Connector | PWM |
| Socket Compatibility | Intel – LGA 1700, 1200, 115X AMD – AM5, AM4 |
This liquid cooler caters to a wide range of CPU sockets, including modern Intel LGA 1700 and AMD AM5, so those looking to pick up a Ryzen 9000 processor won’t need to swap out their cooler. Regarding cabling, the pump uses a traditional PWM header, so it can be plugged into ‘CPU_Fan’ or ‘CPU_AIO’ with no issues. The fans also use standard PWM connectors and can be plugged into a three-way fan cable, which adapts the wires into just one header, saving some motherboard space.

At the time of writing, the ROG Strix LC III 360 ARGB’s MSRP is around $234.99, putting it comfortably within the premium end of the market. Compared to the MSI CoreLiquid E360 ($139.99) and Cooler Master 360 Atmos ($144.99), the ROG Strix LC III is somewhat of an outlier. However, based on its performance, which we’ll touch on later, the pricing looks to be reasonably justifiable and is one of the more affordable options considering the performance metrics.
ASUS ROG Strix LC III 360 ARGB Design
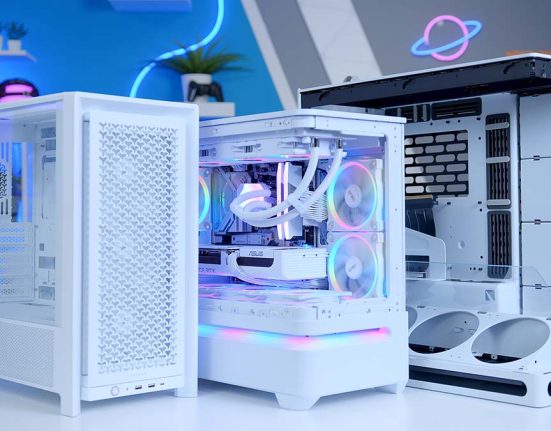
The ROG STRIX LC III 360 liquid CPU cooler is primarily targeted at mid-range and high-end systems, so it isn’t surprising that ASUS has prioritised the overall aesthetic. It comes in black and white, with the black version fitting in well with darker-themed builds and the white variant blending in with other white components. We recently used the white ROG Strix LC III 360 in a white ASUS-themed system, which looks incredibly sleek and clean.

The colouring is consistent across the radiator, fans, tubing, and CPU block. Whether you’ve opted for white or black, all of the individual parts of the AIO match up and look elegant. The only exception is that the cabling, screws and washers do stick out a bit because of their silvery-grey accents. Admittedly, this isn’t a deal-breaker, but it’s a small detail that would further enhance the overall aesthetic of this cooler.

All fans are RGB and use addressable headers to provide customisation through the ASUS Armoury Crate software. It’s great to see the use of a universal standard, as it makes plugging in this cooler much more straightforward across various builds.

The ROG Strix LC III’s standout element is its customisable ROG logo on the CPU blockhead. ASUS offers an ‘LCD’ model, but the standard model cycles through a range of colours, which is configured within Armoury Crate.

Additionally, the CPU blockhead on this cooler can be rotated to match the correct orientation of your system. Held in with magnets, it’s a case of simply twisting the blockhead so the logo is upright.

Installation Process
We’ve benchmarked and tested a vast range of coolers over the years, and the ROG Strix LC III, despite not being a cable-free design, is straightforward to install. This process is often one of the most convoluted parts of a PC build, so any way to slim this down is always commended.
We installed it inside an Intel system to see how this liquid CPU cooler compares to other designs. In this instance, the proper hardware for the LGA1700 socket is the x-shaped backplate, the double-ended LGA 1700 threads, and the Intel thumbscrews.

The necessary thumbscrews, labelled ‘Intel/AMD Thumbnuts, ‘ are in the ‘LGA 115x/1200 Standoffs’ bag. They are needed to secure the CPU blockhead to the CPU.

Furthermore, the backplate is secured inside a small bag inside the box and must be pushed through to the back of the motherboard and then screwed in using the double-sided threads.

AMD users have a slightly different set of steps to follow. The bag labelled ‘AMD AM4/5’ contains the screws and spacers needed to mount the cooler with an AMD system.

The ROG Strix LC III also comes with the Intel bracket pre-installed on the CPU blockhead. This must be swapped out for the AMD bracket, which has the mounting holes pointing north and south rather than diagonally.

Because we’ve built an Intel system, we’ve grabbed all the Intel hardware and left the pre-installed mounting bracket on. The Intel backplate is pushed into the back of the motherboard, and the LGA 1700 threads are then screwed into the posts to hold the backplate in place.

The threads only require thumb strength; you don’t need to use pliers here to secure the backplate to the motherboard, as this could damage the board or the threads.

Next, grab the three fans and lay the radiator on a flat work surface with the tubes on the right-hand side. Line up the fans with the holes on the radiator and use the long screws and washers to secure them to the top of the rad.

Top Tip: Lay the fans on the radiator with the cables coming out towards you. This will make cable management much easier once the radiator is flipped over and installed inside the case.

Flip the radiator over and push it up towards the top panel of your case. Using the smaller screws found in the ‘Fan screws, radiator screws & washers’ bag, attach the radiator to the top of your chassis (or whichever panel suits your preferences).

The CPU blockhead comes with pre-applied thermal paste so that it can be placed on top of the CPU straight away, saving us some time.

Line up the Intel bracket with the threads we installed earlier, and tighten the blockhead using the thumnbnuts. Tighten them initially using finger strength and then use a Phillips screwdriver to tighten them the rest of the way.

For wiring, the CPU blockhead has a USB 2.0 cable and a PWM header for the pump. Plug the USB 2.0 wire into any free header, and the PWM header must go into ‘AIO_Pump’.

This CPU cooler has a splitter for the fans, allowing them to be plugged in via one header. We recommend using this splitter and then plugging the fans into ‘CPU_Fan’ or ‘CPU_Opt’.

ASUS ROG Strix LC III 360 ARGB Performance
The ROG Strix LC III 360 ARGB has been tested in synthetic benchmarks. We use these to determine how well a cooler can handle the thermals of a CPU in various situations, whether gaming or pushing your PC with more intense multi-core workloads.
Our benchmarking system uses an Intel Core i7-14700K paired with four additional fans to increase airflow. All our tests are run at four and eight threads with HWMonitor running in the background to assess the thermal and power load. The results below are from two synthetic applications, Cinebench R23 and CPU-Z.
Cinebench R23 – 4 Threads
In Cinebench R23 at four threads, akin to gaming workloads, the ROG Strix LC III kept temperatures at a crisp 60°C, placing it fourth among the 20 or so coolers we’ve benchmarked.
The DeepCool Mystique outperformed the ROG Strix LC III with a slightly lower max, while the be quiet! Pure Loop 2 and AORUS WATERFORCE X II 360 ICE retain their second and first-place crowns with a sub-50°C reading.

Cinebench R23 – 8 Threads
At eight threads, temperatures rose slightly, with the ROG Strix LC III losing its third-place position to the MasterLiquid 360 Atmos from Cooler Master. Temperatures are notably higher in this benchmark, primarily because the Core i7-14700K is a toasty CPU. But what’s impressive about the ROG Strix LC III is that the difference versus its four-threaded run is relatively minor.
There’s about a 12°C jump up to 72°C from 60°C, but this is great considering how much power the CPU is drawing. The temperatures in this bracket are much closer together, which further shows how solid the ROG Strix LC III is. From the Atmos 360 to the ROG Strix LC III, there’s a variation of 2°C, demonstrating how impressive this AIO is.

CPU-Z – 8 Threads
In the CPU-Z benchmark at eight threads, the ROG STRIX LC III gains some ground, sitting back in fourth place. With an average of 71°C at eight threads, temperatures across both eight-thread runs are consistent. The only significant difference in CPU-Z versus Cinebench is that the max is lower at 77°C as opposed to 81°C. This shows that the ROG Strix LC III 360 can maintain suitable temperatures if performance doesn’t fluctuate too much.

Features We Like
Isn’t Overcomplicated
One of my major points of contention with a range of different fans and coolers released in the past year is that they are unnecessarily complicated. What happened to sticking some good fans on a radiator, installing it in your case, and then plugging in a couple of cables? However, with the ROG Strix LC III, installation is as easy as ever. There’s no proprietary cable mess or hubs being used as middlemen.

The ROG Strix LC III 360 ARGB is easy to assemble and install from start to finish and doesn’t overcomplicate what can already be considered a somewhat convoluted step in any PC build. For this, we commend ASUS for keeping things simple.
Customisable Lighting and Performance
The ASUS Armory Crate software allows you to fully customise the lighting effects and colours on the fan and CPU blockhead. While this isn’t the most refined application, it has an easy-to-use UI that makes configuring the cooler’s performance and customisable elements relatively simple without too much hassle.
Features We Don’t Like
Non-Coloured Screws & Wires
While this is primarily nitpicking, the ROG Strix LC III doesn’t use any form of coloured screws or wires, which results in a mismatched aesthetic. This isn’t a massive point of contention for us. Still, as an AIO made more for the premium market, ASUS could have gone the extra mile to match the design and colour across the entire cooler instead of limiting this to the fans, radiator and CPU blockhead.

Conclusion
ASUS ROG Strix LC III 360 ARGB
Product Name: ROG Strix LC III 360 ARGB
Brand: ASUS
-
Features
-
Design
-
Performance
-
Value For Money
Summary
The ASUS ROG Strix LC III 360 ARGB is a high-performance liquid AIO that streamlines the PC building process by keeping installation simple and uncomplicated. In doing so, all mounting hardware is accurately labelled and easy to find, the fans and radiator are straightforward to mount, and the wiring is quick and clean to plug in. Additionally, ASUS offers customisation of the RGB lighting on this cooler through the Armory Crate software, offering bespoke configuration settings that can enhance your setup and achievable performance.
However, I feel the simplicity of this cooler is its downfall. While performance is excellent, this AIO lacks additional or interesting features that make it stand out. And considering that this is a nearly $250 liquid cooler, the restrictive set of features is disappointing. At $100 cheaper, I feel this would be justified, and the ROG Strix LC III would align itself with coolers like the Atmos 360 and CoreLiquid E360. But at this price point, the ROG Strix LC III is a premium AIO without any premium features. However, few other coolers can offer similar thermal capabilities, which makes the ROG Strix LC III worth considering for those with power-hungry CPUs.
Pros
✅ Excellent thermals
✅ Simple installation
✅ Configurable performance & lighting
Cons
❌ Not many features
❌ Non-coloured screws and wires
❌ Pricey