Those building a PC on a $1300 budget have a plethora of parts to choose from, thanks to the competitive nature of the current market. However, if you’re looking to build a 1440p capable system at this price point, it can be difficult for first-time builders and those who haven’t upgraded in a while to find the right parts at the best price.
For this reason, we’ve put together this comprehensive $1300 gaming PC build guide. We’ll cover how to put it all together, along with the reasoning for our part choices and the expected performance metrics towards the end.
The standout part of this system is the RX 7900 GRE, a highly capable graphics card that delivers solid performance at both 1440p with decent legs in 4K.
We’ve also put together a dedicated video for this PC build, which covers the build process in more depth.
Build Process
Step 1: CPU Install
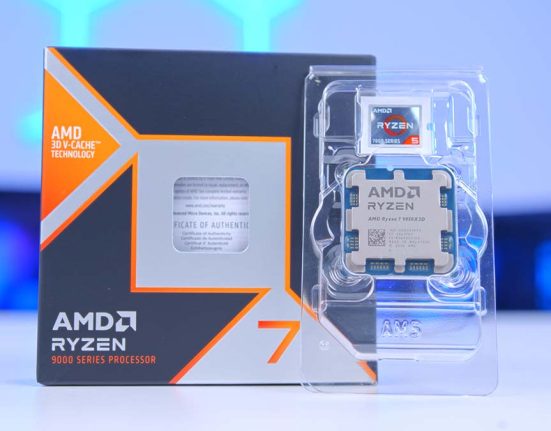
The first part of any PC build involves getting the CPU installed. While many view this as one of the most daunting steps, it’s actually one of the easiest, so allow us to walk you through the process. The processor we’ve picked for this $1300 system is the AMD Ryzen 5 7600. We’ve featured this CPU across various budget builds because it is one of the best-value options.

The Ryzen 5 7600 is a great CPU due to its exceptional single-core performance. The Ryzen 5 7600 can consistently sustain its 5.1GHz clock speed across its six cores, making it an excellent contender within modern games, which massively benefit from higher boost clock speeds. Additionally, the Ryzen 5 7600 is efficient and one of the cooler Ryzen 7000 processors, making it much easier to keep a lid on thermals with a budget cooler.
To get this CPU installed, like always, we’ll take the motherboard out of its box and place it on top to provide a good surface to work on. To access the CPU socket, unhook the metal retention arm, lift it, and then raise the CPU socket cover, exposing the pins underneath.

Find the golden arrow on the Ryzen 5 7600; a matching arrow can be found on the motherboard. This indicates the orientation needed for the CPU to slot into place correctly. Line both arrows up and slowly lower the Ryzen 5 7600 into the socket. No force is required to get the CPU in, and it should sit snugly in its socket if everything has been lined up correctly.

Finally, drop the metal socket cover and place the retention arm back under its hook. Getting the arm into place requires a fair bit of force, but don’t worry; this is normal. While you’re lowering the arm, the plastic protector will pop off unless this was removed earlier. We recommend keeping this inside the motherboard box, as it can be required for repairs or RMA.
The motherboard going into this PC build is the Gigabyte B650M D3HP. Much like the B650 DS3H, the D3HP is a budget board that offers a barebones aesthetic while providing solid features for a Ryzen 7000 PC build. Admittedly, the most significant advantage to picking up this board compared to others is the incredibly low price point, which at the time of writing is around $119.99, making it one of the cheapest motherboards on the market.

On the features front, the B650M D3HP offers RAM speeds up to 7600MT/s, with a max capacity of 192GB. This board comes with Gen4 slots for graphics cards and SSDs, with two slots for M.2 drives. Rear IO is also pretty strong, with this board offering 2.5 Gigabit LAN, three USB 3.2 Gen 1 Type-A ports, a USB 3.2 Gen1 Type-C port, and two additional USB 2.0 ports. There’s also a small audio suite with three 3.5mm jacks for those with dedicated audio setups.
| Specification | Gigabyte B650M D3HP |
|---|---|
| Form Factor | Micro-ATX |
| Supported Memory | 192GB DDR5 7600MT/s |
| PCI-E x16 Slots | 1 x PCI-E 4.0 |
| PCI-E x4 Slots | 2 x PCI-E 4.0 |
| Front IO | 1 x USB 3.2 Gen1 Type-C 1 x USB 3.2 Gen1 2 x USB 2.0 |
| Rear IO | 3 x USB 3.2 Gen1 Type-A 1 x USB 3.2 Gen1 Type-C 2 x USB 2.0 |
| Audio | 3 x Audio Jacks |
| Networking | 2.5 Gigabit LAN |

Step 2: Slot in the RAM DIMMs
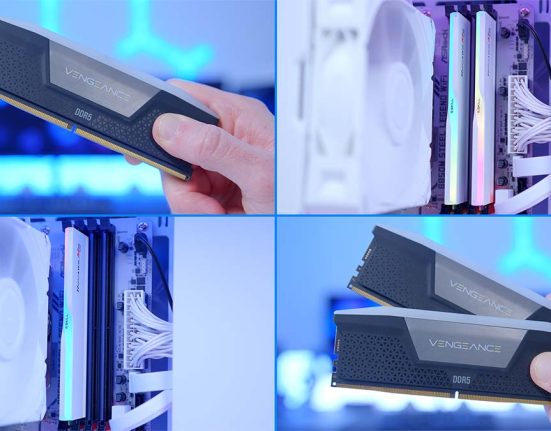
Next, we’ll get the RAM slotted into our motherboard. The RAM we’ve picked is the Teamgroup T-Force Delta RGB kit, which offers speeds up to 6400MT/s with a rated latency of CL40. We’ve featured this RAM across several of our mid-range and budget-oriented PC builds primarily because of its price point. Teamgroup offers highly affordable memory, so they’re an excellent choice for cheaper and more price-conscious systems.

Additionally, the black heat spreader helps the DIMMs blend in with the system we’ve put together, and the RGB strip on the top of each stick provides some additional lighting.
To get this RAM into the motherboard, push down the clips on DIMM slots two and four (from left to right), as these slots provide the best efficiency with two sticks. The DIMM slots on this board only have one clip that needs to be pushed down, saving us some time.

Line up each Teamgroup DIMM with the slots; they can only go in one way. Then, apply pressure to both sides of the DIMM and push them into the slot until you hear a click. This indicates that the RAM has been secured in the slot.
Step 3: Slot in the SSD
Next, we’ll get the SSD secured in the motherboard. Because this is a Micro-ATX board, only two SSD slots are available, but the primary slot has a heatsink, which will keep our drive of choice cool. Speaking of which, following on from the Teamgroup RAM, we’ve also opted to install a Teamgroup NVMe SSD. The Teamgroup MP44L is a highly reliable PCI-E 4.0 SSD, offering read speeds up to 5000MB/s and writes up to 4500MB/s, aligning it with other solid budget drives on the market.

We’ve stuck to the 1TB variant primarily because of the price. While 2TB would be ideal for mass storage space, 1TB is ample to get started and install most of your big games.
First, we must remove the heatsink to get this drive into the board. With a Phillips screwdriver, loosen the singular screw covering the SSD slot and move it to the side. Then push the drive into the slot; it will be coming out at a slight angle before it’s been screwed down.

Next, take the SSD screw that came with the drive, push the drive down and screw it in place. Then place the heatsink back on top, make sure to remove any stickers on the thermal pad beforehand, and screw down the heatsink.

Step 4: CPU Cooler Install
These next steps involve getting the CPU cooler mounted to the motherboard. This can be done inside or outside of the case, but because we’ve opted to use an air cooler, it makes sense to get the heatsink screwed in without being constrained or restricted by a metal box.
The CPU air cooler we chose for this PC build is the DeepCool AK400. This is the slightly cheaper and smaller sibling of the AK620, which swaps the dual-tower layout for a single tower and fan. But despite this, the AK400 is one of the best budget coolers capable of handling CPUs like the Ryzen 5 7600 up to beefier options like the Intel Core i5-14600K. While the AK400 isn’t the most impressive aesthetically, it can easily handle the thermals of the Ryzen 5 7600, keeping this processor nice and cool during gaming.

First, remove the two plastic clips at the top and bottom of the socket. Four Phillips screws hold down these clips, so loosen these and move the clips out of the way.
You’ve probably noticed that there’s already thermal paste on the CPU in the following images. Unless your AK400 isn’t brand new, it should come with pre-applied thermal paste on the CPU blockhead. We’ve added our own because James had a slight accident with the cooler, which you can see in the full build video!

Take the four orange plastic spacers from the mounting hardware bag and place them on the four posts around the socket. Make sure these spacers are sitting securely on the posts around the socket, as this will prevent any wobble when we start installing the mounting plate.

Then, take the four AMD screws and the square mounting plate and secure it on top of the spacers. Make sure the screws are nice and tight, as we don’t want the plate to move at all during the heatsink install.

Take the fan off of the heatsink by pulling the metal clips to the side. After the fan has been taken off, line up the spring-fitted heatsink screws with the two threads on the square plate and start to tighten the heatsink down. We recommend tightening the screws bit-by-bit, torquing one slightly, and then moving to the other and torquing this.
Keep screwing the cooler down until there’s no more movement. Don’t try to force the screws to move anymore once they’re tight, as this could damage the threads or the CPU. Then, put the fan back on the heatsink.

Step 5: Place the Motherboard Inside the Case
Now that we’ve installed the CPU cooler, we can secure the motherboard inside the case. Fortunately, because the DeepCool CH360 case we’ve chosen is on the smaller side, it’s preconfigured out of the box for Micro-ATX boards. However, there is an additional standoff for Mini-ITX motherboards that we don’t need. The standoff we’ve circled in red isn’t required for this build, so remove it and place it in the case accessories box for safekeeping.

We first need to secure the IO shield to install the board properly. The B650M D3HP doesn’t have a built-in shield, so we’ll need to use the small metal plate and push it into the case. Be careful with the IO shield, as the metal around the edges can be sharp.

Once the IO shield is in, it’s now a case of lining up the screw holes on the motherboard with the standoffs and screwing the board down. The DeepCool CH360 comes with a small bag of accessories, which contains all of the screws needed for the board. Make sure you’re using the correct screws, as different screws could thread and potentially damage the standoffs, making future upgrades quite problematic.

The case housing our components in this build is the DeepCool CH360, an airflow-optimised chassis designed for compact systems. It features a highly ventilated front panel, while the side panel is half glass and half mesh, further assisting airflow and thermals. Additionally, the CH360 has a reasonable amount of space for future upgrades, including support for a 360mm radiator at the front, eight 120mm fans around the various panels, and clearance for GPUs up to 320mm long.
The DeepCool CH360 has a small digital LCD towards the bottom right of the side panel to display vital system stats such as temperatures or component usage.

| Key Specs | DeepCool CH360 |
|---|---|
| Form Factor | Mini-Tower |
| Motherboard Support | Mini-ITX, Micro-ATX |
| Case Dimensions (L x W x H) | 428mm x 215mm x 431mm |
| Front IO | 1 x USB 3.0 Type-A 1 x USB 3.2 Gen1 Type-C 1 x 3.5mm Combo Jack |
| PCI-E Slots | 4 |
| Colour | White or Black |
| Max Clearance | 165mm CPU Cooler Height 320mm GPU Length 160mm PSU Length |
| Drive Support | Up to 3 x 2.5 inch Up to 2 x 3.5 inch |
| Fan Support | Front: 3 x 120mm Top: 2 x 120mm Rear: 1 x 120mm PSU Shroud: 2 x 120mm |
| Radiator Support | Front: 360mm Top: 240mm Rear: 120mm |
| Pre-Installed Fans | 3 x 120mm |
It comes with three pre-installed 140mm RGB fans, with two at the front and one at the rear of the case and offers a versatile design that makes the building process incredibly simple. This includes an integrated GPU support arm, magnetic dust filters, and plenty of clearance for cable management.
Step 6: Graphics Card Install
The standout component of this PC build is the graphics card. Because we’ve managed to save a fair amount of cash across the rest of the parts we’ve chosen, there’s extra room in our budget to pick up a beefy GPU, hence why we’ve opted for the Radeon RX 7900 GRE.

Releasing back in 2023, the RX 7900 GRE (Golden Rabbit Edition) was a China-exclusive graphics card that was shifted over to the worldwide market in 2024, landing in the hands of gamers as a step up from the RX 7800 XT. The RX 7900 GRE offers specs similar to its RX 7800 XT sibling but bumps up the stream processors and compute units to better handle rasterised gaming.
This GPU is a beast at 1440p gaming, offering exceptional framerates in almost every title you throw it at while providing decent legs at 4K. Furthermore, the RX 7900 GRE is available at just $50 more than the RX 7800 XT, so it’s a go-to option for most gamers looking for a high-value 1440p graphics card.
| Specification | Gigabyte RX 7900 GRE Gaming OC |
|---|---|
| Video Memory | 16GB GDDR6 |
| Memory Bus | 256-Bit |
| Core Clock Speed | 1.28GHz |
| Boost Clock Speed | 2.39GHz |
| Stream Processors | 5120 |
| Ray Accelerators | 80 |
| Compute Units | 80 |
| Power Consumption | 260W |
| GPU Length | 302mm |
This card’s Gigabyte Gaming OC variant offers a nice overclock to the boost speed and a triple-fan design keeping thermals under wraps. It also features a black/grey design that blends in well with the rest of the system we’ve put together.
We first need to remove the PCI-E covers at the back of the DeepCool CH360 case to install this card. The Gigabyte Gaming OC version of the RX 7900 GRE is a 2.5-slot graphics card, so we need to remove the top two covers so the card can be slotted in.

Similar to how we installed the RAM earlier, line up the graphics card with the PCI-E slot on the board and apply even pressure until the card clicks in place. Then, use the screws we removed from the PCI-E covers to secure the graphics card to the case. We also recommend adjusting the integrated graphics card holder and placing it underneath the edge of the card to alleviate any sag.

Step 7: Power Supply & Cabling
The last component we need to install is the power supply, and for this build, we’ve chosen the Corsair RM750e. Corsair’s RM range has featured across several of our PC builds, as these units are highly reliable and incredibly affordable. The RM750e, in particular, is an ATX 3.0-supported unit, offering an 80 Plus Gold efficiency rating, a fully modular cabling system, and a zero-RPM mode to keep noise levels as low as possible.

The Corsair RM750e is available for around the $100 mark at the time of writing. As a nice value-add, it has a seven-year warranty as standard, ensuring outstanding reliability.
Before we screw in the RM750e, we’ll first pick out the cables that we need for this system. The board we’ve chosen only has one CPU power header, so we’ll need a singular 8-pin EPS CPU cable, a 24-pin motherboard cable, a cable with two 8-pin PCI-E headers for the graphics card, and a SATA power cable for the fan/RGB header in the case.

Once the cables have been plugged in, take off the opposing side panel of the case and slide the PSU towards the back panel. Then use the four hexagonal power supply screws to secure it into place.

Next, we’ll wire up all cables, starting with motherboard power, as this is the most straightforward header to plug in. Take the long rectangular header and plug it into the right side of the motherboard. This cable is keyed so it can only go in one way and should firmly click into place once it’s secured.

CPU power is next. Thread this cable towards the top left of the case and through the cutout near the top panel. Then, push the cable into the header on the motherboard and tug at it afterwards. This ensures that the cable won’t come out, showing the cable clips fully engaged.
The last cable we must plug in is GPU power. The graphics card has two PCI-E headers to power it; ensure these are fully plugged in. Then, move around to the back of the case and plug in the SATA power cable; this provides power for all of the fans and RGB cables that come with the case.

Step 8: Front Panel Wiring & Switch On
The final step of the PC building process involves plugging in the front panel cables. Admittedly, because the case and motherboard we’ve chosen for this system are a little bit more basic, there aren’t many additional cables that need to be plugged in. For this system, we need to wire up the USB 3.0 header, USB-C header, HD Audio, and JFP1 (or front panel power). We recommend checking out our Ultimate Guide to PC Cables & Wiring if you’re unfamiliar with these cables.

After this, double-check the rest of the cables and do any additional cable management. Then, put on the panels, plug in any necessary peripherals, and switch on the PC build!
Performance
![]()
1440p, High Settings
Avg: 265FPS
Preset: High
V-Sync: Off
Anti Aliasing: TSAA
Texture Filtering: 8x
Ambient Occlusion: High
Volumetric Lighting: High
Dynamic Shadows: Enabled
Model Detail: High
![]()
1080p, Comp. Settings
Avg: 270FPS
Preset: Low
V-Sync: Off
Render Distance: Far
TSR: Off
Global Illumination: Off
Ray Tracing: Off
Effects: Low
Post Processing: Low
![]()
1440p, High Settings
Avg: 180FPS
Preset: High
V-Sync: Off
DLSS: Performance
Textures: High
Particle Quality: High
Tessellation: Near
Shaders: High
![]() 1440p, High Settings
1440p, High Settings
Avg: 115FPS
Preset: Recommended
V-Sync: Off
Anti-Aliasing: TAA High
Effects Quality: High
Texture Quality: High
Shadow Quality: High
Motion Blur: Off
Throughout our testing, we’ve found the AMD Ryzen 5 7600X and RX 7900 GRE to be an exceptional combo, offering high frame rates at 1440p and decent legs in 4K. This card is a must-have for 1440p gaming across popular titles like Hogwarts Legacy, Apex Legends, COD Warzone and Fortnite.
Gallery


![FI_[SR190] HYTE X50 Ryzen 5 9600X & MSI RTX 5070 Ti](https://geekawhat.com/wp-content/uploads/2026/01/FI_SR190-HYTE-X50-Ryzen-5-9600X-MSI-RTX-5070-Ti-551x431.jpg)
![FI_[DP064] ASUS Prime AP303 + 9070XT](https://geekawhat.com/wp-content/uploads/2026/03/FI_DP064-ASUS-Prime-AP303-9070XT-551x431.jpg)
![FI_[DM93] Corsair 3200D Launch](https://geekawhat.com/wp-content/uploads/2026/03/FI_DM93-Corsair-3200D-LAUNCH-551x431.jpg)
![FI_[DM89] Phanteks Evolv + AORUS 5090 9850X3D Gallery (8)](https://geekawhat.com/wp-content/uploads/2026/02/FI_DM89-Phanteks-Evolv-AORUS-5090-9850X3D-Gallery-8-551x431.jpg)