Building an awesome gaming PC has become much more affordable in recent years. With a $1600 budget, builders have access to a wide range of components, which opens up a wide range of build configurations for experienced gamers or those looking to assemble their first PC. However, choosing parts isn’t always the most straightforward task, so we’ve done all the hard work for you and put together a high-power system within the confines of a $1600 budget.
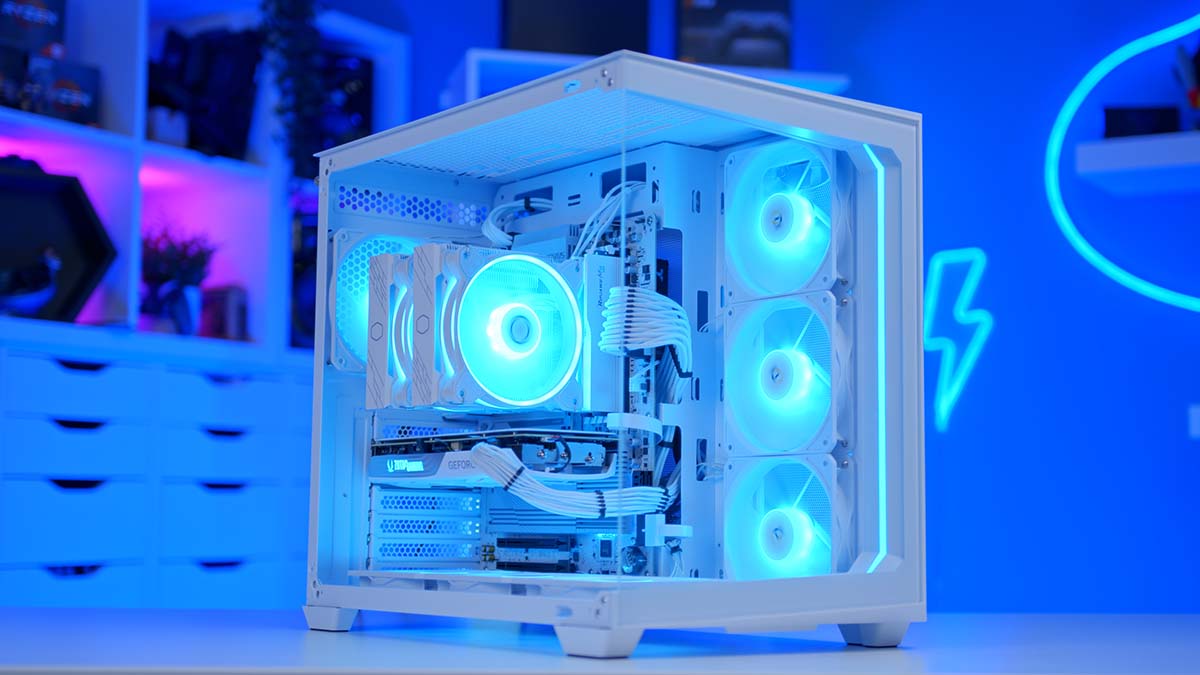
We’ve paired the AMD Ryzen 7 9700X with a Zotac Gaming white RTX 4070 SUPER inside the Antec C5 ARGB case. As always with our PC builds, we’ve detailed the assembly process from start to finish while covering why each part has been chosen specifically for this build. Additionally, we’ve provided some benchmarks towards the end, which give you an idea of how this build performs.
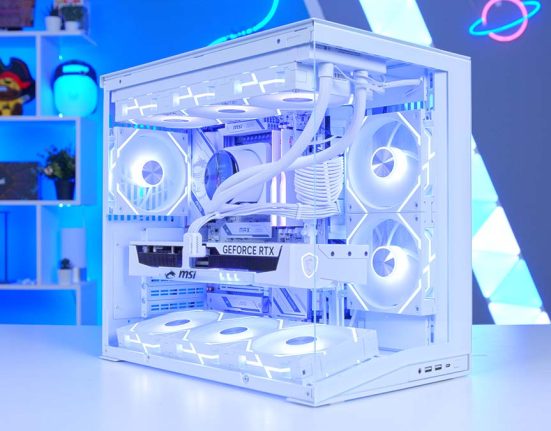
We recommend watching the dedicated YouTube video this article was written alongside. It provides a solid visual aid for understanding how everything fits together.
Build Process
Step 1: Socket the CPU
The first part we’re installing in this build is the CPU. In this configuration, we’ve opted for the AMD Ryzen 7 9700X. With a Windows update and some new microcode, the Ryzen 9000 range is in a considerably better position than when it first launched. The Ryzen 7 9700X offers solid performance at 1440p and 4K, depending on the graphics card pairing. It is also significantly more efficient than its Ryzen 7000 counterpart, which means better power draw and less aggressive thermals.

The specs of the Ryzen 7 9700X haven’t changed much compared to the Ryzen 7 7700X. It still uses eight cores and sixteen threads, but the clock speed has been increased by 100MHz to 5.5GHz. With a 65W TDP instead of a 105W TDP, the Ryzen 7 9700X doesn’t run as hot as the Ryzen 7000 range.
Note: Before installing the CPU into the motherboard, you must update the BIOS. This can be done through BIOS flashback or while a Ryzen 7000 CPU is already on the board. Your PC will not boot if this hasn’t been done.

To install the CPU, first place the motherboard on its box. This provides a stable but soft surface to work on that won’t damage any connections on the underside of the board. Locate the CPU socket and unhook the metal retention arm, alleviating the socket cover’s tension. Lift the cover, exposing all of the pins underneath. AMD Ryzen 9000 CPUs are installed the same way as Ryzen 7000, so locate the golden arrow (typically found at the top left) and find a matching arrow on the board.
Line up the arrow on the CPU with the arrow on the board and slowly lower the CPU into the socket. The Ryzen 7 9700X doesn’t require any force to sit correctly in the socket, and it will just drop into place if the arrows are correctly aligned.

Finally, place the metal socket cover on the CPU and push the metal retention arm underneath the hook. This requires a slight bit of force, but this is normal. While this is happening, the plastic protector will pop off. Keep this for a potential RMA or repair in the future.
The motherboard we chose for this build is the Gigabyte B650 AORUS Elite AX ICE. We’ve used this board in several of our white PC builds because it is gorgeous. It’s one of the few motherboards on the market with an entirely white PCB, heatsinks, and other components on the board. Additionally, it is incredibly feature-rich despite being a cheaper B650 option.

The B650 AORUS Elite AX ICE supports a max RAM capacity of up to 256GB and speeds up to 8000MT/s, providing a performance boost for those overclocking. One Gen5 and two Gen4 M.2 slots offer ample storage expansion. Regarding the rear IO, there are ten ports comprised of one USB 3.2 Gen2x2 Type-C port, three USB 3.2 Gen2 Type-A ports, four USB 3.2 Gen1 Type-A ports, and two USB 2.0 ports. The audio on this board is solid, offering five 3.5mm jacks and optical S/PDIF for those with speaker setups. For networking, you can choose between 2.5 Gigabit LAN and WiFi 6E, both of which provide solid speeds for online gaming.
| Specification | Gigabyte B650 AORUS Elite AX ICE |
|---|---|
| Form Factor | ATX |
| Supported Memory | 256GB DDR5 8000MT/s |
| PCI-E x16 Slots | 1 x PCI-E 4.0 |
| PCI-E x4 Slots | 1 x PCI-E 5.0 2 x PCI-E 4.0 |
| Front IO | 1 x USB 3.2 Gen2 Type-C 1 x USB 3.2 Gen1 Type-A 2 x USB 2.0 |
| Rear IO | 1 x USB 3.2 Gen2x2 Type-C 3 x USB 3.2 Gen2 Type-A 4 x USB 3.2 Gen1 Type-A 2 x USB 2.0 |
| Audio | 5 x Audio Jacks 1 x Optical S/PDIF |
| Networking | 2.5 Gigabit LAN WiFi 6E |

2. Slot in the RAM
The next component to install in the motherboard is the RAM. The memory going into this system is the G.Skill RIPJAWS M5 white kit. These DIMMs are rated at 6000MT/s with a latency of CL30, so top-end gaming and more complex multi-core tasks are more than viable with this RAM. While we could have gone for a lower latency kit in this build, the G.Skill RIPJAWS M5 memory is quite affordable for white RAM, allowing us to keep within our $1600 budget.

Aesthetically, G.Skill has opted for a simple design on this RIPJAWS M5 kit. It utilises a minimalist white heatspreader, which fits in nicely with the lighter theme of this build. The DIMMs also feature a strip of RGB lighting on the top, which can be configured and synced up using software like SignalRGB.
Installing RAM is pretty simple compared to other components in the build, as it doesn’t require any tools. First, push down the tabs at the top and bottom of slots two and four (from left to right). These slots offer the most efficient configuration when a PC only has two RAM sticks. You can use slots one and two, but it would be slower overall.

After pushing down the tabs, line up one RAM stick with the second slot on the board. RAM can only go in one way, making it much easier to line up on the board. Once you’re sure that the stick is correctly aligned, apply firm pressure to both sides of the stick and push it down into the slot until you hear a click. This indicates that the RAM is seated. Repeat this for the other DIMM.

Step 3: Mounting the SSD
Next up is the SSD. The TeamGroup MP44L is a Gen4 drive we’ve used repeatedly across various PC builds, budget, mid-range, and high-end. The reason why we’ve used this so often comes down to it being incredibly affordable and highly resilient. It offers speeds up to 5000MB/s on the reads and 4500MB/s on the writes, which is ample for gaming. Admittedly, most games don’t even need Gen4 speeds to boot quickly, so the performance of the MP44L is more than enough for this build.

We’ve decided to use the 1TB variant of the MP44L in this configuration. While we’d typically opt for 2TB of storage, 1TB is a decent amount of space for a few big games, the operating system, and additional applications like Discord and game launchers. You may have to upgrade later, but saving some money on storage allows us to spend a bit extra on other components like the graphics card, which is helpful as white graphics cards can be quite pricey.
To install this SSD, we first need to remove the heatsink on the motherboard, which covers the M.2 slot. To do this, take a small Phillips-head screwdriver and loosen the screw. This is a captive screw so it won’t fall out of the heatsink. It will remain attached. Once loosened, remove the heatsink from the slot and take the tape off the thermal pad. Also, remove the tape from the thermal pad underneath the board.

Place the TeamGroup MP44L SSD into the slot, which will poke out at a 45-degree angle. Push the drive down into the EZ-latch, which will lock the M.2 SSD in place. Then place the heatsink back on top of the drive and screw it down.

Step 4: Install the CPU Cooler
The Cooler Master Hyper 622 Halo tower air cooler keeps the AMD Ryzen 7 9700X nice and cool in this build. This dual-tower unit has two 120mm RGB fans that offer a rounded look instead of being square. The two heatsinks provide ample heat dissipation to keep our CPU under control, while the fans offer plenty of airflow to move the heat and exhaust it out of the case.

We’ve chosen the white version, which blends nicely with the other components in this build. The heatsink, heat pipes and CPU block are entirely white. Cooler Master has gone the extra mile to ensure the whole cooler is white. The RGB on the fans is also addressable, providing a simple way to sync up the lighting effects and colours.
First, remove the fans from the heatsinks to get the CPU cooler appropriately installed. This provides us with access to the spring-loaded screws underneath.

Remove the plastic AMD clips from the motherboard. These are held in place with four Phillips head screws. We must remove these to access the posts and secure the mounting hardware.

Next, locate the angled AMD brackets, the double-sided standoffs and the small thumbscrews. These are noted down in the instructions as ‘D’, H’, and ‘G’, respectively. Screw in the standoffs first, then slip on the brackets, followed by the thumbscrews. Use finger strength to tighten the thumbscrews most of the way, and then use a Phillips screwdriver to tighten them the rest of the way.

Apply a rice-grain-sized blob of thermal paste to the IHS (internal heatspreader) of the CPU, then line up the spring-loaded screws with the posts on the mounting hardware that we just installed. Move back and forth between the two screws torquing them slightly to apply even pressure to both sides of the socket.

Reattach both fans by slipping the metal brackets onto the heatsink, and wire up the fans and cooler appropriately with the headers on the motherboard. The fans can be plugged into a 3-pin ARGB splitter and a 4-pin PWM splitter to save room on the board.

Step 5: Place the Motherboard into the Case
The Antec C5 ‘Constellation Series’ ARGB case houses all of the components in this $1600 build configuration. This is another fish-tank case, but it has more personality and value than similar chassis we’ve reviewed. This case offers a tempered glass front and side panel, providing an unhindered view of all the components inside. The front panel features an inlaid strip of LEDs, lighting up the case with some RGB.

One of the more attractive qualities of the Antec C5 ARGB is that it comes with seven pre-installed fans. Yes, you heard me. Seven! Three 120mm reverse fans on the side and bottom panel are intake, while the 120mm fan on the rear is exhaust. All of these utilise addressable RGB, which can be plugged into the controller on the back which also offers 4-pin PWM to power the fans.
| Key Specs | Antec C5 ARGB |
|---|---|
| Form Factor | Mid-Tower |
| Motherboard Support | Mini-ITX, Micro-ATX, ATX |
| Case Dimensions (L x W x H) | 469mm x 285mm x 400mm |
| Front IO | 2 x USB 3.0 Type-A 1 x USB 3.2 Gen2 Type-C 1 x 3.5mm Microphone Jack 1 x 3.5mm Headphone Jack |
| PCI-E Slots | 7 |
| Colour | White Black |
| Max Clearance | 160mm Cooler Height 410mm GPU Length 240mm PSU Length |
| Drive Support | Up to 2 x 2.5 inch Up to 1 x 3.5 inch |
| Fan Support | Top: 3 x 120mm Side: 3 x 120mm Bottom: 3 x 120mm Rear: 1 x 120mm |
| Radiator Support | Top: Up to 360mm Side: Up to 280mm Bottom: Up to 360mm Rear: Up to 120mm |
| Pre-installed Fans | 7 x 120mm |
Regarding component support, the Antec C5 can house up to ATX motherboards; unfortunately, due to its smaller size, E-ATX isn’t supported. There’s space for ten 120mm fans (seven of which are taken up by the pre-installed fans, which is not a complaint!), along with 360mm liquid cooler support on the top and bottom panels. This case is incredibly feature-rich and pairs very well with the gorgeous components in this build.

To install our motherboard in the case, we first need to remove the front and side panels, which provides easier access to the internal space. Once these have been removed, lay the case flat on your work surface and line up the rear IO on the board with the cutout at the top left of the chassis.

Using the screws found in the accessory box that comes with the case, secure the motherboard in place. As this is an ATX board, we need to use nine screws in total. Don’t over-tighten these; we don’t want to risk damaging the standoffs.
Step 6: Secure the Graphics Card
The Zotac Gaming RTX 4070 SUPER Twin Edge OC handles all the graphical horsepower in this $1600 gaming PC build. The RTX 4070 SUPER is a solid card that can handle 1440p gaming with ease and has some decent legs at 4K. Across our testing, the RTX 4070 SUPER has reviewed well and is a solid pickup for a mid-range build like the one we’re putting together in this guide.

The Zotac Gaming Twin Edge OC variant of the RTX 4070 SUPER offers additional benefits that make it a standout option. Firstly, this white card features plenty of RGB lighting, so it fits in with the other components we’ve opted for. It is also relatively compact, so there’s no risk of clearance issues in the Antec C5 ARGB case. Furthermore, the Twin Edge OC has a slightly overclocked boost speed, providing performance bonuses in certain games and applications.
| Specification | Zotac Gaming RTX 4070 SUPER Twin Edge OC |
|---|---|
| Video Memory | 12GB GDDR6X |
| Memory Bus | 192-bit |
| Base Clock Speed | 1.98GHz |
| Boost Clock Speed | 2.59GHz |
| CUDA Cores | 7168 |
| RT Cores | 56 |
| Tensor Cores | 224 |
| Power Draw | 220W |
| Length | 234mm |
We first need to remove the PCI-E covers at the back of the case to install this card. The Zotac Gaming RTX 4070 SUPER Twin Edge OC only uses two slots, so from the top, we’ll remove the second and third covers.

After removing these, line up the graphics card with the primary slot on the motherboard. Similar to the RAM, apply even pressure to the card and push it down until you hear a click, indicating that it’s seated correctly.

Finally, use the screws removed from the PCI-E covers to secure the graphics card to the case. Don’t use any other screws, as they will damage the threads on the case.
Step 7: Install the Power Supply & Cabling
The final component to be installed in this $1600 PC build configuration is the Thermaltake Smart BM3 power supply. This 750W unit provides ample power for the system’s components and some extra legroom for future upgrades. The Thermaltake Smart BM3 offers an 80 Plus Bronze efficiency rating, reducing power lost as heat or noise at varying load levels. It also supports ATX 3.0, which is ideal for the NVIDIA GPU we’ve chosen, allowing us to use just one cable.
Additionally, the Thermaltake Smart BM3 is semi-modular, which, to a degree, saves the hassle of having to pick and choose cables, which saves some time during the building process.

Before installing this power supply in the case, we need to plug in a couple of cables beforehand. For this build, we need a 12VHPWR cable for the graphics card and SATA for the fan/RGB hub in the case.
Once the cables have been plugged in, slide the power supply into the back of the case. The mounting is located towards the top, so you’ll need to hold onto the Smart BM3 while it gets screwed down. Next, we can start wiring up the power for this build.

As always, we’ll start with motherboard power first. This is one of the cables that’s hard-wired into the power supply. The header is pretty long and rectangular and only plugs in one way. Once it’s plugged in, give the cable a firm tug to double-check that it’s seated properly.

Next is CPU power. The Gigabyte B650 AORUS Elite AX ICE has a full 8-pin EPS header and a 4-pin header next to it. Plug in both of these. While the second CPU power isn’t always necessary, it’s good practice to plug in both. It spreads power delivery better, which helps with thermals.

For the graphics card, we’re using the 16-pin 12VHPWR cable, specifically designed to provide more power for GPUs with just one cable. Plug this into the Zotac Gaming RTX 4070 SUPER Twin Edge OC.

Finally, SATA power must be plugged into the fan/RGB hub with the case. SATA power is notched, and the cables are friction fit, so they snap together once lined up correctly.

Step 8: Front Panel Wiring & Switch On
The last significant step of any PC build is the front panel cables, followed by the first power on. In this configuration, we need to wire up a few front-panel headers: JFP1 (front panel power), HD_Audio for the 3.5mm jacks at the front of the case, a USB-C header, and a USB 3 header.
We can also take this opportunity to organise all the cables and wiring. We recommend using zip ties and the various cutouts around the case to clean up the cable mess.

USB-C and USB 3 are typically close to each other, just situated under the motherboard header. Because they are notched, they can only be plugged in one specific way.

HD_Audio is located at the bottom left of the motherboard and has a blocked-out pin on the second row. Find the blocked-out plastic on the header and give the header a firm push.

Finally, JFP1 (or front panel power) must be plugged in so you can use the power button at the front of the chassis. Fortunately, Antec has provided a singular header instead of individual pins, making the installation process relatively simple. Plug in JFP1 towards the bottom right of the case. After this, put the panels back on the case, grab some peripherals and a monitor, and switch on the power.
Performance
Framerates in Hogwarts Legacy and Alan Wake II were pretty solid, with averages of 63FPS and 76FPS, respectively. The RTX 4070 is a great card in rasterised gameplay at 1440p.
The strong performance continued in our Esports benchmarks. Fortnite and Apex Legends saw insane framerates, surpassing the 144Hz sweet spot with 316FPS and 238FPS, respectively.
Gallery


![FI_[SR190] HYTE X50 Ryzen 5 9600X & MSI RTX 5070 Ti](https://geekawhat.com/wp-content/uploads/2026/01/FI_SR190-HYTE-X50-Ryzen-5-9600X-MSI-RTX-5070-Ti-551x431.jpg)