ASUS is one of the few manufacturers that provides pretty much everything you need to build a PC. ASUS has you covered whether you need a case, graphics card, motherboard, or even CPU coolers. ASUS is an incredibly premium brand that prioritises high performance and gorgeous aesthetics while offering a bountiful set of features.
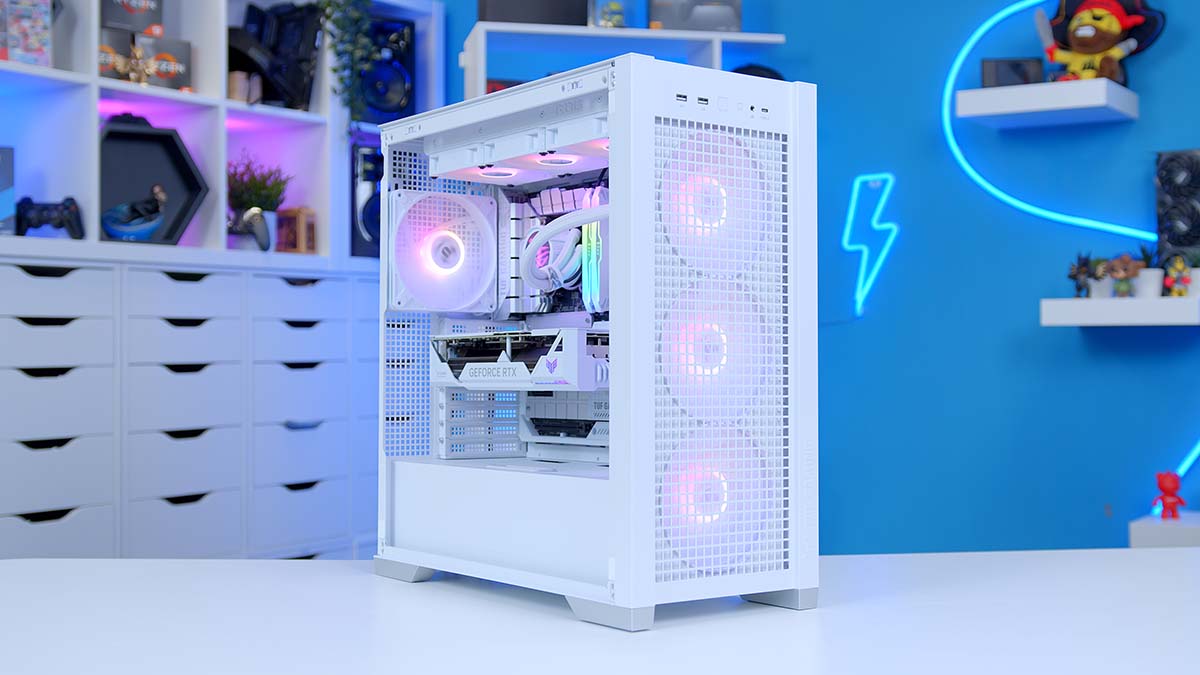
Hence, we’ve decided to assemble this awesome cable-less ASUS RTX 4070 Ti SUPER gaming PC. We’ve utilised a range of white BTF components, such as the TUF Gaming Z790-BTF WiFi motherboard, housed inside the ASUS TUF GT302 case.
In this building guide, we’ll cover the entire process in depth, including how to assemble this PC and why we chose each part. Towards the end, we’ll discuss expected performance metrics. This article is accompanied by a dedicated video in which James extensively covers the building steps.
Build Process
Step 1: Socket the CPU
The first significant step of any PC build is to install the CPU into the motherboard. We recommend installing as much as possible on the board outside the case so you’re not restricted and can freely move around. However, because this is a BTF system, we need to be careful about how we approach the installation. The CPU we’ve opted for in this build is the Intel Core i5-14600K. The Core i5-14600K is a highly-powerful processor primarily geared towards the mid-range market.

It has 14 cores and 20 threads, clocked at a max frequency of 5.3GHz. Its strong boost clock speed makes it a substantial competitor within AAA and Esports titles, and when paired with the right graphics card, it can easily handle 4K and 1440p gaming. Additionally, the Core i5-14600K is relatively affordable, sitting around the $300 mark at the time of writing, which cements its place in the mid-range market.
To install this CPU correctly, remove the polystyrene insert from the box on which the motherboard sits and place it on a flat work surface, followed by the motherboard. Because this is a BTF option, the board needs a raised surface to avoid damaging the headers or connectors.

Unhook the metal retention arm of the CPU socket and raise it. This releases the tension on the socket cover. Lift the cover, exposing the pins underneath. Next, locate the small golden arrow, typically found at the bottom left of the processor. There is a matching arrow on the motherboard. Line both arrows up, indicating the correct orientation for the CPU to slot in.

Lower the CPU until it sits snugly inside the socket. No additional force or movement is required to put the CPU in place. If the orientation is correct, it should just drop into the socket.

Finally, drop the socket cover and push the retention arm back under its hook. The arm does require a fair bit of pressure to go back under the hook, but this is normal. While this happens, the plastic protector will likely pop off when pressure is applied to the socket cover. Keep this protector for any future repairs or potential RMAs.
The motherboard we’ve opted for in this configuration is the ASUS TUF Gaming Z790-BTF WiFi. This is a reverse connector board, so all visible headers (including GPU power) have been shifted to the back. Doing this results in a much cleaner build where cables are out of sight and out of mind. It also makes cable management much easier, as they can be easily channelled into one place with plenty of slack.

Furthermore, we wanted to choose a white motherboard that matched the aesthetic of the build, and the TUF Gaming Z790-BTF WiFi fits this style perfectly. It offers a white and grey colour scheme across the heatsinks, along with the traditional industrial TUF design and livery.
| Key Specs | ASUS TUF Gaming Z790-BTF WiFi |
|---|---|
| Form Factor | ATX |
| Supported Memory | 192GB DDR5 7200MT/s |
| PCI-E x16 Slots | 1 x PCI-E 5.0 1 x PCI-E 4.0 |
| PCI-E x4 Slots | 4 x PCI-E 4.0 |
| Front IO | 1 x USB 3.2 Gen2 Type-C 1 x USB 3.2 Gen1 Type-A 2 x USB 2.0 |
| Rear IO | 1 x USB 3.2 Gen2x2 Type-C 1 x USB 3.2 Gen2 Type-C 2 x USB 3.2 Gen2 Type-A 4 x USB 3.2 Gen1 Type-A |
| Audio | 5 x Audio Jacks 1 x Optical S/PDIF |
| Networking | WiFi 7 2.5 Gigabit LAN |
Features-wise, the TUF Gaming Z790-BTF WiFi is equipped with a PCI-E 5.0 compatible GPU slot alongside four PCI-E 4.0 M.2 slots, which is plenty of storage space. As for IO connectivity, this board supports the latest WiFi 7 and has eight USB ports: one USB 3.2 Gen2x2 Type-C, three USB 3.2 Gen2, and four USB 3.2 Gen1, all of which are blazing-fast options.

Step 2: Slotting in the RAM DIMMs
The memory kit going into the TUF Gaming motherboard is the Lexar Ares DDR5 kit. This RAM offers speeds up to 6400MT/s with a latency of CL32, making it a top contender for a high-end build. Across our testing, this Lexar Ares RAM has proved its performance capabilities and is one of the most robust sets of DIMMs you can buy for either gaming or more intense applications.

Additionally, the design of the individual RAM sticks fits in exceptionally well with our build style. The white heatsinks blend well with the system’s lighter theme, while the lighting offers additional customisation and flair that can be synced up with other RGB components.

Push down the two locking tabs at the top of RAM slots two and four to install this RAM. We always use these slots with two sticks, as it is the most efficient configuration and will offer better performance than slots one and three.
Line up each RAM DIMM with the slots. They can only go one way, so double-check the orientation of the DIMMs beforehand. Apply even pressure to both sides of the RAM and push it into the slot until you hear a click. This click sound indicates that the RAM has been slotted in correctly and is secured.

Step 3: Securing the SSD
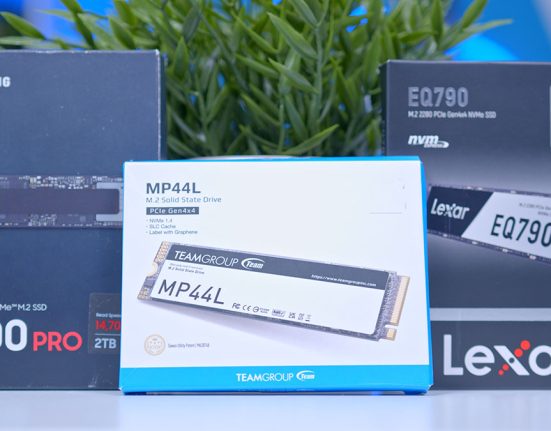
For storage, the Samsung 990 Pro is appearing in this build. The 2TB version of this drive is a mainstay across many of our mid-range and high-end PC builds due to its solid price point and excellent performance. The 990 Pro is one of the top-performing drives that utilises PCI-E 4.0 bandwidth and can reach read and write speeds up to 7450MB/s and 6900MB/s, respectively.

We’ve opted for a 2TB drive because this is what we believe to be the sweet spot for capacity. Picking up a 1TB drive often requires builders to upgrade later down the line, while 2TB is more than ample to house a significant range of games and other additional applications.
To install this drive, unscrew the primary heatsink towards the top of the motherboard. The screw thread size on the heatsink is relatively small, so you may need a different screwdriver to loosen the heatsink.

Take the heatsink off the motherboard, remove the tape on the thermal pad, and put the heatsink aside. Remove the tape on the thermal pad underneath the SSD slot, and place the 990 Pro into the M.2 interface. It will poke out at a 45-degree angle while inside the slot. This is normal.

Push the SSD down so that it connects with the standoff, and use the plastic latch mechanism to secure the drive inside the slot. Finally, take the heatsink, place it back inside the slot and screw it down.
Step 3.5: Attaching the CPU Cooler Backplate
This is the final step before putting the motherboard inside the case. Because this is an Intel build, our CPU cooler requires a backplate to which the mounting hardware can attach. In the CPU cooler hardware box, we need the LGA1700 backplate and LGA1700 threads. These are typically labelled and have individual bags, making them easier to pick out.

Push the backplate through the back of the motherboard so that the posts are visible on the other side. Then, use the LGA1700 threads to secure the backplate to the board. These screws only require thumb strength. Pliers are not necessary.

Step 4: Place the Motherboard Inside the Case
Now that we’ve installed all of the components we can outside of the case, we’ll install the motherboard inside the chassis to continue with the rest of the build. The chassis in this configuration is the ASUS TUF Gaming GT302 in white. The TUF GT302 case is a sophisticated mid-tower chassis that supports reversed connector motherboards and comes with four pre-installed 140mm RGB fans designed to maximise airflow.

This case has a detachable top panel, making the building process incredibly easy when installing various components. It can also house E-ATX motherboards and has space for graphics cards up to 407mm long when installed horizontally or 125mm thick cards vertically mounted. Cable management is excellent, with plenty of Velcro ties and channels to tidy up messy wires.
| Key Specs | ASUS TUF Gaming GT302 ARGB |
|---|---|
| Form Factor | Mid-Tower |
| Motherboard Support | Mini-ITX, Micro-ATX, ATX, E-ATX |
| Case Dimensions (L x W x H) | 485mm x 235mm x 520mm |
| Front IO | 2 x USB 3.2 Gen1 Type-A 1 x USB 3.2 Gen2x2 Type-C 1 x 3.5mm Combo Jack |
| PCI-E Slots | 8 + 3 (vertical) |
| Colour | Black White |
| Max Clearance | 165mm Cooler Height 407mm GPU Length 220mm PSU Length |
| Drive Support | Up to 3 x 2.5 inch Up to 2 x 3.5 inch |
| Fan Support | Front: 3 x 140mm Top: 3 x 140mm Rear: 1 x 140mm |
| Radiator Support | Front: Up to 280mm Top: Up to 360mm Rear: Up to 140mm |
| Pre-Installed Fans | 4 x 140mm |
Remove both side panels of the case and lay the chassis flat on a work surface. This makes the motherboard easier to install and situate inside the case, minimising the risk to any power headers or pins.

Note: James installs the motherboard while the case stands up in the imagery we’ve provided. We still recommend laying it flat. James is a veteran PC builder who can install most components without adjusting the case much.
Place the motherboard inside the case, lining up the built-in IO shield with the cutout towards the top left of the case. This will position the board correctly so that the holes line up with the standoffs inside the chassis.

Use the small motherboard screws found inside the accessory box inside the case to secure the motherboard to the tray of the chassis. Don’t over-tighten the screws, as this could risk damaging or loosening the standoffs, which will make any future upgrades challenging.
Step 5: Top Mounting the CPU Cooler
Because the case we’ve chosen already has four pre-installed fans across the front and rear, the obvious and convenient position to secure a CPU cooler is the top panel, which is where we’ll be mounting the AIO selected for this build.

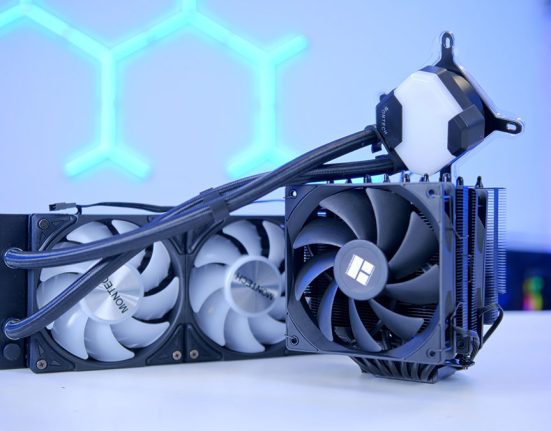
We’ve used the ASUS ROG Strix LC III 360 ARGB a few times, and in our testing, it is one of the most robust CPU coolers we’ve seen. Throughout our results, the ROG Strix LC III lands itself in the top five, competing with the Cooler Master 360 Atmos and the Gigabyte AORUS WATERFORCE X II 360, both top-end AIOs designed to keep even the hottest CPUs under control.

This liquid CPU cooler is also incredibly easy to install, with a streamlined mounting system that saves time and effort. The ROG Strix logo is fully customisable using the ASUS Armory Crate software and can easily be adjusted to the correct orientation, all thanks to the magnetic CPU blockhead design. Overall, the ROG Strix LC III 360 ARGB slots perfectly into this system and matches the sophisticated and clean aesthetic that we’ve chosen.
First, lay the radiator on your work surface with the tubing on your right. Place the three ROG fans on top of the cooler, lining them up with the threads on the radiator. Use the long screws found with the cooler accessories to secure all of the fans onto the rad. Ensure the cables are pointing towards you so the wires can easily thread through the cutouts at the top of the case when the radiator is flipped.

Remove the case’s top panel and push the radiator towards the mounting rails, ensuring one hand stays on the radiator. Using the screws found in the accessories box, secure the radiator to the top of the chassis.
Top Tip: We recommend starting with the corner screws first while still pushing the radiator upwards. Once there’s a screw in each corner, you can remove your hand on the radiator and fill in the rest of the screws.

Fortunately, the ROG STRIX LC III has the Intel mounting already pre-installed on the CPU blockhead, so there’s no need to search for it in the box. Line up the Intel bracket with the threads that we screwed in earlier, and use the thumbscrews to secure the blockhead to the CPU.
Start by tightening these screws with finger strength first, then use a Phillips head screwdriver to tighten them the rest of the way. Do this in a star pattern. Start with one of the corners, move to the opposite corner, move up or down to the next screw, and then go to the opposing corner again.

Additionally, you can wire up the cooler now, saving some time later, or leave it until the end so that all cables are streamlined and tidy with the rest of the PC build.
Step 6: Secure the Graphics Card
The RTX 4070 Ti SUPER, specifically the ASUS TUF BTF White variant, handles the graphical horsepower in this build. Due to its capability across 1440p and 4K gaming, the RTX 4070 Ti SUPER is a mainstay in mid-range and high-end PC builds. The RTX 4000 SUPER refresh saw significant improvements to the RTX 4070 Ti, putting the SUPER model in a considerably better position at the same price point as its predecessor, competing with GPUs like the RX 7900 XT.
Regarding specs, the RTX 4070 Ti SUPER has 16GB of GDDR6X VRAM on a 256-bit memory bus. The increased VRAM and improved memory bus compared to the original RTX 4070 Ti provide better bandwidth and longevity in modern games, making it a more competitive offering despite maintaining the same MSRP.

We’ve settled on the TUF Gaming BTF variant for a couple of reasons. The first is compatibility. ASUS BTF motherboards only work with BTF graphics cards because of the proprietary change to the power design. Furthermore, the TUF Gaming RTX 4070 Ti SUPER BTF fits in with the build aesthetic and wire-free nature. We’ve picked out a TUF motherboard and case (both in white), so it makes sense to stick with the theme and maintain a clean white design that minimises cable hassle where possible.
| Key Specs | ASUS TUF Gaming RTX 4070 Ti SUPER BTF |
|---|---|
| Video Memory | 16GB GDDR6X |
| Memory Bus | 256-bit |
| Core Clock Speed | 2.34GHz |
| Boost Clock Speed | 2.67GHz |
| CUDA Cores | 8448 |
| RT Cores | 66 |
| Tensor Cores | 264 |
| Power Consumption | 285W |
| GPU Length | 306mm |
![[DP008] ASUS GT302 + 4070Ti Super PCI-E Cover Removal](https://3.10.58.239/wp-content/uploads/2024/07/DP008-ASUS-GT302-4070Ti-Super-PCI-E-Cover-Removal.jpg)
To install this card, first remove the PCI-E covers. The easiest way to determine which covers need to be removed is to initially line up the card with the GPU slot on the motherboard. Doing this shows you which of the available slots need to be removed. Alternatively, from a glance, it’s relatively simple to tell that this is a 2.5-slot graphics card, so slot covers two and three must be removed.

Once the slot covers are out, line up the RTX 4070 Ti SUPER with the slot, apply firm pressure to both sides of the card, and push the GPU down into the PCI-E slot. The slot will click once the graphics card is seated correctly, indicating it’s secured. Make sure to use the screws removed from the PCI-E covers to alleviate sag from the card.

Step 7: PSU Install & Wiring
The final component to be installed is the TUF Gaming 750W Gold power supply from ASUS. Again fitting in with the ASUS theme, the TUF Gaming PSU is a solid unit that offers an 80 Plus Gold efficiency rating, minimising power lost as heat or noise at varying load levels. It has a standard ten-year warranty and features ATX 3.0 compatibility, so we only need to plug in one cable for the graphics card, reducing wiring hassle.

This unit features an entirely modular cabling system, allowing builders to pick and choose which wires they need, saving time during cable management. It’s worth noting that while we could have picked out a white power supply for this system, it won’t matter, as the PSU will be hidden at the back of the case where it won’t be visible.
Before screwing the power supply in, it’s worth picking out the cables needed for this build beforehand. For this particular configuration, we’ll need a motherboard power cable, CPU power (one with two 8-pin headers for any potential overclocking), a 12VHPWR cable for the graphics card, and SATA power for the fans and RGB.

After plugging these all in, slide the power supply into the back of the case and use the four hexagonal screws to secure it in place. Ensure not to overtighten, as we don’t want to damage the threads.

Next, we’ll wire up the various power cables on this board. Starting with motherboard power, this long rectangular connector can only go in one way. This is located towards the left side of reverse connector motherboards.

CPU power is sitting at the top right of the motherboard. These power connectors have eight pins; we’ll need to plug in both headers. While the second header isn’t always necessary, it’s good practice to plug it in anyway, especially if you’re overclocking.

GPU power is next up, and because this is an RTX 4000 build, we’ll be using the 12VHPWR cable. The header is unique, and it can only go one way. Graphics card power connectors are typically located on the left side of the motherboard underneath motherboard power. In this system, the 12VHPWR connector is the top-most option.

SATA power is friction fit and is required to power RGB and fans across the case and cooler. These cables are notched slightly and are relatively easy to plug in.
Step 8: Front Panel Wires & Switch On
The final step of this build is to plug in the rest of the front panel wires, do some cable management, and switch on the build. Plugging in the front panel wires and cable management can be done simultaneously. Because we know what all of the component clearances are now, it’s a case of threading the cables through to the appropriate places and tying them up with the included Velcro or some cable ties of your own.

The front panel wires needed for this build are USB 3.0, USB-C, HD Audio, and front panel power. Fortunately, ASUS has streamlined the JFP1 wires by combining all the pins into a single header, making them much easier to find and plug in.

Once these are all plugged in and you’re happy with cable management, put the case panels on, plug in power, grab some peripherals and a monitor, and switch on the build!
Performance
In this build configuration, we’ve paired the Intel Core i5-14600K with the RTX 4070 Ti SUPER to handle the performance demands of modern games. This incredible system is capable of playing games at 1440p high at solid framerates, alongside 4K, with a slight dip in framerates, depending on the title.
Gallery


 4K, High Settings
![FI_[DM87] HAVN BF & RTX 5090 Build](https://geekawhat.com/wp-content/uploads/2026/01/FI_DM87-HAVN-BF-RTX-5090-Build-551x431.jpg)


![FI_[DM82] TT MineCUBE Build](https://geekawhat.com/wp-content/uploads/2025/12/FI_DM82-TT-MineCUBE-Build-551x431.jpg)

