While PC building has become more affordable recently, the current market is hugely competitive regarding component choices. For this reason, sourcing the right parts that sit within a $1100 budget and offer the best price-to-performance ratio can be difficult for the average builder.
That’s where this guide comes in! This PC-building article details the steps to assemble an incredible $1100 gaming PC and the reasoning behind our component choices.
This system pairs the AMD Ryzen 5 7600 with the AMD Radeon RX 7800 XT to bring high framerates in Esports and modern games at 1440p.
We’ll guide you through the installation steps, cables and wiring and cover the performance at the end. There’s also a dedicated video on YouTube where James covers the process in greater depth. This is worth following along in the background as a visual aid.
Build Process
Step 1: Installing the CPU
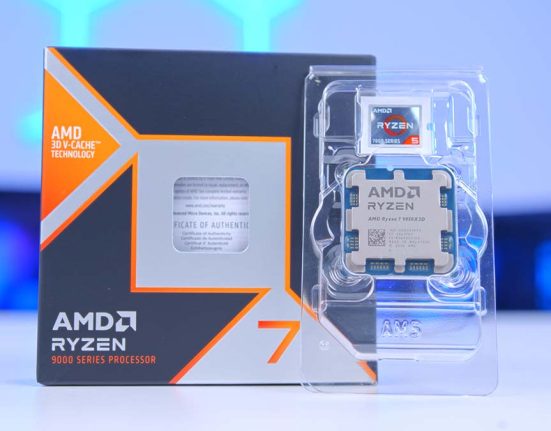
The first component to install is the CPU. While this seems like one of the most daunting parts of the process, it’s one of the easiest, and we’ll guide you through this part step by step. The processor going into this build is the AMD Ryzen 5 7600. The Ryzen 5 7600 is featured across a range of our budget builds because it is one of the most robust CPUs for price-conscious gamers.

Offering six cores and twelve threads at a 5.1GHz boost speed, the Ryzen 5 7600 is well equipped to handle the demands of 1440p gaming. While we could have picked an older CPU like the Ryzen 5 5600X to save some cash, the Ryzen 5 7600 stands out based on its low price point and performance. Furthermore, the Ryzen 5 7600 offers longevity in newer titles and upgradeability for those who need a little more oomph out of their system.
To get this CPU into the build, first, take the Gigabyte B650 EAGLE AX motherboard out of its box and place it on top. It’s good practice to put the board on top of the box as this is a soft surface for the motherboard to sit on without suffering any damage. Then, locate the metal retention arm and unhook it. Lift the metal CPU socket cover, exposing all of the pins underneath.

Next, find the golden triangle on the AMD Ryzen 5 7600, which typically sits at the top left of the processor. Line up this arrow with a matching arrow on the motherboard and slowly lower the CPU into the socket.
Place the CPU socket cover back on the processor and push the metal retention arm back under its hook. The retention arm requires a bit of force to be fully secured. This might feel like you’re breaking the CPU, but this is normal. It’s worth noting that the plastic cover will pop off while the retention arm is being pushed down. We recommend keeping this inside the motherboard box in case it’s needed for an RMA or refund.

The motherboard in this PC build is the Gigabyte B650 EAGLE AX. Those familiar with the Gigabyte ‘EAGLE’ branding will know this is primarily restricted to graphics cards. However, Gigabyte has since delved into EAGLE motherboards, which provide a well-rounded set of features at a reasonably budget-level price point.

The Gigabyte B650 EAGLE AX offers RAM overclocking up to 7600MT/s and comes with a Gen5 SSD slot, providing plenty of space for future storage. Additionally, this board comes with an integrated IO shield with nine USB ports, primarily made up of USB 2.0 options, Gigabit LAN and WiFi 6E.
| Specification | Gigabyte B650 EAGLE AX |
|---|---|
| Form Factor | ATX |
| Supported Memory | 192GB DDR5 7600MT/s |
| PCI-E x16 Slots | 1 x PCI-E 4.0 |
| PCI-E x4 Slots | 1 x PCI-E 5.0 2 x PCI-E 4.0 |
| Front IO | 1 x USB 3.2 Gen1 1 x USB 3.2 Gen1 Type-C 3 x USB 2.0 |
| Rear IO | 2 x USB 3.2 Gen2 Type-A 1 x USB 3.2 Gen1 Type-C 6 x USB 2.0 |
| Audio | 3 x Audio Jacks |
| Networking | WiFi 6E Gigabit LAN |

Step 2: Slot in the RAM
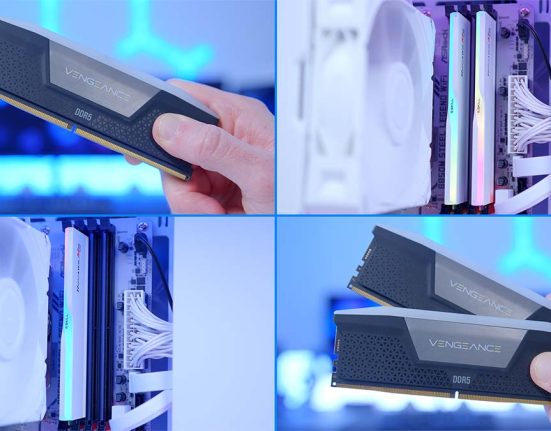
Our next component in this build is the TeamGroup T-Force Delta RAM kit. This particular set of DIMMs features across our budget builds because it is one of the most affordable DDR5 RAM kits we’ve tested. This RAM comes in a 32GB capacity, offers speeds up to 6400MT/s, and has a latency of CL40. While we could have picked out lower latency RAM for this build, it isn’t necessary for gaming, so CL40 is ample for this system.

On the aesthetic front, the TeamGroup T-Force RAM comes in black and white; we’ve opted for black in this particular build. Each memory stick features an RGB strip on the top, providing additional lighting and flair inside the case.
Getting this RAM into the motherboard is pretty simple. Firstly, push the clips at the top and bottom of slots two and four to free up the entire length. Then, line up one of the DIMMs (they can only go in one way) and firmly press down on both sides until the RAM clicks into place. The audible click tells us that the RAM is seated correctly.

Take the same approach with the fourth slot, applying even pressure on both sides until you hear a firm click. We’re installing the RAM in slots two and four because this is the most efficient performance configuration when you only have two sticks.

Step 3: Screw in the SSD
Next is the SSD, of which we’ve picked out the TeamGroup MP44L, a budget-build staple. This 1TB Gen4 SSD offers a reasonable speed of up to 5000MB/s, but its most enticing characteristic is its highly competitive price point. Gen4 storage is hugely affordable, and SSDs like the TeamGroup MP44L are worth picking up for those looking to save cash for other components.

Regarding the specs, the TeamGroup MP44L offers reads and writes up to 5000MB/s and 4500MB/s, respectively. This SSD doesn’t come with a heatsink, but it can easily be installed underneath a motherboard SSD heatsink to counteract thermals. TeamGroup also offers a five-year warranty with this drive, a great value add for those expecting to use this drive heavily.
To get this SSD installed, first remove the heatsink. The heatsink uses a small Phillips thread, so you’ll need an accompanying screwdriver. Once the screw has been loosened, slide the heatsink to the left, freeing it entirely.

Place it to one side and push the TeamGroup MP44L into the SSD slot. It’ll poke out at a 45-degree angle. This is normal. Remove the plastic tape from the heatsink, then place it back on top of the drive by sliding it to the right, and screw it down.

Step 4: Mount the CPU Cooler
Instead of using the standard AMD stock cooler, we’ve decided to step things up and utilise a slightly stronger cooler to keep thermals to a minimum. The CPU air cooler going into this build is the Vetroo V5. Vetroo is a reputable manufacturer in the budget cooler space, similar ThermalRight, with many of their air tower coolers sitting in the $20-$30 region.

The Vetroo V5 aligns with similar coolers, such as the Thermalright Peerless Assassin, offering decent thermals for budget and mid-range CPUs like the Ryzen 5 7600. In our testing, the Vetroo V5 kept the Core i7-14700K at 72 degrees Celsius on average, which is a pretty strong showing, considering the Core i7-14700K runs very hot. This air CPU cooler is also relatively easy to install and only requires a few screws to be secured.
The first step of this install involves securing the AMD mounting brackets to the blockhead of the CPU. The AMD brackets are straight compared to the Intel brackets, which are angled and will line up with the four posts at the top and bottom of the CPU socket.

Place the cooler aside for a moment and unscrew the two plastic clips at the top and bottom of the socket. These are held in by two screws each.

The Vetroo V5 doesn’t come with any pre-applied thermal paste, so you’ll need to add a rice grain/pea-sized amount of thermal paste to the top of the CPU.

Then, line up the CPU cooler with the posts, and screw it in. We recommend securing the cooler in a star pattern, starting from one corner and moving to the opposite. Make sure not to tighten the screws too much, as this could damage the CPU.
You’ll notice from the images that we’ve provided James installs the CPU cooler once the motherboard is inside the case. While you can do this, installing it outside the case is much easier and saves time.

Next, we need to attach the fan. The fan on the Vetroo V5 is a bit finicky to install, so some patience is required. Take two of the fan brackets and place the metal prongs in the back of the fan. Once you’ve got both fan brackets in, we recommend tensioning them so they don’t slip out. Place the fan on top of the cooler, ensuring the fan is on the right side, and pull the brackets around so that the metal prongs sit snugly in the heatsink. Finally, plug the four-pin cable into the ‘CPU-Fan’ header and the RGB cable into the 3-pin RGB header.

Step 5: Place the Motherboard Inside the Case
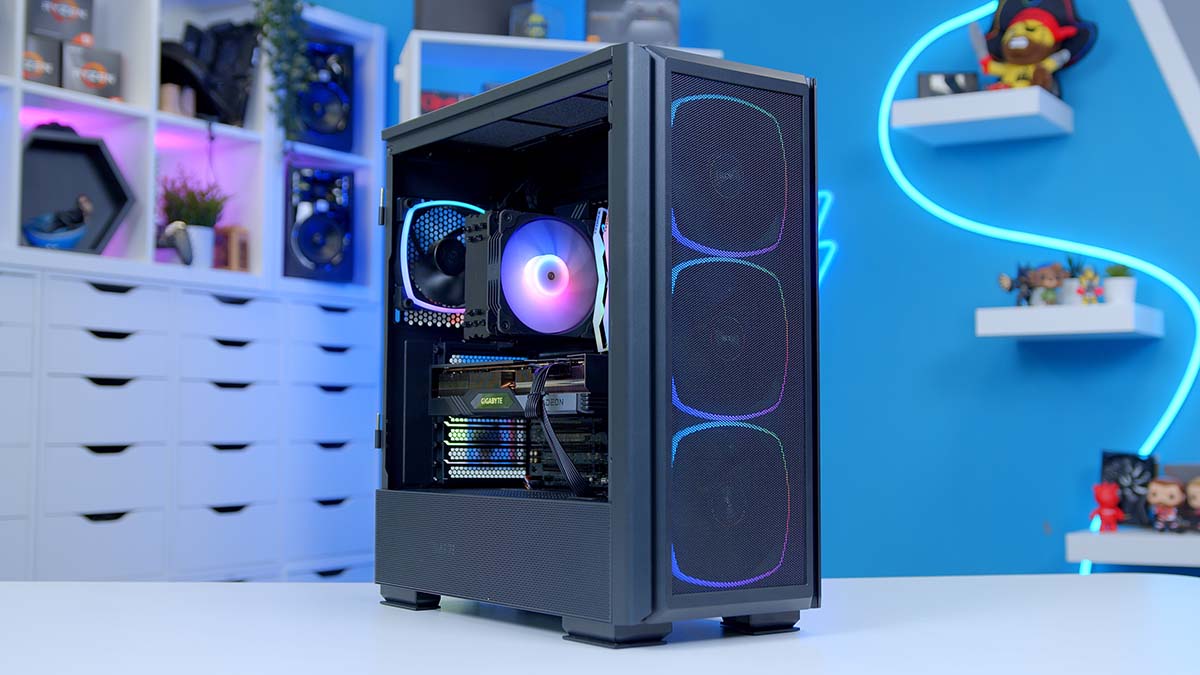
The case housing all of these components is the Montech Sky Two GX. At Computex, we looked at the new iteration of Montech’s Sky range, the Sky 3, and we’re excited to see how this chassis builds upon the solid features of the Sky Two. The Sky Two GX is an elegant case constructed to provide excellent airflow while maintaining a budget price point.

This case has a mesh top and front panel, of which three pre-installed 140mm RGB fans exist. It can accommodate up to eleven fans, including two that can be mounted on the side panel and two on the PSU shroud. The Sky Two GX accommodates E-ATX motherboards, up to 400mm long graphics cards, and 360mm liquid coolers at the top and front. A third of the side panel is mesh, providing airflow for the power supply. This case is an excellent option for those on a budget and offers considerable room for future upgrades.
| Key Specs | Montech Sky Two GX |
|---|---|
| Form Factor | Mid-Tower |
| Motherboard Support | Mini-ITX, Micro-ATX, ATX, E-ATX |
| Case Dimensions (L x W x H) | 460mm x 215mm x 500mm |
| Front IO | 2 x USB 3.0 Type-A 1 x USB Type-C 1 x 3.5mm Audio Jack 1 x 3.5mm Mic Jack |
| PCI-E Slots | 7 |
| Colour | White or Black |
| Max Clearance | 168mm CPU Cooler Height 400mm GPU Length 210mm PSU Length |
| Drive Support | Up to 6 x 2.5 inch Up to 2 x 3.5 inch |
| Fan Support | Front: 3 x 140mm Top: 3 x 120mm Side: 2 x 120mm Rear: 1 x 120mm PSU Shroud: 2 x 120mm |
| Radiator Support | Front: Up to 360mm Top: Up to 360mm |
| Pre-Installed Fans | 3 x 140mm |
The Sky Two GX (much like most other mid-tower cases) is configured out of the box to support ATX motherboards. Fortunately, the Gigabyte B650 EAGLE AX is an ATX board, so we don’t have to move around any standoffs. To get this board into the case, lie the chassis flat and carefully place the motherboard inside. Push the board until the IO shield lines up with the cutout towards the top left.

Once the board is correctly in place, use the motherboard screws found inside the case accessories box to secure it down. Make sure to use the correct screws and do not overtighten, as this could damage the standoffs, which may prove future upgrades to be quite challenging.
Step 6: Graphics Card Installation
The graphics card we’ve chosen for this $1100 gaming PC build is the centrepiece of this system. While the budget graphics card market has become more competitive in recent years, there are still fewer options than those with $600-$800 spare to spend. However, with several price drops, a range of AMD GPUs has become increasingly more affordable, making them an excellent pickup for price-conscious gamers.

In particular, the Gigabyte RX 7800 XT Gaming OC stood out to us as the best selection for this build for many reasons. The first is rasterised performance. The RX 7800 XT is a titan at 1440p and can handle Esport and modern titles with ease. The Gigabyte Gaming OC variant of the RX 7800 XT is also one of the cheapest cards available, sitting below the $500 mark at the time of writing. This GPU is a worthwhile consideration for budget builds, especially if you can save money in other areas by picking up cheaper components.
| Specification | Gigabyte RX 7800 XT Gaming OC |
|---|---|
| Video Memory | 16GB GDDR6 |
| Memory Bus | 256-Bit |
| Core Clock Speed | 1.29GHz |
| Boost Clock Speed | 2.56GHz |
| Stream Processors | 3840 |
| Ray Accelerators | 60 |
| Compute Units | 60 |
| Power Consumption | 263W |
| GPU Length | 302mm |
Much like the CPU, installing the graphics card is relatively simplistic. First, remove the PCI-E covers at the back of the case. The easiest way to do this is to place the graphics card inside the case, holding it above the GPU slot on the motherboard, which will show you the covers that need to be removed. The Gigabyte RX 7800 XT Gaming OC is a two-slot card, so we’ll remove the covers from slots two and three.

Once this is done, line up the graphics card with the GPU slot and give it a firm push to secure it in the slot. Then, use the screws removed from the PCI-E covers to secure it to the case.

Step 7: Power Supply & Cables
The last component that needs to be installed is the power supply. The unit going into this build is the Thermaltake Smart BM3 750W. This PSU has featured across several of our budget builds due to its competitive pricing and solid feature set. The Smart BM3 offers an 80 Plus Bronze efficiency rating. It features a semi-modular cable design, so PCI-E and SATA cables can be wired up individually, while CPU and motherboard power are built into the unit.

The Smart BM3 also offers ATX 3.0 compatibility, which is excellent for upgrades. Although we won’t use the ATX 3.0 cable for the AMD graphics card in this build, it’s a nice value-add that offers an easy switch if you decide to change to an NVIDIA graphics card.
Before securing the power supply, we recommend plugging in the necessary cables. CPU and motherboard power are built into the power supply, so we’ll plug in a PCI-E cable with two headers and a SATA power cable for the fan and RGB hub that comes with the Montech Sky Two GX.

Once these cables are plugged in, push the power supply into the rear of the case and screw it in using the four hexagonal screws found in the case accessories box.

Now, we can start wiring up all of the power cables. As usual, we advise beginning with motherboard power first, as this is one of the most straightforward cables to plug in. The header for the motherboard power cable is long and rectangular and only goes in one way. Give this a firm push into the connector on the right side of the motherboard and tug the cable to ensure it’s seated properly.

CPU power is next. Like the motherboard header, these cables can only go one way, making the installation quite simple. The power connector is located at the top left of the motherboard and requires a full 8-pin header. Again, tug at the cable, ensuring that the clip on the header is fully engaged and the cable is seated correctly.

The graphics card power cable is up next. The RX 7800 XT requires two 8-pin PCI-E headers available through just one cable. Push these firmly into the graphics card until the header clips connect with the notch on the connector.

The last cable is SATA power. This is required to power the fan and RGB hub at the back of the Sky Two GX case. While this isn’t a requirement, it frees up some motherboard headers for a potential cooler or fan upgrade. SATA power cables are notched at one end, so locate this notch, line it up with the male SATA power cable, and connect them.

Step 8: Front Panel Cabling & Power On
The final step of any PC build is cable management. To make this last part more manageable, we often recommend cable managing while you build, as this can save a significant amount of time towards the end. However, if you haven’t done that, this part of the process provides an excellent opportunity to manage cables and ensure everything is plugged in correctly.
It’s good practice to start with the main power cables first, as these are the biggest and require the most space in the cable channels at the back of the case. Then, move on to the front panel cables. All of these can be managed as you plug them in, using the cutouts and Velcro ties to keep them clean and tidy.
For this particular build, you’ll need to plug in JFP1 (front power), HD Audio for the microphone and headphone jacks at the front of the case, the USB Type-C header, and a single USB 3.0 header. Both the USB headers are notched, making them much easier to plug in.

The front panel cable is an entire header instead of individual pins. This makes plugging in the header much more accessible for those unfamiliar with the JFP1 pin layout. HD Audio is blocked out, so this header can only go one way.

The USB 3.0 and USB Type-C headers are typically located underneath the motherboard power connector, and again, both are notched, so they will only go in one way.

Once all the cables have been managed and plugged in correctly, grab a monitor and your favourite peripherals, switch on the power at the back and press the power button!
Performance
![]()
1440p, High Settings
Avg: 252FPS
Preset: High
V-Sync: Off
Anti Aliasing: TSAA
Texture Filtering: 8x
Ambient Occlusion: High
Volumetric Lighting: High
Dynamic Shadows: Enabled
Model Detail: High
![]()
1080p, Comp. Settings
Avg: 286FPS
Preset: Low
V-Sync: Off
Render Distance: Far
TSR: Off
Global Illumination: Off
Ray Tracing: Off
Effects: Low
Post Processing: Low
![]()
1440p, High Settings
Avg: 177FPS
Preset: High
V-Sync: Off
DLSS: Performance
Textures: High
Particle Quality: High
Tessellation: Near
Shaders: High
![]() 1440p, High Settings
1440p, High Settings
Avg: 96FPS
Preset: Recommended
V-Sync: Off
Anti-Aliasing: TAA High
Effects Quality: High
Texture Quality: High
Shadow Quality: High
Motion Blur: Off
Our rigorous benchmarking results show that the RX 7800 XT and Ryzen 5 7600 perform well at 1440p high settings across Esports and AAA games. This mid-range system is more than capable of handling the demands of top-end gaming, offering excellent framerates across a range of titles.
Gallery


![FI_[SR190] HYTE X50 Ryzen 5 9600X & MSI RTX 5070 Ti](https://geekawhat.com/wp-content/uploads/2026/01/FI_SR190-HYTE-X50-Ryzen-5-9600X-MSI-RTX-5070-Ti-551x431.jpg)
![FI_[DP064] ASUS Prime AP303 + 9070XT](https://geekawhat.com/wp-content/uploads/2026/03/FI_DP064-ASUS-Prime-AP303-9070XT-551x431.jpg)
![FI_[DM93] Corsair 3200D Launch](https://geekawhat.com/wp-content/uploads/2026/03/FI_DM93-Corsair-3200D-LAUNCH-551x431.jpg)
![FI_[DM89] Phanteks Evolv + AORUS 5090 9850X3D Gallery (8)](https://geekawhat.com/wp-content/uploads/2026/02/FI_DM89-Phanteks-Evolv-AORUS-5090-9850X3D-Gallery-8-551x431.jpg)