Building a white mid-range gaming PC has never been easier, thanks to the vast selection of lighter-themed components. However, because of the sheer variation in the market, separating which white parts are worth buying and which ones you should avoid can be challenging.
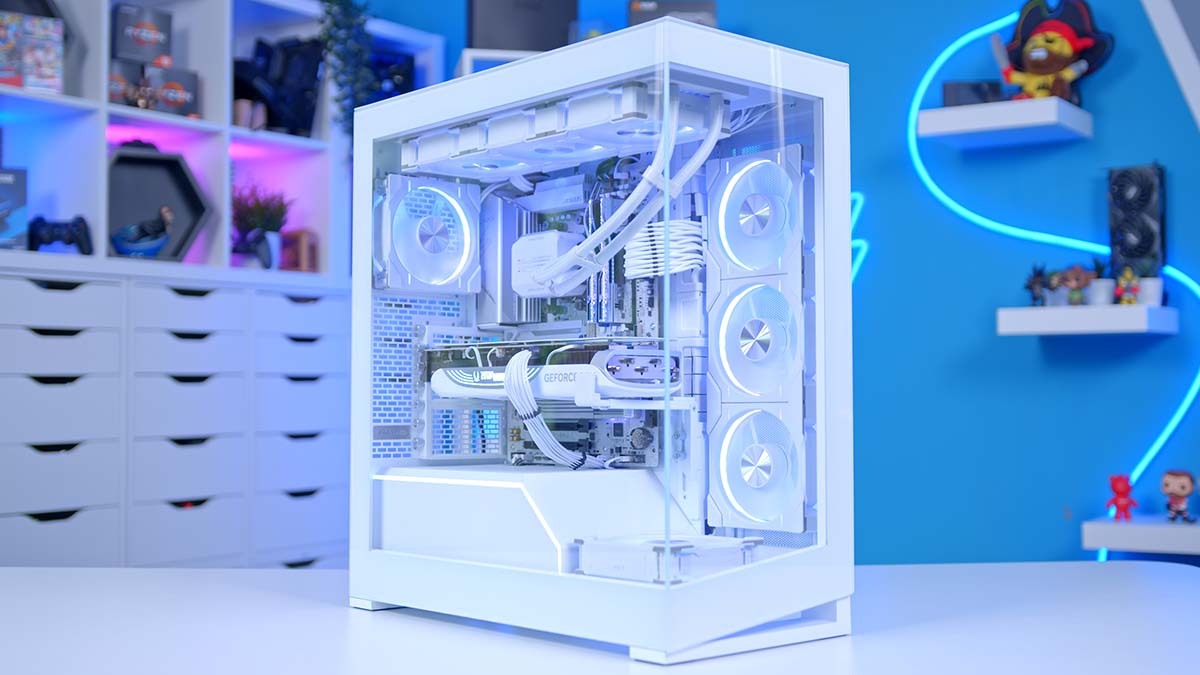
That’s where this gaming PC build guide comes in. We’ve set out to configure the best white mid-range system you can buy, featuring the RTX 4070 Ti SUPER, housed inside the gorgeous Phanteks NV5 white PC case. This build is the ultimate white system for those looking to maintain a clean aesthetic.
With all of our build guides, we’ve written up a complete set of directions on how this PC was put together, along with coverage of our reasoning for each part choice. Additionally, this article was put together alongside a dedicated build video, which we recommend watching as James goes into greater detail about the assembly process.
Build Process
Step 1: Socket the CPU
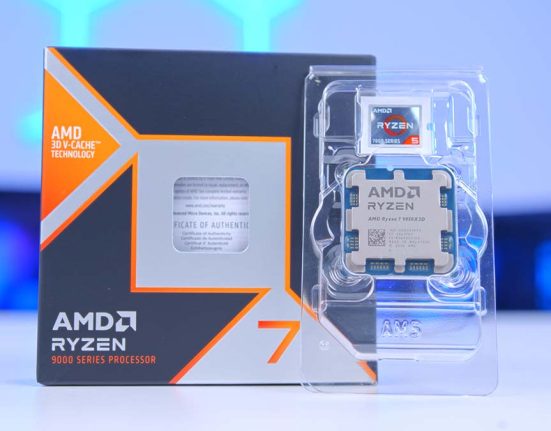
The first significant step of any PC build involves getting the CPU socketed and secured inside the motherboard. The CPU going into this build is the AMD Ryzen 7 7800X3D. This processor offers exceptional value due to its solid gaming performance and highly competitive price point. Even AMD has gone as far as to say that the Ryzen 9000 range, releasing at the end of July, won’t dethrone the gaming capabilities of the 7800X3D, making it a truly one-of-a-kind CPU for gaming.

Regarding specs, the Ryzen 7 7800X3D is an eight-core, sixteen-thread CPU, making intense multi-core tasks very viable. Boost clock speeds max out at 5GHz, synergising with the blazing-fast 3D V-Cache, making this processor a strong competitor within modern and Esports games. Its highly competitive price point also makes it stand out against current Intel 14th-Gen options, which struggle to beat out the 7800X3D in gaming performance.
Before we install any components, take the motherboard out of its box and place it on top. This acts as a soft but sturdy surface to work on instead of a rough desk, which could damage some of the pins on the back of the PCB. After this, unhook the small metal retention arm and lift the socket cover, exposing the pins underneath. This is where the CPU goes.

Next, the golden arrow must be located. This arrow indicates the correct orientation of the CPU so that it can slot into the board correctly. For the Ryzen 7 7800X3D, this arrow is at the top left, and a matching arrow is at the top left of the board.

Slowly lower the CPU into the socket, and it will drop into place. No force is required to get the processor to sit in the socket; if the arrows have been lined up correctly, it should simply drop in.

Lower the socket cover until it sits on the CPU, and push the metal retention arm back under its hook. Getting the arm back underneath takes a fair amount of force, but this is normal. While this happens, the plastic protector will pop off as force is applied to the CPU socket. Keep this protector for any future repairs or RMA.
It’s worth noting that a Ryzen 7 7700X was used initially to start this build. We’re still recommending the Ryzen 7 7800X3D for this system; it wasn’t available during the initial filming, hence its appearance at the start of this build.

The motherboard we’re using is the Gigabyte B650 Elite AX ICE. This board is a popular feature in many of our lighter-themed builds because it is one of the few motherboards that offers a genuinely white aesthetic, which includes colouring the PCB. Gigabyte has gone the extra mile with the B650 Elite AX ICE, adopting a bright design across the heatsinks, PCB, and even the RAM clips.
| Specification | Gigabyte B650 AORUS Elite AX ICE |
|---|---|
| Form Factor | ATX |
| Supported Memory | 192GB DDR5 8000MT/s |
| PCI-E x16 Slots | 1 x PCI-E 4.0 |
| PCI-E x4 Slots | 1 x PCI-E 5.0 2 x PCI-E 4.0 |
| Front IO | 1 x USB 3.2 Gen2x2 Type-C 1 x USB 3.2 Gen1 2 x USB 2.0 |
| Rear IO | 1 x USB 3.2 Gen2 Type-C 2 x USB 3.2 Gen2 Type-A 5 x USB 3.2 Gen1 Type-A 4 x USB 2.0 |
| Audio | 3 x Audio Jacks |
| Networking | WiFi 6E 2.5 Gigabit LAN |
Aesthetic aside, the B650 Elite AX ICE is an excellent mid-range motherboard. It supports powerful builds and offers great features. This board supports Gen5 SSDs and has space for two additional Gen4 SSDs. The graphics card slot is restricted to Gen4, but this isn’t particularly important because there aren’t any Gen5 GPUs on the market yet.

IO is also pretty strong, with twelve ports, four of which are USB 2.0, four as USB 3.2 Gen1, and the rest are USB 3.2 Gen2, with an additional Type-C port. The B650 Elite AX ICE also comes with WiFi 6E and 2.5 Gigabit LAN, both ideal for competitive gaming.
Step 2: Slot in the RAM
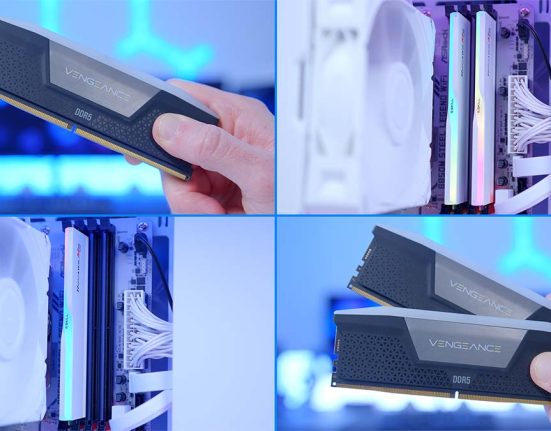
The RAM we’ve opted for in this configuration is G.Skill’s Trident Z5 Royal Series. Since the launch of DDR5 memory in 2022 with the arrival of Intel 12th-Gen motherboards, we’ve been waiting for G.Skill to release a DDR5 version of their Royal memory kits. This kit is one of the most sophisticated sets of memory you can buy and has been a mainstay feature across many of our high-end systems during the height of DDR4 memory.

This particular kit offers a one-of-a-kind look, with a sleek silver heat spreader and crystals lining the top of each DIMM. These RAM sticks are entirely RGB compatible and provide excellent speeds. Boasting a 48GB capacity (two 24GB sticks) and clocking in at 7200MT/s with a latency of CL36, this kit is more than ample for gaming.
Getting this RAM installed is incredibly simple. First, push down the clips at the top and bottom of RAM slots two and four. We’re using these slots because this is the most efficient configuration when you only have two sticks of RAM.

Line them up with their respective slots, apply even pressure on each side and push the RAM down into the slot until you hear a click. The click indicates that both clips have locked the RAM in place, securing it inside the slot. Do this for both sticks, making sure to be firm but not too aggressive, as this could damage the DIMMs.

Step 3: Secure the SSD
For storage, we’re installing the Samsung 990 Pro. While this motherboard supports Gen5 storage, it isn’t entirely necessary for this build, as we’re primarily sticking to gaming. Gen5 SSDs, while perfect for a build like this, are also quite expensive for lower capacities such as 1TB or 2TB. So, in order to save cash and gain access to higher-capacity storage, we’ve stuck to Gen4 drives for the time being

The 990 Pro is one of the most powerful Gen4 SSDs on the market, reaching read and write speeds of 7450MB/s and 6900MB/s, respectively. 2TB is also an ideal size for this build, as it leaves us with plenty of space for the operating system, several big games, and any additional applications that need to be installed, like Discord or Photoshop.
To get this drive installed correctly, the SSD heatsink on the motherboard must be removed first. Remove the three screws holding it in place (two on the left and one on the right) and lift it off the board.
Top Tip: We recommend leaving the primary SSD slot free as this supports Gen5 drives. Leaving this slot open will make any future upgrades incredibly straightforward.

Place the heatsink aside and push the Samsung 990 Pro into one of the slots underneath. The drive will poke out at a 45-degree angle. Push it down and use the M.2 latch to secure it in place. Finally, place the heatsink back on top and screw it down. This will provide some solid thermal dissipation for any storage underneath.

Step 3.5: Screw in the CPU Cooler Threads
Before installing the motherboard inside the case, it’s worth screwing in the CPU cooler threads. Installing as much as possible outside of the case is good practice before the available space becomes much more confined.

Because this is an AMD build, we don’t need to install a backplate, but we need to secure the AMD mounting threads. To do this, remove the plastic AMD clips at the top of the bottom of the socket by removing the four screws. Then take the four AMD screws found inside the cooler mounting accessories and place them into the four posts around the CPU socket.
Step 5: Place the Motherboard Inside the Case
For the next step, we’ll install the motherboard inside the PC case. The chassis housing this build’s components is the Phanteks NV5. This mid-tower case utilises a tempered glass front and side panel, providing a perfect view of all the internals. A small strip of RGB lines the PSU chamber of the case, providing some additional lighting and spicing up the look of the build.

Regarding component support, the Phanteks NV5 can house E-ATX motherboards, has space for graphics cards up to 440mm long, and CPU coolers up to 180mm tall. Cooling support is excellent, with this chassis accommodating eight 120mm fans and two 360mm radiators on the top and side panels. Additionally, the front IO houses two USB 3.0 ports, a USB 3.2 Gen2 Type-C port, and 3.5mm combo jacks for microphones and headsets.
| Specification | Phanteks NV5 |
|---|---|
| Form Factor | Mid-Tower |
| Motherboard Support | Mini-ITX, Micro-ATX, ATX, E-ATX |
| Case Dimensions (L x W x H) | 528mm x 239mm x 477mm |
| Front IO | 1 x USB 3.2 Gen2 Type-C 2 x USB 3.0 Type-A 1 x 3.5mm Combo Jack |
| PCI-E Slots | 7 |
| Colour | Black White |
| Max Clearance | 180mm Cooler Height 440mm GPU Length 230mm PSU Length |
| Drive Support | Up to 4 x 2.5 inch Up to 3 x 3.5 inch |
| Fan Support | Top: 3 x 120mm Side: 3 x 120mm Bottom: 1 x 120mm Rear: 1 x 120mm |
| Radiator Support | Top: Up to 360mm Side: Up to 360mm Rear: Up to 120mm |
| Pre-Installed Fans | 0 |
Fortunately, the NV5 case is preconfigured to support ATX motherboards straight out of the box, so there’s no reason to move any standoffs. To get the motherboard inside, lay the case flat, remove the glass panels, and lower the board into the case. Ensure the integrated IO shield lines up with the cutout towards the top left of the case.

After this, locate the case accessory box, typically found at the rear of the chassis. We’ll be using the small screws to secure the motherboard down inside the chassis.

Finally, use these screws to fix the motherboard to the case. Make sure that the standoffs are all lined up with the holes on the PCB, and tighten each of the screws. Don’t over-torque the screws, as this could damage the standoffs, making future upgrades somewhat complicated.

Step 6: CPU Cooler Mounting
Cooling the Ryzen 7 7800X3D is the Phanteks Glacier One D30 liquid cooler. This is a 360mm AIO utilising a white radiator and set of fans, adhering to the clean and lighter-themed aesthetic we’ve opted for in this build. Phanteks have made the CPU cooler installation incredibly simple by including a daisy-chainable unit of fans controlled through one cable.

The Glacier One D30 is compatible with modern Intel and AMD sockets, has pre-applied thermal paste and extra compound for future upgrades, and features white tubing and cabling, maintaining a tidy design throughout the cooler.
We’ve also used Phanteks D30 reverse and intake fans across the case and cooler for this build. In this configuration, we’ve decided to swap the CPU cooler fans and use these on the side as intake while the reverse fans are used as exhaust on the radiator.

To get started, place the radiator on your work surface with the tubing facing to the right. Take the three reverse fans and connect them. These fans snap together to form a 360mm unit. The bridge clips cover the fan connectors and provide data and power between each fan. Once they’re connected up, place the fans on top of the radiator with the cable facing in a direction that is easily accessible, either towards you or towards the tubing. Then, screw in the fans using the long radiator screws.

Remove the top panel of the Phanteks NV5, exposing the radiator and fan mounting. Push the radiator up towards the top of the case. Keep one hand in place underneath the radiator to hold it, and using the screws, secure the radiator to the top panel.
Top Tip: We recommend starting with the corner screws of the radiator first, getting one in each corner so that they take the weight. Then you can remove your hand underneath and fill in the rest of the screws.

Finally, attach the AMD mounting bracket to the CPU blockhead. Intel is pre-installed, so this needs to be slid out first. Once the AMD bracket is in place, push the CPU blockhead onto the CPU, lining up the bracket with the threads around the socket’s corners. Then, use the spring-loaded thumb nuts to fix the blockhead to the CPU. It comes with pre-applied thermal paste, so we don’t need to add our own.
We recommend screwing down the nuts in a star-like pattern. Start at one of the top corners, go diagonally down to the opposing corner, and then to the remaining top corner. Keep doing this until all of the screws are nice and tight. Don’t over-torque them, as this could damage the CPU.

Connect the cables to the motherboard. The AIO pump uses a 3-pin header, while the fans use a standard 4-pin PWM header. Plug these in, as they provide power for the cooler and fans.
Step 7: Extra Fans Install
As mentioned in the CPU Cooler Installation section, we’ve taken a non-traditional approach to fans and airflow. The NV5 has no pre-installed fans, so we’ve supplied our own. On the side panels, we’ve used the AIO fans and an additional D30 fan as intake; these are on the side and rear panels. The bottom fan is a reverse model and will be exhausting air.

To get these fans installed, use the supplied screws that come with the box and secure them to the chassis. You’ll need to attach the side fans using the daisy-chaining system. However, once they’re all clipped together, secure them to the side panel and plug them into a motherboard or fan hub.
For the bottom fan, remove the fan bracket by loosening the case screw towards the side panel, pull the bracket towards you and then up and it will lift out. Attach the fan to the bracket, then return it to the case.

Step 8: Securing the Graphics Card
As the driving force for the graphical power in this PC build, we’ve opted for an RTX 4070 Ti SUPER. The Zotac Gaming Trinity OC white variant is the best fit to keep in line with the white theme. This triple-fan card offers excellent thermals and plenty of RGB lighting across the top and rear of the GPU. The Trinity model is also an OC card, so the boost clock speed has been slightly overclocked to provide better gaming performance.

Regarding performance, the RTX 4070 Ti SUPER is one of NVIDIA’s most popular graphics cards for 1440p gaming. The refresh to the RTX 4070 Ti brought more VRAM, up to 16GB, along with a memory bus improvement and an increased core count. In doing so, rasterised performance has increased significantly, while NVIDIA’s pillar technologies, such as DLSS and ray tracing, continue to impress across modern AAA titles.
| Specification | Zotac Gaming RTX 4070 Ti SUPER Trinity White OC |
|---|---|
| Video Memory | 16GB GDDR6X |
| Memory Bus | 256-bit |
| Core Clock Speed | 2.34GHz |
| Boost Clock Speed | 2.61GHz |
| CUDA Cores | 8448 |
| RT Cores | 66 |
| Tensor Cores | 264 |
| Power Consumption | 285W |
| GPU Length | 306mm |
In this configuration, we’ve decided to install the RTX 4070 Ti SUPER horizontally rather than vertically, saving some time. To get this card into the case, the PCI-E covers need to be removed first. We advise lining up the GPU with its slot first to see which covers need to be removed.

For this build, the second and third covers must be removed to create enough space for the graphics card. The Zotac RTX 4070 Ti SUPER is only a 2.5-slot card, so only two covers must be removed. Next, push the GPU into the slot by applying even pressure to both sides of the card until you hear a click. Much like when we installed the RAM earlier, the click indicates that the card is sitting correctly inside the slot.

Finally, adjust the built-in GPU support bracket so that it cradles the bottom of the graphics card. The screw underneath the bracket allows you to extend it, catering to GPUs at various heights. The two other screws can be loosened to adjust the bracket up and down depending on the size of the card.

Step 9: Power Supply & Cabling
The final component we must install is the Cooler Master GX III 850W Gold power supply. This PSU features a slimline design with a module cabling system, allowing prospective buyers to easily pick and choose wires and making cable management very straightforward. The GX III offers ATX 3.0 support for modern NVIDIA graphics cards, offering a singular power cable.

The GX III is also 80 Plus Gold rated, ensuring minimal power is lost as extra heat or noise. This power supply has an A- Cybenetics noise rating, denoting that this power supply will remain quiet even under load.
Before screwing the PSU into the case, we first need to attach the cables required for this build to the power supply. For this configuration, you’ll need a motherboard power cable, CPU power, a 12VHPWR cable for the graphics card, and SATA power for the D-RGB power.

We’ve also used white braided cable extensions to maintain the white aesthetic across this PC build. While these are optional, they provide a nice look to the build, sticking to a clean and tidy look.

Once the cables have been plugged in, slide the power supply in through the side of the case, and secure using the four hexagonal screws. Make sure to use the correct screws, as we don’t want to damage the threads.

Now, we can start plugging in all of the power cables. We’ll begin with the motherboard and CPU power first. Motherboard power is a longer rectangular connector, typically found on the right side of the motherboard. The B650 AORUS Elite AX ICE motherboard uses an 8-pin and 6-pin for CPU power. Plug in and tug at the cables to ensure the clips are correctly engaged.

Next is GPU power. The 12VHPWR cable only goes in one way but can be a bit more finicky to plug in. Give the connector a firm push to ensure the clips at the header’s top (or bottom) are engaged.

SATA is being used in this build to power the RGB lighting around the build, including the strip on the PSU shroud. This power cable is friction-fit and has a slight notch, so it can only go one way.
Step 10: Front Panel Cables & Switch On
The final steps of any PC build are front panel wires and cable management. You’ll need to plug in the USB-C header, USB 3.0, HD Audio and front panel power for front panel wires. Fortunately, the Phanteks NV5 uses a dedicated header for power, reset, and HDD instead of individual pins, making wiring much simpler.

After these have been plugged in, it’s an excellent time to start managing cables. This can be lengthy, but we recommend using Velcro ties and the additional cable ties that come with the case accessories to smarten everything up. There are plenty of cable grommets and cutouts that wires can be threaded through to keep everything tidy.
Finally, put the panels back on and plug in power, peripherals, a Windows USB, and a monitor. Fire up the PC, and it will boot into BIOS. Boot priorities and XMP can be configured before the Windows installation.
Performance
![]()
1440p, High Settings
Avg: 275FPS
Preset: High
V-Sync: Off
Anti Aliasing: TSAA
Texture Filtering: 8x
Ambient Occlusion: High
Volumetric Lighting: High
Dynamic Shadows: Enabled
Model Detail: High
![]()
1080p, Comp. Settings
Avg: 290FPS
Preset: Low
V-Sync: Off
Render Distance: Far
TSR: Off
Global Illumination: Off
Ray Tracing: Off
Effects: Low
Post Processing: Low
![]()
4K, High Settings
Avg: 118FPS
Preset: High
V-Sync: Off
DLSS: Performance
Textures: High
Particle Quality: High
Tessellation: Near
Shaders: High
![]() 4K, High Settings
4K, High Settings
Avg: 75FPS
Preset: Recommended
V-Sync: Off
Anti-Aliasing: TAA High
Effects Quality: High
Texture Quality: High
Shadow Quality: High
Motion Blur: Off
Our benchmarking data shows that the NVIDIA RTX 4070 Ti SUPER and AMD Ryzen 7 7800X3D perform exceptionally well in AAA titles at 1440p. This excellent PC can easily handle the demands of top-end gaming and offers solid framerates across a range of titles.
Gallery


![FI_[SR190] HYTE X50 Ryzen 5 9600X & MSI RTX 5070 Ti](https://geekawhat.com/wp-content/uploads/2026/01/FI_SR190-HYTE-X50-Ryzen-5-9600X-MSI-RTX-5070-Ti-551x431.jpg)
![FI_[DP064] ASUS Prime AP303 + 9070XT](https://geekawhat.com/wp-content/uploads/2026/03/FI_DP064-ASUS-Prime-AP303-9070XT-551x431.jpg)
![FI_[DM93] Corsair 3200D Launch](https://geekawhat.com/wp-content/uploads/2026/03/FI_DM93-Corsair-3200D-LAUNCH-551x431.jpg)
![FI_[DM89] Phanteks Evolv + AORUS 5090 9850X3D Gallery (8)](https://geekawhat.com/wp-content/uploads/2026/02/FI_DM89-Phanteks-Evolv-AORUS-5090-9850X3D-Gallery-8-551x431.jpg)