The NVIDIA RTX 4070 Ti SUPER is a top-end graphics card designed to easily handle 1440p and 4K while offering longevity in modern games. However, with such a competitive market, finding the right components to pair up with this excellent graphics card can be difficult for first-time builders and those who haven’t upgraded in some time.
We’ve put together this fantastic PC build guide to alleviate the stress of picking the right components and assembling them. With the RTX 4070 Ti SUPER at the forefront of the build, we’ve paired up this GPU with the Core i5-14600K and the NZXT H7 Elite to house a powerful top-end system.
In this guide, we’ll walk you through the PC building process step-by-step while covering the reasoning for our component choices. Towards the end, you’ll also find a brief coverage of the performance achievable with this build, alongside a dedicated video where James goes through the build in finer detail.
Build Process
Step 1: Install the CPU
The first significant step of any PC build involves getting the CPU installed. While this can be scary, it’s one of the easiest parts of the process and involves no additional tools. The processor that we’ll be installing in this build is the Intel Core i5-14600K. We’ve used this CPU across a few of our previous builds, and it serves as an affordable mid-range CPU while offering a high core and thread count to deal with more intense applications.

With a 5.3GHz clock speed and 20 threads, the Core i5-14600K is designed to handle 1440p and 4K gaming while offering enthusiasts the hardware for multi-threaded workloads. The Core i5-14600K also comes in around the $300 mark, which allows us to prioritise spending a bit more cash on important components like the graphics card, SSD and CPU cooler.
As always, remove the motherboard from its box and place it on top for a clear but soft work surface. Then, unhook the small metal arm next to the CPU socket and raise the CPU socket cover, which exposes all of the pins underneath; this is where the CPU needs to go.

Next, find the arrow on the CPU, indicating which way the CPU needs to go into the socket. A matching arrow can be found on the motherboard, which is typically at the bottom left of the board. Align these two arrows, and slowly lower the Core i5-14600K into the socket. If the CPU doesn’t sit snugly, give it a slight nudge; this should get the processor to sit correctly.

Then, drop the metal CPU socket cover and place the retention arm back under the hook. Getting the arm back under the hook can require a fair amount of pressure, but this is normal. The plastic protector will pop off while the socket cover is being pushed down. We recommend keeping this inside the motherboard box in case it’s needed for a future repair or RMA.
The motherboard we’ve picked for this PC build is the MSI MAG Z790 TOMAHAWK MAX WiFi. We’ve used this board a few times and have been pretty impressed with the features. The Z790 TOMAHAWK MAX is more of a mid-range motherboard, but it offers excellent connectivity and upgradeability despite its price point.

The most notable feature of which is its WiFi 7 compatibility, which offers blazing-fast speeds and stability with supporting routers. The Z790 TOMAHAWK MAX also supports Gen5 SSDs and graphics cards and provides a bountiful set of rear IO, which includes a complete audio suite with S/PDIF and ten USB ports, all of which are USB 3.2 Gen1 or higher. This board is also an excellent choice for overclocking with a 16+1+1 VRM power phase design.
| Specification | MSI MAG Z790 TOMAHAWK MAX WiFi |
|---|---|
| Form Factor | ATX |
| Supported Memory | 256GB DDR5 7800MT/s |
| PCI-E x16 Slots | 1 x PCI-E 5.0 1 x PCI-E 4.0 |
| PCI-E x4 Slots | 1 x PCI-E 5.0 3 x PCI-E 4.0 |
| Front IO | 1 x USB 3.2 Gen1 Type-A 1 x USB 3.2 Gen1 Type-C 2 x USB 2.0 |
| Rear IO | 4 x USB 3.2 Gen1 Type-A 4 x USB 3.2 Gen2 Type-A 1 x USB 3.2 Gen2 Type-C 1 x USB 3.2 Gen2x2 Type-C |
| Audio | 1 x Optical S/PDIF 5 x Audio Jacks |
| Networking | 2.5 Gigabit LAN WiFi 7 |

Step 2: Slot in the RAM Kit
The next install is the RAM Apacer Panther DDR5 RGB kit. This set of DIMMs comes in a 32GB capacity with a rated speed of 6000MT/s and a latency of CL40. The board would allow us to install a higher-end kit, but we’ve opted for a slightly slower option to save some money.
While this RAM kit isn’t ideal for a workstation system, it can easily handle the demands of modern games and provides this build with additional flair in the form of an RGB strip on the top of each DIMM.

To install this RAM, first push down the clips at the top and bottom of slots two and four. These are slots provide the best performance for two DIMMs, known as a dual-channel configuration.

Then, line up each stick of RAM with their respective slots, apply even pressure and push them down until you hear a click. This indicates that the RAM has been fully seated and is secure.

Step 3: Mount the SSD
The SSD is the final component we’ll install outside of the case. The drive we’ve chosen for this particular system is the MSI Spatium M480, a Gen4 NVMe SSD. The reason why we’ve opted for this drive over a Gen5 SSD is because of the price. While Gen5 drives are potent, most PCI-E 5.0 SSDs are price well over $160 for just 1TB. The high speeds aren’t necessary for this build, so Gen4 speeds are more than ample for this gaming PC.
It’s worth noting that a drive like the MSI Spatium M570 PRO FROZR would be perfect for this build, as the Z790 TOMAHAWK MAX WiFi supports Gen5 SSDs. If you’re looking for better speeds, this is the drive we’d recommend using.

The MSI Spatium M480 offers up to 7000MB/s on the reads and 6800MB/s on the writes, which is exceptionally strong. The Spatium also comes with a heatsink that can be screwed in optionally, improving thermals across the board.
The primary heatsink must be removed first to get this drive into the motherboard. This SSD slot uses a tool-less mechanism to secure it in place, so new screwdrivers are required. Press the latch at the left side of the heatsink to unlock it, and put this off to one side.

Then, push the Spatium M480 into the drive slot; it will poke out at a 45-degree angle. From here, you’ve got two choices. If the MSI heatsink was installed, we won’t be able to replace the motherboard heatsink back on top because there isn’t enough clearance.
Those who haven’t installed the heatsink (which is what we did) will need to remove the tape on the thermal pads underneath the SSD and the heatsink. Then place the motherboard heatsink shield back on top of the drive, and it should lock into place with no screws required.

Step 3.5: CPU Cooler Backplate Install
Because this is an Intel PC build, we need to ensure that the CPU cooler backplate is secured to the board before screwing things down inside the case. The Intel backplate has four mounting threads pointed at 45-degree angles instead of 90, so it should be relatively easy to find the backplate.

Next, we’ll need the LGA 1700 standoffs. These screws have a large hex-shaped bolt that is split horizontally, compared to the LGA 1200/115X standoffs, which have one big bolt. Push the backplate up against the rear of the board and screw the threads down until the backplate is fully secured in place.
Step 4: Place the Motherboard Inside the Case
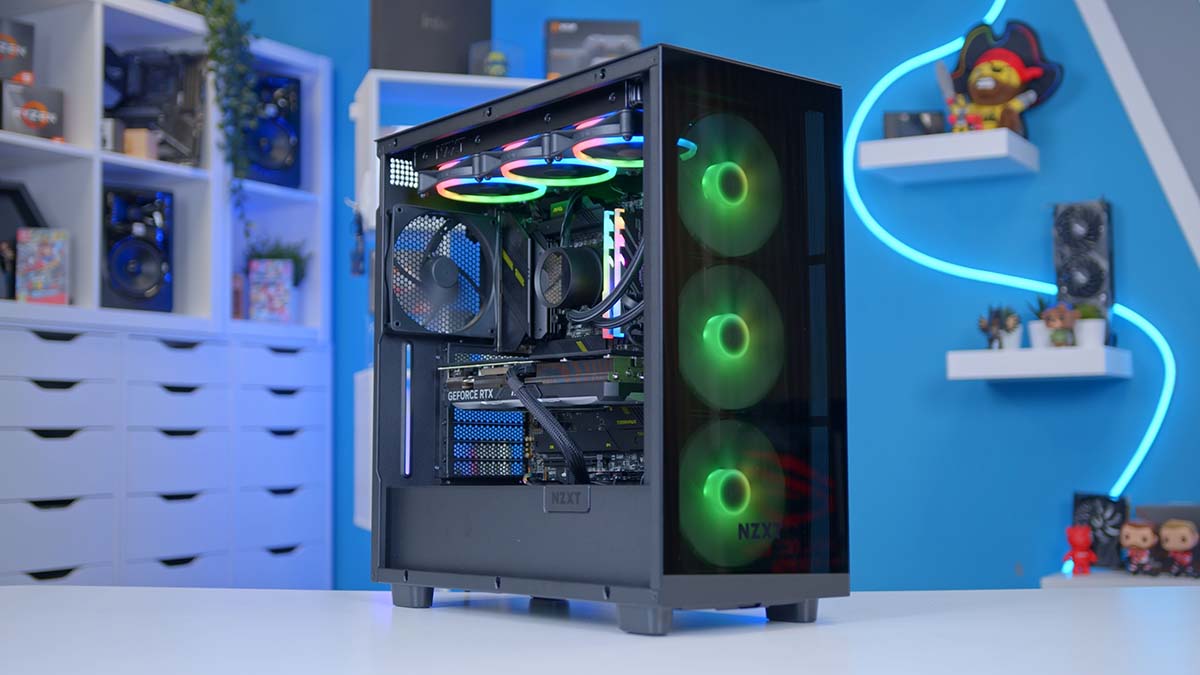
Now that we’ve installed all of the components we can outside of the case, we’ll get the board mounted inside the chassis so we can continue with the rest of the build. The case we’ve picked out for this system is the NZXT H7 Elite. We previously reviewed this chassis as part of the H7 line-up release in 2022 and were impressed with the overall design.
Since its release, NZXT has given the H7 series an update, with the Elite model receiving new pre-installed fans and an upgraded RGB/fan controller. While these changes aren’t massive, it’s good that NZXT keeps up with the times.

The NZXT H7 Elite is a premium mid-tower case with a glass front and side panel and four pre-installed fans for plenty of airflow. This case features NZXT’s signature cable management bar, allowing you to thread through any wires easily, and there are ample channels, including Velcro ties, to secure any cables. This chassis accommodates ATX motherboards, graphics cards up to 400mm long, and CPU coolers up to 185mm tall. Overall, the NZXT H7 Elite is a well-rounded case that adds a premium feel and look to this build.
| Key Specs | NZXT H7 Elite |
|---|---|
| Form Factor | Mini-Tower |
| Motherboard Support | Mini-ITX, Micro-ATX |
| Case Dimensions (L x W x H) | 480mm x 230mm x 505mm |
| Front IO | 2 x USB 3.2 Gen1 Type-A 1 x USB 3.2 Gen2 Type-C 1 x Headset Audio Jack |
| PCI-E Slots | 7 |
| Colour | White or Black |
| Max Clearance | 185mm CPU Cooler Height 400mm GPU Length |
| Drive Support | Up to 6 x 2.5 inch Up to 2 x 3.5 inch |
| Fan Support | Front: 3 x 140mm Top: 3 x 120mm Rear: 1 x 140mm |
| Radiator Support | Front: 360mm Top: 360mm Rear: 140mm |
| Pre-Installed Fans | 4 x 140mm |
The NZXT H7 Elite is pre-configured to support ATX motherboards, so there’s no reason to move any standoffs around. To get the MSI Z790 TOMAHAWK MAX WiFi installed, line up the PCB with the small cutout towards the top left, which is where the IO shield sits.

Then, use the screws found in the accessory box of the H7 Elite to secure down the board. Make sure to use the correct-sized screws, as different screws could thread and damage the standoffs, making future upgrades somewhat tricky.

Step 5: Mount the CPU Liquid Cooler
The next step involves getting the cooler installed in the case, so we recommend following closely. First off, screw the three 120mm fans to the radiator. To do this, place the radiator on a flat surface with the tubes on your right-hand side and have the fan cables facing towards you. Then take the long radiator screws and secure all of the fans in place.

Next, remove the case’s top panel, exposing the rails that will allow us to secure the radiator to the chassis. Grab one of the radiator screws and put it on the end of a Phillips screwdriver, and using the other hand push the radiator up to the top of the case to screw it down. While still holding the radiator repeat this process until you’ve got at least one screw in each corner, which will hold the weight of the radiator. Install the rest of the screws in the rad.

As a small tip, if the radiator is sitting too far to the left or right of the case, slightly loosen all of the screws holding the radiator in place, and slide it until the radiator is in a suitable position.

Finally, we can mount the CPU blockhead and secure it on top of the CPU. The NZXT Kraken 360 comes with pre-applied thermal paste, so we don’t need to apply our own. Line up the CPU retention bracket with the four threads around the CPU socket and use the thumb screws to secure the blockhead. We recommend tightening the thumbscrews down with finger strength first and then using a Phillips screwdriver to tighten them the rest of the way.

The CPU cooler we’ve opted for in this build is the NZXT Kraken 360. Fitting in with the NZXT theme, this AIO features an LCD that can showcase stats and GIFs, providing additional flair for the case. The Kraken 360 comes with three F120P 120mm fans, providing strong airflow, and the powerful Asetek pump ensures noise levels remain whisper-quiet during intense workloads. The Kraken 360 can easily handle the Core i5-14600K and is a solid option for future CPU upgrades.
Step 6: Installing the Graphics Card
As mentioned in the intro, the star of this PC build is the RTX 4070 Ti SUPER, more specifically, the MSI Ventus 3X version. The RTX 4070 Ti SUPER is designed to handle the demands of 1440p gaming while offering outstanding performance at 4K. We’ve used the RTX 4070 Ti SUPER in many builds, and it reviewed well during the RTX 4000 SUPER refresh.

This card received some hardware upgrades compared to the original RTX 4070 Ti, including 4GB of VRAM, a memory bus improvement from 192-bit to 256-bit, and additional cores to help improve rasterised and ray traced gameplay. The MSI Ventus 3X version of the RTX 4070 Ti SUPER is a highly efficient design, offering a triple-fan shroud that ensures temperatures remain low across games and other intense workloads.
| Specification | MSI RTX 4070 Ti SUPER Ventus 3X |
|---|---|
| Video Memory | 16GB GDDR6 |
| Memory Bus | 256-Bit |
| Core Clock Speed | 2.34GHz |
| Boost Clock Speed | 2.61GHz |
| CUDA Cores | 8448 |
| RT Cores | 66 |
| Tensor Cores | 264 |
| Power Consumption | 285W |
| GPU Length | 308mm |
To get this card into the case, first need to remove the PCI-E covers at the back of the NZXT H7 Elite chassis. The MSI Ventus 3X version is a 2.5-slot graphics card, so two PCI-E covers can be removed and put in the case accessory box.

Then, line up the graphics card with the PCI-E slot on the motherboard and apply some pressure to push the card until we hear a slight click. This indicates that the RTX 4070 Ti is secured within the slot. However, you’ll need to use the screws removed from the PCI-E covers to alleviate any sag and make sure the GPU is seated properly.

Step 7: Power Supply Cabling & Wires
The final part to go into this PC build is the power supply. The unit we’ve chosen is the MSI A850GL PCIE5, an 80 Plus Gold unit offering a fully modular cabling system and ATX 3.0 compatibility. ATX 3.0 support is beneficial for this build as the graphics card we’ve chosen uses 12VHPWR, allowing us to plug in one cable instead of an adapter, resulting in a cleaner look at the front of the case.

The MSI A850GL PCIE5 is a compact-sized power supply, so it can easily fit inside modern cases, with plenty of additional space for cable management. The PSU fan also uses a Fluid Dynamic Bearing that perfectly balances thermal performance and noise levels, ensuring this unit is cool and quiet.
Before installing the PSU inside the case, we’ll plug in all of the necessary cables we need for this build; these are a 24-pin motherboard power cable, an 8-pin EPS CPU cable with two headers, the 12VHPWR graphics card power cable, and SATA power for the RGB hub.

After plugging these in, take the four hexagonal PSU screws and secure the power supply at the back of the case. Make sure to use the four hexagonal screws, as other types could potentially damage the threads.

Now we can plug in all of the cables. Start with motherboard power first, as this is the easiest of the bunch to find. This cable has a long rectangular header, which will only go in one way. Make sure to give the cable a good pull to check that it’s fully engaged in the header.

There are two headers for CPU power. Both headers don’t need to be plugged in to supply power, but we recommend doing both if you decide to do any overclocking. Again, these cables only go in one way, so ensure the clips at the top of the headers are fully secured.

The 12VHPWR cable for the graphics card only goes in one way, and there are no additional headers other than the one on the graphics card. Give the cable a firm push, as this particular header can be more challenging to get in.

Finally, for SATA power, thread the cable up towards the RGB hub at the top of the case and plug in the header. The SATA power header is notched, making it easier to plug in.
Step 8: Front Panel Cabling & Turn On
One of the steps that we often leave until last is front panel power. While this can be done after the motherboard has been installed in the case, it can be easier to leave this until we know what our clearances are between components. The front panel cables that need to be plugged in for this system are the USB 3.0 header, USB Type-C header, HD audio, and the JFP1 (front panel power).
We recommend following our cables and wiring guide if you haven’t plugged in front panel cables before.

After wiring up the front panel cables, put the case panels back on, plug in your peripherals and a monitor, and switch on the PC. You have built and wired up an excellent RTX 4070 Ti SUPER gaming PC.
Performance
![]()
1440p, High Settings
Avg: 275FPS
Preset: High
V-Sync: Off
Anti Aliasing: TSAA
Texture Filtering: 8x
Ambient Occlusion: High
Volumetric Lighting: High
Dynamic Shadows: Enabled
Model Detail: High
![]()
1080p, Comp. Settings
Avg: 280FPS
Preset: Low
V-Sync: Off
Render Distance: Far
TSR: Off
Global Illumination: Off
Ray Tracing: Off
Effects: Low
Post Processing: Low
![]()
1440p, High Settings
Avg: 176FPS
Preset: High
V-Sync: Off
DLSS: Performance
Textures: High
Particle Quality: High
Tessellation: Near
Shaders: High
![]() 1440p, High Settings
1440p, High Settings
Avg: 138FPS
Preset: Recommended
V-Sync: Off
Anti-Aliasing: TAA High
Effects Quality: High
Texture Quality: High
Shadow Quality: High
Motion Blur: Off
All of the PCs that we put together are put through rigorous testing and benchmarking, and we’ve found the Intel Core i5-14600K and RTX 4070 Ti SUPER to be an excellent CPU GPU combo, offering high frame rates at 1440p in both modern and Esports games. This card is a must-have for 1440p gaming across popular titles like COD Warzone, Fortnite, Hogwarts Legacy, and Apex Legends.
Gallery