AMD X870 is officially here, with several X870 and X870E motherboards released on September 30th. These boards offer strong performance, refined overclocking support, and new high-speed features primarily geared towards top-end and mid-range builds.
So, what better way to showcase this launch than with an enthusiast gaming system that we’ve fully configured from the ground up? This build utilises the AMD Ryzen 7 9700X and the NVIDIA RTX 4090 with the ASUS ROG Strix X870E-E Gaming WiFi housed inside the gorgeous Antec C8 Wood PC case.
Per our PC building guides, this article was put together alongside a dedicated video covering the part selection and assembly process in plenty of depth. We recommend watching this video while reading, as it is an excellent visual aid to help you build this awesome PC!
Build Process
Step 1: Socket the CPU
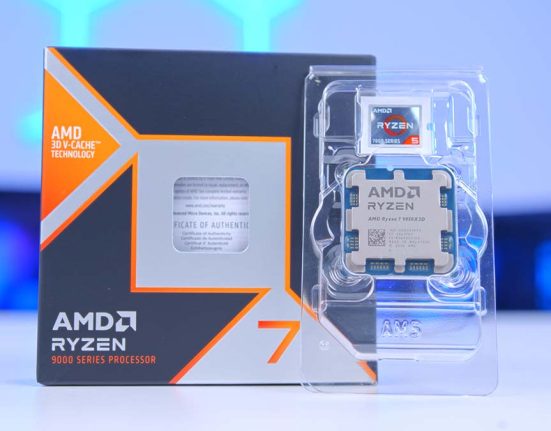
We chose the AMD Ryzen 7 9700X CPU for this X870 PC build. The Ryzen 9000 range uses the same socket as the Ryzen 7000, but the boards don’t require a BIOS update and work straight out of the box, making them a great choice if you’re looking to avoid hassle. The Ryzen 7 9700X processor is geared towards mid-range and high-end PCs, offering excellent 1440p and 4K gaming performance depending on the graphics card pairing.

Specs-wise, the Ryzen 7 9700X clocks up to 5.5GHz on the boost speed (100MHz better than the Ryzen 7 7700X) and has a core count of six, with twelve threads, making multi-core workloads fully viable. This is an excellent CPU for modern gaming, and once prices of the Ryzen 9000 range drop, the value proposition will only increase.
To install this processor, remove the motherboard from its box and place it on top. We’ll use this as our primary work surface while installing components into the board. Unhook the retention arm to release pressure from the CPU socket, and lift the cover to expose the pins underneath.

Locate the golden triangle on the Ryzen 7 9700X, typically found at the top left. Find the matching arrow on the motherboard and line both of these up. This shows the correct orientation for the CPU. Slowly lower the Ryzen 7 9700X into the socket. It will simply drop into place, and no additional force is required.
Finally, lower the metal cover onto the CPU and push the metal retention arm back under the hook. This requires some force. While this is happening, the plastic protector will pop off. Keep this for any future RMAs or repairs.

The motherboard we’ve just installed the CPU into is the ASUS ROG Strix X870E-E Gaming WiFI. This is an enthusiast-level motherboard and one of the strongest ASUS options. It has many excellent features aimed at high-performance builds, such as an 18+2+2 VRM power phase configuration for overclocking and NITROPATH technology, increasing RAM speeds.
| Specification | ASUS ROG Strix X870E-E Gaming WiFi |
|---|---|
| Form Factor | ATX |
| Supported Memory | 192GB DDR5 8400MT/s |
| PCI-E x16 Slots | 1 x PCI-E 5.0 1 x PCI-E 4.0 |
| PCI-E x4 Slots | 3 x PCI-E 5.0 2 x PCI-E 4.0 |
| Front IO | 1 x USB 3.2 Gen2x2 Type-C 2 x USB 3.2 Gen1 Type-A 3 x USB 2.0 |
| Rear IO | 2 x USB4 Type-C 1 x USB 3.2 Gen2x2 Type-C (30W PD) 9 x USB 3.2 Gen2 Type-A 1 x USB 3.2 Gen2 Type-C |
| Audio | 1 x Optical S/PDIF 2 x Audio Jacks |
| Networking | 5 Gigabit LAN WiFi 7 |
This board also features widespread PCI-E 5.0 compatibility, a Gen5 graphics card slot, and three Gen5 M.2 slots for storage expansion. It has a vast amount of high-speed rear IO, including two USB4 Type-C ports, 5 Gigabit LAN and WiFi 7 for networking options.

Step 2: Slotting in the RAM
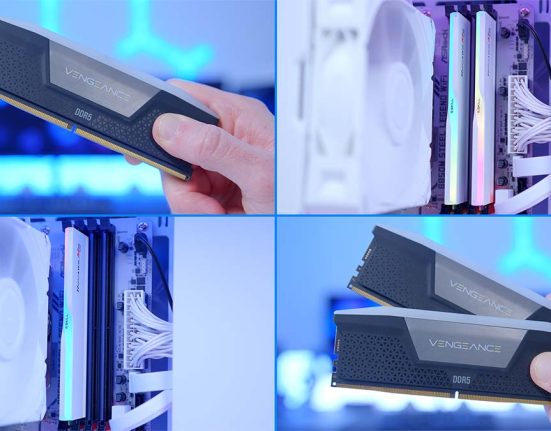
Next up is the RAM, and we’ve picked out the G.Skill Trident Z5 NEO RGB EXPO kit. These DIMMs come in a 32GB capacity, clocking in at 6000MT/s with a latency of CL30. While we don’t necessarily need high-speed gaming RAM, the kit we’ve picked for this build is ample for 4K gaming and some more challenging workstation-based applications.

Additionally, these G.Skill Trident Z5 NEO RGB DIMMs use a black heatspreader that blends in well with the dark-themed components in this system. Each stick also features a strip of RGB that can be synced up with the rest of the lighting across the build.
To install this RAM, first, push down the tabs at the top and bottom of slots one and two on the motherboard. We always use these slots when using two sticks of RAM, as they offer the most efficient performance configuration.

Once these tabs have been pushed down, line up one of the RAM DIMMs with the second slot on the motherboard. RAM can only go in one way, so double-check where the centre notch on the RAM lines up with the motherboard. Then, apply even pressure to both sides and firmly push it down into the slot until you hear a click, which indicates that the RAM is seated correctly. Do the same for the second RAM sick.

Step 3: Mount the SSD
We’ve opted for the Samsung 990 Pro 2TB SSD for storage. This is a Gen4 drive, offering excellent speeds for gaming. Because it’s a 2TB variant, there’s a tremendous amount of room for a range of games, the operating system, and any additional applications we might need, like Discord or other game launchers.

Regarding speeds, the Samsung 990 Pro is one of the most robust Gen4 drives on the market, offering reads up to 7450MB/s and writes up to 6900MB/s. These speeds ensure that boot times and game load times are blazing fast. While we could have chosen a Gen5 SSD for this particular build, it isn’t strictly necessary for gaming. These drives are expensive compared to their Gen4 counterparts, so we can save some money and pick up a higher-capacity option.
Getting the Samsung 990 pro is effortless, thanks to this motherboard’s wide range of DIY-friendly features. Push down the button on the main SSD slot, releasing the heatsink. Remove the tape from the thermal pads and place the heatsink to one side.

Push the Samsung 990 Pro into the slot on the board; it will poke out at a 45-degree angle. Then, push the drive down past the SSD latch, securing it in place. Then, place the heatsink on top of the drive and click it into place.

Step 3.5: Attach the CPU Cooler Hardware
Before getting the motherboard in the case, we can save time by installing CPU cooling hardware while the motherboard is loose. Firstly, remove the plastic AMD mounting clips from the motherboard. Four screws hold in these. Loosen these and place them inside the motherboard box if needed for other CPU cooler mounting.

Locate the AMD stand-offs found inside the AMD accessories box. Screw these into the posts around the CPU socket. You should only use finger strength for this. Pliers are not required.

Step 4: Place the Motherboard Inside the Case
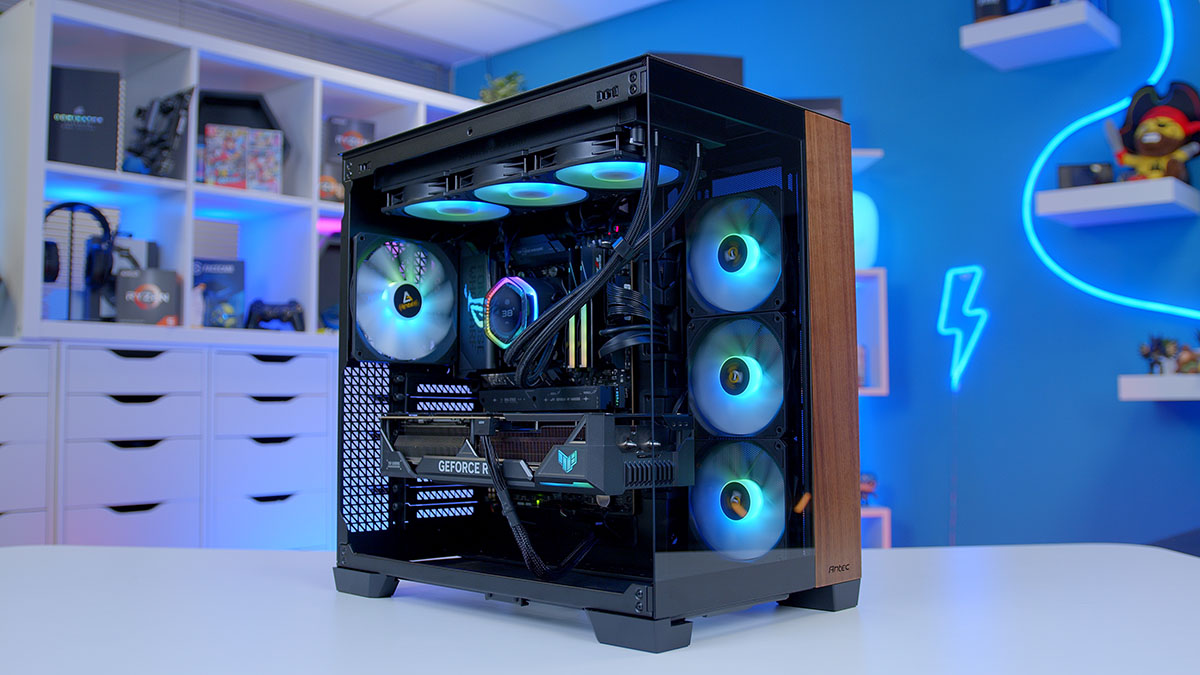
The case housing all of the components in this X870 gaming PC build is the Antec C8 Wood. Antec’s new range of cases utilises the familiar fish-tank design. Still, they are incredibly well-designed and have unique elements that make them stand out compared to similar cases on the market. One of the most exciting qualities of the C8 is its wood panel at the front of the chassis. This gives the chassis some personality while adding to the overall sleek minimalist design.

It features dual tempered glass panels, one on the side and one on the front. While this case doesn’t come with pre-installed fans, there’s plenty of room for cooling support with space for three 140mm fans across the top and bottom panels, three 120mm fans on the side and one on the rear. The C8 Wood can also house 360mm radiators on the top, side, and bottom panels. There’s ample clearance for modern GPUs, supporting graphics cards up to 440mm long, which is ideal for the RTX 4090 we’ll install later.
| Key Specs | Antec C8 Wood |
|---|---|
| Form Factor | Full Tower |
| Motherboard Support | Mini-ITX, Micro-ATX, ATX, E-ATX |
| Case Dimensions (L x W x H) | 464mm x 303mm x 476mm |
| Front IO | 2 x USB 3.0 Type-A 1 x USB 3.2 Gen2 Type-C 1 x 3.5mm Combo Jack |
| PCI-E Slots | 8 |
| Colour | White Black |
| Max Clearance | 175mm Cooler Height 440mm GPU Length 210mm PSU Length |
| Drive Support | Up to 4 x 2.5 inch Up to 2 x 3.5 inch |
| Fan Support | Top: 3 x 140mm Side: 3 x 120mm Bottom: 3 x 140mm Rear: 1 x 140mm |
| Radiator Support | Top: Up to 360mm Side: Up to 360mm Bottom: Up to 360mm Rear: Up to 120mm |
| Pre-installed Fans | 0 |
Remove the glass side panels to install the ASUS ROG Strix X870E-E Gaming WiFi in the case. We recommend laying the chassis flat. This makes installing the motherboard easier and minimises the risk of dropping the board inside the case. Line up the board with the standoffs and the rear IO with the cutout towards the top left of the C8 Wood.

Finally, use the motherboard screws found inside the accessories box to secure the board to the motherboard tray. Don’t overtighten these screws, as it can damage the standoffs, making future upgrades quite challenging.

Step 5: Securing the Liquid CPU Cooler
The next component that needs to be installed is the Cooler Master MasterLiquid ION 360 liquid CPU cooler. This is Cooler Master’s first entry into the liquid AIO (all-in-one) space that features a screen. This 360mm unit is designed to offer strong cooling performance for modern CPUs. It has three pre-installed 120mm fans and a 2.1-inch LCD screen to showcase system stats, lighting, or custom GIFs and images.
All the hardware is neatly labelled, and daisy-chained wiring streamlines cabling. This AIO is also straightforward to assemble and works well with the dark aesthetic we’ve chosen across the components.

Getting the MasterLiquid ION 360 installed into this build is pretty quick because Cooler Master has cut out most of the hassle for us. We’ve already installed the mounting hardware to the motherboard, and the radiator already has the fans pre-installed, so we don’t need to attach them to the radiator ourselves.
Note: In this configuration, we decided to spin the fans around so that the cables pointed towards the back of the chassis, which made them easier to plug in later.

First, remove the case’s top panel to expose the mounting rails for coolers and fans. Push the radiator up to the rails, ensuring that the tubing is sitting on the right-hand side, and start to screw in the cooler. Keep holding onto the MasterLiquid 360 ION until you’ve got at least four screws in place, and then let go and secure the rest.

Attach the AMD mounting bracket to the CPU blockhead. Push the bracket onto the blockhead and twist it to lock it in place. Plug both cables into the CPU blockhead, as this will save some time later on.

The MasterLiquid ION 360 has no pre-applied thermal paste, so you’ll need to add some to the CPU’s IHS (internal heatspreader). We recommend adding a rice-sized grain.

Place the CPU blockhead onto the CPU, lining up the bracket with the standoffs on the motherboard. Then, use the thumbscrews to secure it in place. Use finger strength initially and then tighten the screws the rest of the way with a Phillips head screwdriver.

Step 5.5: Install Some Extra Fans
The Antec C8 Wood has no pre-installed fans, so builders must add our own. In this configuration, we installed some Antec P12R fans, three reverse fans on the side, and a standard fan on the rear. These fans use addressable RGB and plug in with a 4-pin PWM header.

We recommend starting with the side panel fans first. We’ve used reverse fans as the side panel will act as an intake, which means we’ll have six fans in total, drawing in cool air.

The rear fan here is being used as an exhaust, shifting all the hot air from the cooler and graphics card out of the back of the case. All of these fans were installed using the included screws with a Phillips head screwdriver.

Step 6: Mount the Graphics Card
One of the last components we’ll be installing is the RTX 4090. This card handles all the graphical power in this high-end X870 PC build and can output high framerates at 4K. The RTX 4090 is NVIDIA’s most powerful graphics card, designed to handle anything you can throw at it. Additionally, with 24GB of VRAM on a 384-bit memory bus, the RTX 4090 is well-equipped for more intense workloads.

The RTX 4090 variant we installed is the TUF Gaming OC version. We’ve used this card multiple times before because it offers solid thermals and a boost speed overclock. Furthermore, the industrial grey design fits the build’s overarching aesthetic while adding some customisable RGB.
| Specification | ASUS TUF Gaming RTX 4090 OC |
|---|---|
| Video Memory | 24GB GDDR6X |
| Memory Bus | 384-bit |
| Base Clock Speed | 2.23GHz |
| Boost Clock Speed | 2.59GHz |
| CUDA Cores | 16384 |
| RT Cores | 128 |
| Tensor Cores | 512 |
| Power Draw | 450W |
| Length | 347mm |
Getting this card installed was nice and easy. First, remove the PCI-E covers at the back of the case. ASUS notes that the TUF 4090 OC is a 3.65-slot GPU, so we must remove the second, third, and fourth covers (from top to bottom).

Then, line up the graphics card with the slot on the motherboard. The RTX 4090 is a large card, so we recommend holding onto it with both hands. Give the card a firm push into the GPU slot until you hear a click, indicating that the GPU is seated correctly.

Lastly, use the screws removed from the PCI-E covers to secure it to the case. The TUF variant of the RTX 4090 also comes with a GPU support bracket, which we advise using to alleviate any sag.
Step 7: Install the Power Supply & Wiring
The last part we need to install is the power supply. In this build configuration, we’ve opted for the Cooler Master MWE Gold 1050W PSU. This 1050W unit features an 80 Plus Gold efficiency rating designed to minimise additional power lost as heat or noise. It is fully modular, allowing you to pick and choose all of the cables that need to be plugged in.

The MWE Gold 1050 is fully ATX 3.0 compatible, allowing us to easily plug in the power cable for the RTX 4090 without having to use adapters. As this unit is fully modular, it also provides a simple way to keep all of the cables clean and avoid clutter.
Before installing the Cooler Master MWE Gold 1050 in the case, we’ll first plug in the cables. This system needs a 24-pin motherboard power cable, two 8-pin EPS CPU cables, a 12VHPWR cable for the graphics card, and SATA power for the cooler. Plug all these in and give all the wires a firm tug to ensure they’re engaged correctly.

Slide the power supply into the back of the case, and use the hexagonal screws to secure it to the back of the chassis. Make sure to use the right screws, as any others could damage the threads.

For the cabling, we’ll start with the motherboard power cable. This uses a long rectangular header, typically on the motherboard’s right side. Give this a firm push into the header to ensure the cable clips are seated.

The ROG Strix X870E-E Gaming WiFi has two 8-pin EPS headers at the top left of the PCB. You don’t need to plug in both headers, but it’s good practice to do so as it spreads the power delivery better, resulting in lower temperatures.

The graphics card power cable is a bit tougher to plug in as it has an extra set of pins on top of the header. Again, give this a firm push to make sure the header is seated correctly.

Finally, SATA power is a friction-fit cable with a notch on one end. These cables very easily snap together and won’t come apart unless forced.
Step 8: Front Panel Wires & Switch On
The last step of any PC build is front panel wiring. Typically, we recommend doing cable management in the middle of the build to avoid doing a considerable amount at the end, saving some time. Once you’re happy with how everything is wired up, we advise plugging in the front panel cables. These are necessary to use the ports and the power button at the front of the Antec C8 Wood case.

Starting with USB, the USB 3 and USB-C headers sit on the right side of the motherboard, just under the motherboard power header. Both are notched, so they can only be plugged in one way.

The last two headers are HD_Audio and JFP1. HD_Audio is at the bottom left of the PCB required for the 3.5mm combo jack on the case. JFP1, or front panel power, is necessary for the power button. Fortunately, the Antec C8 Wood features a singular header instead of individual pins, which can be finicky. Get both of these plugged in.

Now that everything has been plugged in, put the panels back on the case, plug in power, grab some peripherals and a monitor and switch on the build. You’ve successfully built a high-power X870 gaming PC!
Performance
![]()
4K, High Settings
Avg: 269FPS
Preset: High
V-Sync: Off
Anti Aliasing: TSAA
Texture Filtering: 8x
Ambient Occlusion: High
Volumetric Lighting: High
Dynamic Shadows: Enabled
Model Detail: High
![]()
1080p, Comp. Settings
Avg: 387FPS
Preset: Low
V-Sync: Off
Render Distance: Far
TSR: Off
Global Illumination: Off
Ray Tracing: Off
Effects: Low
Post Processing: Low
![]()
4K, High Settings
Avg: 105FPS
Preset: Custom
Resolution Scaling: FSR
Texture Quality: High
Anisotropy: x8
Contact Shadows: On
Ambient Occlude: High
Frame Generation: On
![]() 4K, High Settings
4K, High Settings
Avg: 75FPS
Preset: Custom
Resolution Upscaling: FSR
Texture Res: High
Volumetric Light: High
Shadow Res: High
SSAO: On
Motion Blur: Off
Framerates reached 105FPS in Hogwarts Legacy and surged past 75FPS in Alan Wake II at 4K high settings. As the benchmarks show, the RTX 4090 can handle almost anything, so 4K at high settings doesn’t pose much of an issue.
The strong performance continued through to the Esports games. Fortnite and Apex Legends saw insane framerates, surpassing the 144Hz sweet spot with 387FPS and 269FPS, respectively.
Gallery


![FI_[SR190] HYTE X50 Ryzen 5 9600X & MSI RTX 5070 Ti](https://geekawhat.com/wp-content/uploads/2026/01/FI_SR190-HYTE-X50-Ryzen-5-9600X-MSI-RTX-5070-Ti-551x431.jpg)
![FI_[DP064] ASUS Prime AP303 + 9070XT](https://geekawhat.com/wp-content/uploads/2026/03/FI_DP064-ASUS-Prime-AP303-9070XT-551x431.jpg)
![FI_[DM93] Corsair 3200D Launch](https://geekawhat.com/wp-content/uploads/2026/03/FI_DM93-Corsair-3200D-LAUNCH-551x431.jpg)
![FI_[DM89] Phanteks Evolv + AORUS 5090 9850X3D Gallery (8)](https://geekawhat.com/wp-content/uploads/2026/02/FI_DM89-Phanteks-Evolv-AORUS-5090-9850X3D-Gallery-8-551x431.jpg)