$2000 is a solid budget to build an excellent 4K-capable gaming PC. A graphics card like the RTX 4070 Ti SUPER from NVIDIA is a good starting point because this GPU offers robust performance for 4K gaming. But for those trying to stick within a $2000 budget, what components should you pick up next? There’s such a great selection on the market that determining which parts to buy that sit below the $2000 mark is no easy task.
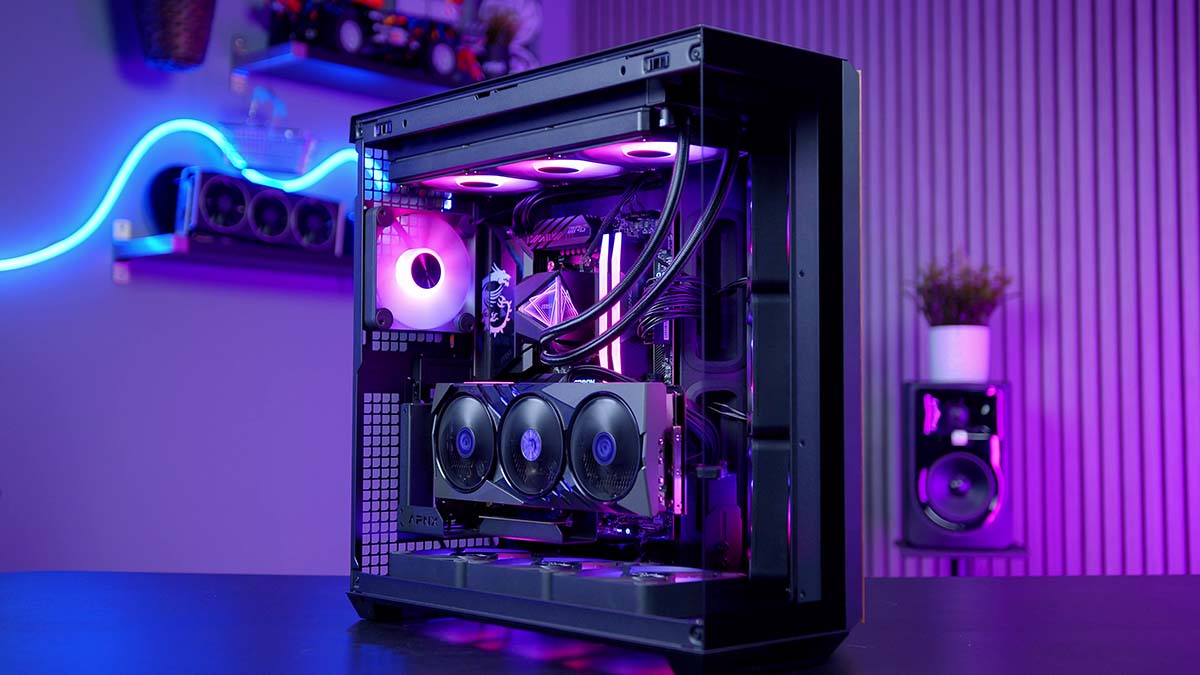
That’s where we come in! We’ve configured an excellent gaming PC for under $2000. It features the AMD Ryzen 7 9800X3D and the MSI RTX 4070 Ti SUPER Gaming X Slim, housed inside the APNX V1 chassis, a unique panoramic case with a sophisticated wood panel.
Our dedicated video on this build, found below, includes further details and offers a visual guide through the assembly process.
Build Process
Step 1: Socketing the CPU
The first component we’ll get installed is the CPU. This is none other than the Ryzen 7 9800X3D. AMD has become the firm favourite among PC builds with this CPU, and it is designated as the world’s fastest gaming processor. The Ryzen 7 9800X3D offers a solid performance uplift across a range of games and applications, and much like its predecessor, it is pretty affordable. It features a boost clock speed that can reach 5.2GHz, and this chip is also overclockable, which wasn’t possible on previous generation 3D SKUs.

It’s also worth highlighting that because the Ryzen 7 9800X3D is on the AM5 socket, those with an X670 or B650 motherboard won’t need to upgrade. This processor can handle 1440p and 4K gaming when paired with the right graphics card and is a worthwhile consideration for various builds.
To install the CPU, we must remove the motherboard from its box and place it on top. This is to avoid damaging the board, as the box provides a soft but sturdy surface to work on while we install as many components as possible outside of the case. Then, we need to unhook the metal retention arm next to the CPU socket, lift it, and raise the socket cover, exposing the pins underneath.

Find the golden arrow at the top left of the 9800X3D. Then, find the matching arrow on the motherboard and line it up. These arrows indicate the correct orientation for the CPU to sit in the socket correctly. Once both arrows are aligned, carefully lower the 9800X3D into the socket. Give it a slight wiggle once socketed to ensure it’s correctly sitting in place.

Place the metal socket cover on top and push the metal retention arm back under the hook. Pushing this down requires some force, but this is normal. While this is happening, the plastic protector will pop off. Keep this in case it’s needed for a potential return or RMA.

We’ve just installed the CPU in the MSI MPG X870E Carbon WiFi motherboard. The Carbon WiFi has been reviewed well across our articles and is generally a board we’d recommend for mid-range and top-end PC builds. This board features an all-black aesthetic with minimalist RGB lighting on the rear IO shield.
| Specification | MSI MPG X870E Carbon WiFi |
|---|---|
| Form Factor | ATX |
| Supported Memory | 256GB DDR5 8400MT/s |
| PCI-E x16 Slots | 2 x PCI-E 5.0 1 x PCI-E 4.0 |
| PCI-E x4 Slots | 2 x PCI-E 5.0 2 x PCI-E 4.0 |
| VRM Power Phases | 18+2+1 |
| Front IO | 2 x USB 2.0 2 x USB 3.2 Gen1 Type-A 1 x USB 3.2 Gen2x2 Type-C |
| Rear IO | 2 x USB4 Type-C 9 x USB 3.2 Gen2 Type-A 2 x USB 3.2 Gen2 Type-C |
| Audio | 1 x Optical S/PDIF 2 x Audio Jacks |
| Networking | 5 Gigabit LAN 2.5 Gigabit LAN WiFi 7 |
Regarding expansion and connectivity, the MPG X870E Carbon WiFi offers vast Gen5 support, with space for two Gen5 SSDs and a PCI-E 5.0 graphics card. Rear IO support is bountiful, with this board featuring nine USB 3.2 Gen2 Type-A ports, two USB 3.2 Gen2 Type-C ports, and two USB4 Type-C ports, along with dual 5 Gigabit and 2.5 Gigabit LAN.

Step 2: Slotting in the RAM
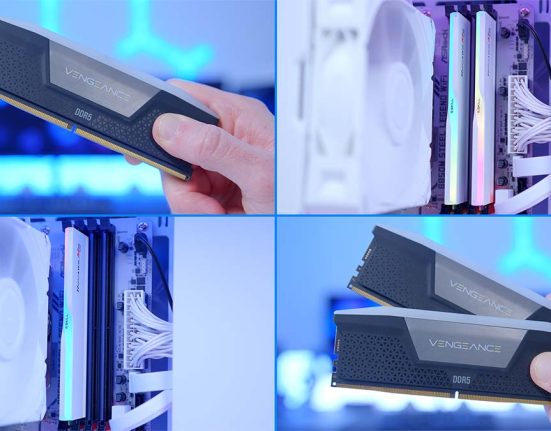
The next component to install is the RAM. We’ve picked out Corsair’s Vengeance RGB DDR5 kit for this build. This RAM clocks in at a 6200MT/s speed and has a latency of CL32. Pairing up this Ryzen 9000 CPU with fast RAM is beneficial, so this Corsair Vengeance memory is a solid pick. We’ve colour-matched the DIMMs to the rest of the system components to maintain the black theme. The RGB lighting is also fully customisable and can be synced with other parts in the build.

First, push down the tabs on RAM slots two and four to install this RAM correctly. We’re using these slots because they offer better efficiency (compared to slots one and three) for two DIMMs.

Line one of the RAM sticks up with the second slot on the motherboard. Ensure the RAM is oriented correctly. The easiest way is to check where the notch is in the middle. Then, firmly push the RAM into the slot by adding pressure to both sides until you hear a click. This indicates that the RAM is seated correctly. Follow the same steps for the second RAM stick.
Step 3: Mount the SSD
For storage, we’ve chosen the MSI Spatium M480 Pro. This 1TB Gen4 NVMe SSD offers speeds up to 7400MB/s on the reads and 7000MB/s on the writes, which is ample for modern gaming. Typically, we’d choose a 2TB drive to install plenty of games. However, by picking up a cheaper drive, we can spend more on other components like the graphics card.

Design-wise, the MSI Spatium M480 Pro is pretty basic. This particular drive doesn’t have a heatsink, so it’s fairly barebones aesthetically. However, this won’t be an issue as this drive will be going underneath a motherboard heatsink.
To install the Spatium M480 Pro, remove the top SSD heatsink on the X870E Carbon WiFi motherboard. The heatsink has a small latch to the left, which frees it from the board. Remove the heatsink from the board and pull off the tape covering the thermal pad.

Remove the second piece of tape from the thermal pad underneath and push the M480 Pro into the slot. It will poke out at a 45-degree angle. Push the SSD down, and it will click into place. All of the slots on this board are tool-less, so the M.2 drives are easily installed or removed with MSI’s latch mechanisms. Finally, again, place the heatsink back on top of the drive, clicking it into place.

Step 3.5: Adding the Mounting Hardware
Before placing the motherboard inside the case, it’s worth installing the mounting hardware for the CPU cooler while we still have plenty of room to work with. If possible, we advise doing this outside the case to minimise hassle and time later on.
Before screwing in any threads, the AMD plastic mounting needs to be removed first. To do this, grab a Phillips screwdriver and loosen the four screws around the CPU socket. Then, remove the plastic mounting points and place them inside the motherboard box. These are handy to keep a hold of in case a future cooler upgrade uses them to mount onto.

Then, grab the four AMD mounting posts from the CPU cooler accessories box, and screw them into the threads on the motherboard. Just use your fingers and thumbs. Pliers are not required.

Step 4: Place the Motherboard Inside the Case
The next component is the showpiece of this build, the APNX V1. This is a fish-tank-style case with an angled wood grain panel, providing some personality for the chassis. We’ve previously reviewed another of APNX’s cases, the APNX C1, and overall, we were pretty impressed. The V1 looks to step things up by offering a panoramic glass design that provides an unhindered window into your build.

This chassis supports graphics cards up to 395mm long, has space for ten 120mm fans, and can house 360mm radiators on the side, top, and bottom panels. It features a modern front IO, which includes a USB 3.2 Gen2x2 Type-C port and two USB 3.2 Gen1 Type-A ports and comes in various colours. While this particular build we’ve put together is black, alternative options exist for those looking to build a lighter-themed PC.
| Key Specs | APNX V1 |
|---|---|
| Form Factor | Mid-Tower |
| Motherboard Support | Mini-ITX, Micro-ATX, ATX |
| Case Dimensions (L x W x H) | 500mm x 290mm x 485mm |
| Front IO | 1 x USB 3.2 Gen2x2 Type-C 2 x USB 3.2 Gen1 Type-A 1 x 3.5mm Combo Jack |
| PCI-E Slots | 7 |
| Colour | Black White |
| Max Clearance | 170mm Cooler Height 395mm GPU Length 220mm PSU Length |
| Drive Support | Up to 6 x 2.5 inch Up to 2 x 3.5 inch |
| Fan Support | Side: 3 x 120mm Top: 3 x 120mm Bottom: 3 x 120mm Rear: 3 x 120mm |
| Radiator Support | Side: Up to 360mm Top: Up to 360mm Bottom: Up to 360mm Rear: Up to 120mm |
| Pre-Installed Fans | 0 |
Next, we’ll place the motherboard inside the case. To do this, remove the side and front glass panels. Lay the case flat on your work surface and place the motherboard on the standoffs, aligning the rear IO with the cutout at the top left.

Using the small screws found inside the case accessories box, secure the motherboard inside the case. As this is an ATX motherboard, you’ll need to grab nine screws. Ensure you don’t over-tighten the screws, as we don’t want to damage or loosen the standoffs.

Step 5: Secure the CPU Cooler & Fans
The MSI MAG CoreLiquid I360 AIO (all-in-one) keeps the AMD Ryzen 7 9800X3D nice and cool. This 360mm unit has been used in several builds before, and overall, it’s a solid option. The standout quality of the MAG CoreLiquid I360 is its mounting system. It uses a universal mounting plate on the CPU blockhead, so switching between AMD or Intel is very easy, depending on the build you’re putting together. This makes installation generally very simple.

Regarding aesthetics, the CoreLiquid I360 is available in black and white (we’ve colour-matched it to this system). It features shrouding on the sides to hide any cable mess and has a dual-sided infinity mirror, adding some flair and customisable lighting for the build.
We must remove the mounting rails at the top to get this into the case. Remove the thumbscrew holding the rails in place, and then secure the CoreLiquid I360 to the rails using the included screws with the cooler. All the fans come pre-installed, so we can skip a step. Once that radiator is secure, put the removable mounting panel back into the case and install the thumbscrew to hold it in place.

After this, we’ll install an exhaust fan on the rear panel of the case. In this build, we’re using the APNX FP1 fans. We’ll place one on the rear, three on the bottom, and three on the side. To install the rear fan, line up the holes with the rails at the back of the case and use the included screws to secure it. Ensure the cables are pointing out on the correct side to make them easier to manage.
Next, we’ll add three additional 120mm fans to the bottom panel of the case. The bottom panel is held in by a couple of thumbscrews. Once these are loosened, the panel can be removed from the case, and the fans screwed onto it. Ensure the fans are reversed when installing them, as these act as intake, pulling air in from the bottom of the chassis.

On the side panel, we have three reverse FP120 fans, which will also act as intake. To install them, take off the wooden panel on the side, and screw in the fans from the back. Make sure the cables are oriented towards the rear chamber so they can be easily managed.

Lastly, thermal paste is applied to the CPU. We recommend using a pea-sized amount, which will be enough to cover the IHS (internal heatspreader) once the cooler is fully secure.

Grab the CPU blockhead and place it on top of the threads surrounding the CPU socket. Then, using the thumbscrews, screw the cooler down. Use finger strength first, then tighten the thumbscrews the rest of the way using a Phillips head screwdriver.

Step 6: Power Supply Install & Cabling
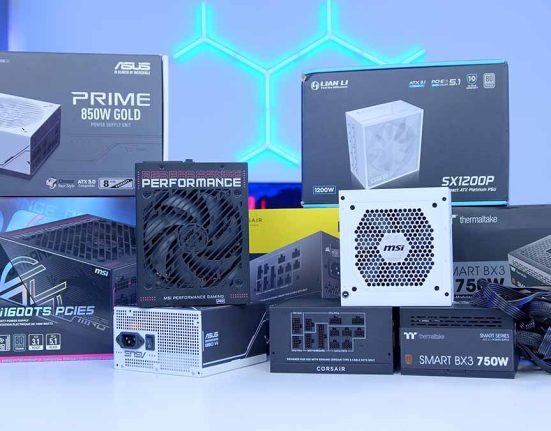
The Corsair RM750x provides all the juice for the components in this PC build. This 750W unit features an 80 Plus Gold efficiency rating, which ensures that minimal power is lost as heat or noise. The RM750X is tuned for low-noise operation, minimising buzzing or whirring when under load. It also has a zero RPM mode, which switches off the fan once the overall system load is low enough.

The fully modular cabling system allows us to select precisely which wires to plug in for this build. This unit also features a ten-year warranty, guaranteeing reliable operation across your builds.
Installing this power supply is relatively simple, but first, it’s good practice to plug in the required cables beforehand, as this will make cable management more straightforward. For this particular configuration, we need two eight-pin EPS CPU connectors, one 24-pin motherboard power cable, a 12VHPWR cable for the graphics card, and one SATA power cable for various peripherals and fans.

Once the cables are snugly installed in the power supply, the PSU can be secured to the case. Take the four hexagonal screws found inside the power supply box, and attach the power supply to the rear of the chassis.

Once the power supply is screwed in, we can start plugging in all of the cables. First is motherboard power. This is one of the larger headers and only plugs in one way. Give the cable a firm tug to ensure that it’s seated correctly.

You’ll find two CPU power headers at the top left of the motherboard. Again, these can only be plugged in one way, but securing them properly is pretty straightforward. Ensure the clips on the top are engaged, indicating that the cables are plugged in correctly.

Step 7: Front Panel Wiring
While plugging in cables, now is a good time to get the front panel cables wired up. We need to plug in four headers. The first is USB 3.0. This is a rectangular header with a small notch on the top, indicating which way it needs to go.

Next is the USB-C header. This cable is keyed, so it can only go in one direction despite the fact that both sides of the header look similar. If done correctly, this cable will firmly click into the motherboard.

JFP1 (front panel power) is the third header. This needs to be plugged in to fire up your PC build from the button on the front of the case. Fortunately, the APNX V1 comes with a full-size header instead of individual pins, which makes plugging this in very simple.

Lastly is HD Audio. This header allows you to use the 3.5mm jacks at the front of the case. One of the pins is blocked out on the connector, so spotting the proper orientation is easy.

Step 8: Mounting the Graphics Card
We’ve decided to use a vertical riser to showcase the graphics card in this build. Installing the riser mount is pretty simple, but there are a few additional steps required.

First off, screw in the riser cable to the bottom of the riser mount. Thread the PCI-E Gen4 cable through the bottom of the mount, and use the included screws to secure it firmly into place.

Remove the PCI-E covers at the back of the case. Unscrew all of the PCI-E covers, bar the top, as this will leave an open space, potentially attracting more dust.

Attach one end of the riser cable to the motherboard. This plugs in similarly to a graphics card. Once the cable is installed correctly, the latch will click into place.

Then, screw the PCI-E riser to the case. Use the screws you removed earlier from the PCI-E covers to secure it in place. Don’t use other screws, as these can damage the threads.

Place the graphics card into the slot, plug in the power, and you’re done! We installed the MSI RTX 4070 Ti SUPER Gaming X Slim GPU. This slimline graphics card is designed to provide great performance in a lightweight form factor. It comes with three fans, ensuring that the graphics card stays cool and that its dark aesthetic matches the primarily black theme of this PC build.
| Specification | MSI RTX 4070 Ti SUPER Gaming X Slim |
|---|---|
| Video Memory | 16GB GDDR6X |
| Memory Bus | 256-bit |
| Base Clock Speed | 2.34GHz |
| Boost Clock Speed | 2.68GHz |
| CUDA Cores | 8448 |
| RT Cores | 66 |
| Tensor Cores | 264 |
| Power Draw | 285W |
| Length | 307mm |
Regarding performance, the RTX 4070 Ti SUPER is primarily aimed at 1440p gaming, but thanks to its increased VRAM and cores compared to the original RTX 4070 Ti, it has very strong legs at 4K, making it an excellent competitor for top-end builds.

Performance
Framerates reached 71FPS in Hogwarts Legacy at 4K and surged to 64FPS in Alan Wake II at 1440p with ray tracing enabled. The MSI RTX 4070 Ti SUPER Gaming X Slim is a solid performer in rasterised and ray traced settings, so the overall experience here is smooth.
The strong performance continued through to the Esports games. Fortnite and Apex Legends saw insane framerates, surpassing the 144Hz sweet spot with 184FPS and 487FPS, respectively.
Gallery




 4K, High Settings
 1440p, High Settings, RTX On