The RX 7900 XTX is AMD’s most powerful graphics card from the Radeon 7000 range. It deserves to be paired with equally capable components to form an awesome gaming PC. However, with so many excellent parts in the high-end market, finding the right components that strike a balance between performance and value can be challenging.
That’s where this dedicated build guide comes in handy! We’ve done all the hard work for you and chosen a fantastic selection of parts that we believe are the best to pair with the RX 7900 XTX. This configuration features the Ryzen 7 7800X3D at its core, alongside other awesome parts like the Samsung 990 Pro, housed inside the Thermaltake E660 MX case.
Our build guides cover the building process and the reasoning behind our part selection, accompanied by a dedicated video that acts as a visual guide.
Build Process
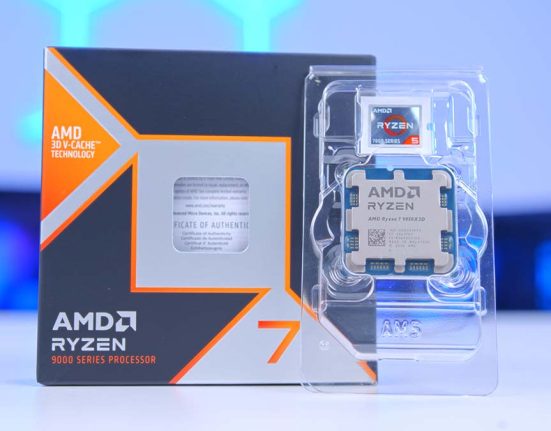
Step 1: Socketing the CPU
The first step of any PC build starts with socketing a CPU into a motherboard. The processor chosen for this configuration is the AMD Ryzen 7 7800X3D. This CPU is a must-have for mid-range and top-end gaming PC builds due to its unrivalled performance across modern and Esports titles. The AMD proprietary 3D V-Cache technology and 5GHz boost clock speed make the Ryzen 7 7800X3D blazing-fast, allowing CPU instructions to be easily read, written, and executed exceptionally quickly.

While this isn’t a build that sticks to any particular budget, the Ryzen 7 7800X3D is also very competitively priced compared to market alternatives. At less than $400 at the time of writing, it is affordable and worth considering for anyone building a gaming-focused system.
Before we install anything, it’s good practice to use the motherboard box as a soft but sturdy surface to work on. Placing the board on top of the box prevents it from moving, which risks damaging the connections on the underside of the PCB. Additionally, installing as many components outside the case as possible will save us some time, making the building process straightforward.

Once the motherboard is placed on top of the box, unhook the metal retention arm at the side of the CPU socket and lift the metal cover, exposing the array of pins. Don’t touch any pins inside the socket, as they will likely be damaged.
The golden arrow on the CPU is typically found at the top left of AMD CPUs. There will also be a matching arrow on the motherboard at the top left, which indicates the correct orientation of the processor.

Hold the CPU by the sides and slowly lower it into the socket. No force is required to get the CPU to sit correctly. If you’ve found the proper orientation, it will drop into place with no additional movement needed.

Lower the metal cover so it’s sitting on top of the CPU, and push the metal retention arm back under the hook to secure the cover in place. This arm requires a fair amount of tension to get back under the hook, but don’t worry—this isn’t damaging the CPU. When tension is applied to the CPU socket cover, the plastic protector will pop off. Keep this inside the motherboard box if needed for an RMA.

The motherboard the Ryzen 7 7800X3D has just been installed into is the Gigabyte X670 AORUS Elite AX. This motherboard was one of the first options to launch with the Ryzen 7000 range in 2022, and it’s a popular choice for mid-range and high-end systems. Because it is an X670 motherboard, it can leverage the benefits of being on the X670 chipset but at a lower cost than X670E motherboards.
| Specification | Gigabyte X670 AORUS Elite AX |
|---|---|
| Form Factor | ATX |
| Supported Memory | 192GB DDR5 8000MT/s |
| PCI-E x16 Slots | 2 x PCI-E 4.0 1 x PCI-E 3.0 |
| PCI-E x4 Slots | 1 x PCI-E 5.0 3 x PCI-E 4.0 |
| Front IO | 1 x USB 3.2 Gen2x2 Type-C 2 x USB 3.2 Gen1 2 x USB 2.0 |
| Rear IO | 1 x USB 3.2 Gen2 Type-C 2 x USB 3.2 Gen2 Type-A 6 x USB 3.2 Gen1 Type-A 4 x USB 2.0 |
| Audio | 3 x Audio Jacks |
| Networking | WiFi 6E 2.5 Gigabit LAN |
The X670 AORUS Elite AX has a solid set of features, including support for Gen5 SSDs alongside three additional Gen4 M.2 slots. The rear IO is also excellent, with this board housing 13 ports in total. Four are USB 2.0, while the rest is made up of six USB 3.2 Gen1 Type-A ports, two USB 3.2 Gen2 Type-A ports, and a blazing-fast 20Gbps USB 3.2 Gen2x2 Type-C port.

Those planning to play many online games can choose between WiFi 6E and 2.5 Gigabit LAN for networking, which are incredibly stable and offer great speeds and low latencies.
2. Slotting in the RAM DIMMs
Memory is the next component we’ll be installing into the motherboard, with our RAM kit of choice being the Apacer Panther DDR5 RGB. We’ve used this kit many times in previous builds because it is incredibly affordable, blends in well with dark builds, and offers some RGB lighting. This set of DIMMs has a 32GB capacity and a rated speed and latency of 6000MT/s at CL40, respectively.

Admittedly, we could have picked out a more powerful RAM kit for this configuration, but it isn’t necessary for gaming. In recent testing, we’ve discovered that speed is more of an essential factor over latency. While lower latency kits will affect gaming performance, the difference in-game between low and high latency is relatively negligible most of the time. That’s why we’ve settled on these Apacer DIMMs over pricier, better latency options.
To install this RAM on the motherboard, first, push down the tabs at the top and bottom of slots two and four. We’re using these slots because this is the most efficient configuration when you have just two sticks of RAM.

Once each slot is fully exposed, line up each stick of RAM with its respective slot and apply even pressure to both sides firmly, pushing down. While pushing, you’ll hear a clicking sound, indicating that both tabs have locked the RAM in place. Do this for both RAM sticks until they’re secured.

Step 3. Mounting the SSD
The Samsung 990 Pro is housing our games and operating system. Those who read our PC build articles will be familiar with the 990 Pro, which regularly features in many of our mid-range and high-end systems. This Gen4 drive is one of the most robust options on the market, offering read and write speeds of 7450MB/s and 6900MB/s.

2TB is generally the sweet spot for storage. This should be enough to house a selection of large games, the operating system, and any additional applications such as Discord or extra game launchers. Again, we could have opted for a more powerful drive, primarily because the X670 AORUS Elite AX supports Gen5 SSDs, but it isn’t needed for this build and wouldn’t significantly affect performance compared to Gen4 options.
Getting this drive installed into the motherboard is incredibly simple. Firstly, use a small screwdriver to loosen the screw on the heatsink covering the primary drive slot. Once the screw is loose enough, slide the drive out and put it to one side.

Remove the plastic stickers on the thermal pads. One is underneath the SSD slot and on the underside of the heatsink. Slide the Samsung 990 Pro into the slot, and it will poke out at a 45-degree angle.

Finally, push the drive down so the small cutout at the end sits snugly on the standoff. Then, use the small plastic latch to secure the drive in the slot. After this, put the heatsink back on top of the drive and screw it down.

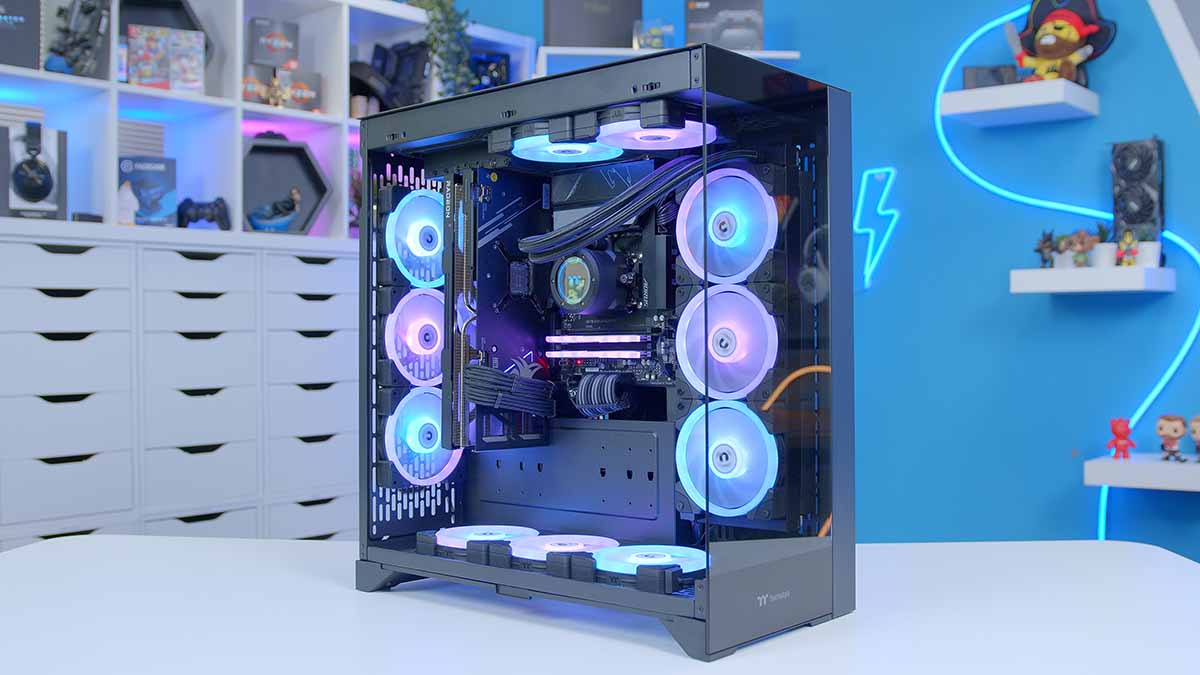
Step 4: Mount the Motherboard in the Case
The next step is to install the motherboard inside the case. This build uses the Thermaltake E660 MX chassis, a mid-tower case with a unique rotational design. The E660 MX features a dual-chamber design, hiding cables at the rear while ensuring the front is strictly for showing off all your components. This case accommodates up to E-ATX motherboards, graphics cards with a max length of 443mm, and CPU coolers up to 166mm tall.

There’s also vast support for radiators and fans, including space for 420mm radiators across the entire chassis, barring the top panel and a maximum of 14 120mm fans. Furthermore, Thermaltake includes a riser bracket and cable for vertical mounting, allowing you to showcase your graphics card uniquely.
| Specification | Thermaltake E660 MX |
|---|---|
| Form Factor | Mid-Tower |
| Motherboard Support | Mini-ITX, Micro-ATX, ATX, E-ATX |
| Case Dimensions (L x W x H) | 513mm x 70mm x 558mm |
| Front IO | 1 x USB Type-C 2 x USB 3.0 Type-A 1 x 3.5mm Combo Jack |
| PCI-E Slots | 7 |
| Colour | Black White Blue Green |
| Max Clearance | 166mm Cooler Height 443mm GPU Length 220mm PSU Length |
| Drive Support | Up to 3 x 2.5 inch Up to 2 x 3.5 inch |
| Fan Support | Front: 3 x 140mm Top: 2 x 120mm Side: 3 x 140mm Bottom: 3 x 140mm Rear: 3 x 140mm |
| Radiator Support | Front: Up to 420mm Top: Up to 240mm Side: Up to 420mm Rear: Up to 420mm Bottom: Up to 420mm |
| Pre-Installed Fans | 0 |
To insert this board into the case, remove the glass panels on the side and front and lay the case flat on the work surface. Then, rotate the motherboard sideways so the rear IO faces the top of the chassis. The graphics card slot will also line up with the PCI-E covers at the top left.

It’s worth noting that the case is upright in the imagery we’ve provided. James is a veteran builder who can assemble most builds without laying the case down. For first-time builders or those who haven’t upgraded in some time, we recommend laying the case flat to get this board installed.
After the motherboard has been correctly lined up in the case, use the included screws found inside the accessories box to secure it in place. Use the correct screws so as not to damage any of the standoffs.

Step 5: Installing the CPU Cooler
Next is the CPU liquid cooler, and we’ve chosen the ToughLiquid 360 EX Pro ARGB Sync for this configuration. This 360mm liquid cooler features an infinity mirror CPU blockhead and SWAFAN EX magnetic daisy-chainable fans. This AIO is designed to simplify the building process, saving the hassle of having to wire up a series of individual headers to provide power and data to the cooler.

While the SWAFAN EX standard fans are solid, we wanted to pick some RGB options to enhance the build’s look. For this reason, we’ve opted to use Thermaltake’s SWAFAN EX12 RGB fans. They utilise the same magnetic daisy-chain connection as the fans on the CPU cooler, but they also have a ring of RGB, providing some additional flair for this system. Adding these fans is optional, but it enhances the style and aesthetic of the build with some addressable RGB lighting.

First, take the SWAFANs out of the box and connect them. They are magnetic, so they snap together very quickly. Place these on top of the radiator and connect the snap-on cable to the end opposite the tubing. After this, screw down the fans using the long radiator screws so that the fans are secure.

SWAFAN EX blades are reversible, so we’ve used the reversible configuration with the rear and bottom panel fans. However, the fans mounted to the front of the radiator are not reversed and will intake air instead.
To provide some extra airflow, we’ve also decided to mount the fans that come with the 360 EX Pro cooler to the back of the radiator in a push/pull configuration, which helps with heat dissipation. To do this, place the radiator inside the case with the tubes at the top. Then use additional long radiator screws to secure the fans to the radiator at the back.
Ensure that the fans at the back are flipped, as these will pull the air in, and the fans on the other side will push the cool air into the case, constantly circulating new air to keep everything cool.

This can be pretty demanding to do. We advise holding the bottom of the fans and radiator while pushing them against the side panel mounting rails. Start with a couple of the corners at the top and bottom of the fans, and let go once the screws are holding the weight. The fans and radiator can be easily repositioned by loosening the screws and adjusting up or down.
With the radiator secured, we can move onto the CPU blockhead. Locate the square bracket, which has two screw holes on raised mounts. Attach these to the bracket using the spring-loaded thumbscrews and small rectangular eyelets. These eyelets mount onto the plastic clips on AMD motherboards as standard. Then, push the bracket onto the CPU blockhead.

Apply a rice grain/pea-sized amount of thermal paste to the top of the CPU. The EX Pro cooler does not have pre-applied thermal paste, but Thermaltake provides a tube to add your own.

Finally, place the CPU blockhead on top of the CPU and line up the eyelets with the notches at the top and bottom of the CPU socket (because the motherboard is rotated, these clips are located on the side). Again, this can be finicky. Shifting the cooler slightly will get the eyelets into the correct position. It can then be screwed down using your thumbs initially, followed by a screwdriver to tighten the screws the rest of the way.

Step 5.5: Mounting the Extra Fans
As mentioned in the CPU cooler section, we’ve spiced up the look of this PC build by adding the SWAFAN EX ARGB fans. They offer additional configurable RGB lighting while providing extra airflow and improving thermals.
We’ve added three sets of fans: two at the top, three at the rear, and three at the bottom. The fans at the rear and bottom are reversed, so they act as exhaust, moving hot air out of the case. The fans at the top are not reversed, so they’ll also control the intake of cold air along with the six fans mounted on the side. The rear fans can be attached using traditional fan screws, and there are no mounting brackets or additional hardware.

The top fans can also be added to the case without extra hardware. Remove the top panel of the case, push the fans up to the mounting rails, and screw them in from the top of the chassis.

The bottom fans need to be attached to a removable bracket. Unscrew the two screws holding the bracket in the case and attach the fans to it. Place the fans upside down, put the bracket on top, and screw the fans in from the back.

Place the mounting bracket back inside the case, and secure it to the bottom of the case using the two screws that we loosened earlier.

Step 6: Graphics Card Installation
The AMD Radeon RX 7900 XTX, specifically the PowerColor Hellhound variant, handles our gaming performance in this build. The RX 7900 XTX is AMD’s most powerful GPU in the Radeon 7000 range, available at a price point that competes with the RTX 4080 SUPER. During its initial launch, the RX 7900 XTX was received with plenty of positivity due to its high VRAM capacity of 24GB, 384-bit memory bus, and competitive price compared to NVIDIA’s (at the time) RTX 4080, which was well over $1000.

The RX 7900 XTX is still highly competitive, with many variants sitting close to the $900 mark at the time of writing. This GPU can handle 4K gaming with ease and has excellent legs at 1440p. Furthermore, improvements to AMD’s pillar technologies, such as FSR and Fluid Motion Frames, can significantly bolster framerates when switched on.
| Specification | PowerColor Hellhound RX 7900 XTX |
|---|---|
| Video Memory | 24GB GDDR6 |
| Memory Bus | 384-Bit |
| Core Clock Speed | 1.92GHz |
| Boost Clock Speed | 2.49GHz |
| Stream Processors | 6144 |
| Ray Accelerators | 96 |
| Compute Units | 96 |
| Power Consumption | 355W |
| GPU Length | 320mm |
The PCI-E covers at the top of the case must be removed before installing this card. The PowerColor Hellhound variant of the RX 7900 XTX is a 3-slot graphics card, sitting at 320mm long, so three PCI-E covers naturally need to be removed. Remove the second, third, and fourth covers from right to left.

Next, line up the graphics card with the slot on the motherboard. Firmly push the card into the slot, and you’ll hear a slight click indicating the card is locked in. Use the screws removed from the PCI-E covers to hold the card in place, relieving any sag.

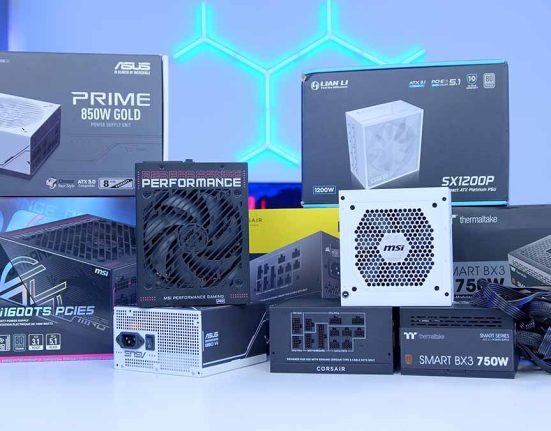
Step 7: PSU Mounting & Power On
The last component being installed in this PC build is the Thermaltake Toughpower PF3 1200W PSU. This 80 Plus Platinum-rated power supply ensures minimal power is lost as heat or noise at varying load levels. The Toughpower PF3 is also fully modular, meaning you can pick and choose any wires, making cable management very straightforward.

The Toughpower PF3 is designed to handle high-power excursions and supports the ATX 3.0 standard. Although we don’t need a 12VHPWR cable for this build, it’s good to know that there’s plenty of room to upgrade in the future.
Before screwing this into the case, we’ll pick out the cables we need to plug into the power supply. The cables required for this build are one motherboard power cable, CPU power (with two 8-pin headers), 8-pin GPU power (three headers are required for this graphics card), and SATA power for the fans and RGB in this system.

Once the necessary cables have all been plugged in, slide the power supply into the back of the case, and use the four hexagonal screws to secure it in place.

The final step is to plug in all of the cables. All major power cables, such as motherboard or CPU power, can only go in one way and are relatively easy to plug in. The other wires, like fans, RGB, and front panel wires, are slightly more complicated. We’ve written a dedicated guide for cables and wiring, which we recommend reading if you’re unfamiliar with this process.
Finally, once all the cables and wires are plugged in and managed, grab some peripherals and a monitor. Put all the panels back on the case, switch the PSU on at the back, and press the power button!
Performance
![]()
4K, High Settings
Avg: 221FPS
Preset: High
V-Sync: Off
Anti Aliasing: TSAA
Texture Filtering: 8x
Ambient Occlusion: High
Volumetric Lighting: High
Dynamic Shadows: Enabled
Model Detail: High
![]()
1080p, Comp. Settings
Avg: 312FPS
Preset: Low
V-Sync: Off
Render Distance: Far
TSR: Off
Global Illumination: Off
Ray Tracing: Off
Effects: Low
Post Processing: Low
![]()
4K, High Settings
Avg: 166FPS
Preset: High
V-Sync: Off
DLSS: Performance
Textures: High
Particle Quality: High
Tessellation: Near
Shaders: High
![]() 4K, High Settings
4K, High Settings
Avg: 90FPS
Preset: Recommended
V-Sync: Off
Anti-Aliasing: TAA High
Effects Quality: High
Texture Quality: High
Shadow Quality: High
Motion Blur: Off
Our benchmarking data shows that the AMD Radeon RX 7900 XTX and AMD Ryzen 7 7800X3D perform exceptionally well in a range of games at 4K. This powerhouse PC can easily handle the demands of intense gaming and offers high framerates across a range of titles.
Gallery


![FI_[SR190] HYTE X50 Ryzen 5 9600X & MSI RTX 5070 Ti](https://geekawhat.com/wp-content/uploads/2026/01/FI_SR190-HYTE-X50-Ryzen-5-9600X-MSI-RTX-5070-Ti-551x431.jpg)
![FI_[DP064] ASUS Prime AP303 + 9070XT](https://geekawhat.com/wp-content/uploads/2026/03/FI_DP064-ASUS-Prime-AP303-9070XT-551x431.jpg)
![FI_[DM93] Corsair 3200D Launch](https://geekawhat.com/wp-content/uploads/2026/03/FI_DM93-Corsair-3200D-LAUNCH-551x431.jpg)
![FI_[DM89] Phanteks Evolv + AORUS 5090 9850X3D Gallery (8)](https://geekawhat.com/wp-content/uploads/2026/02/FI_DM89-Phanteks-Evolv-AORUS-5090-9850X3D-Gallery-8-551x431.jpg)