The NVIDIA RTX 4090 is the most powerful desktop gaming graphics card in 2024. The RTX 4090 can handle anything you throw at it, whether it’s 4K games with ray tracing enabled or complex multi-core applications that need a little bit more oomph.
But with so many excellent high-end components to choose from, putting together a powerful PC that uses the right parts can be complicated due to the sheer amount of variety on offer.
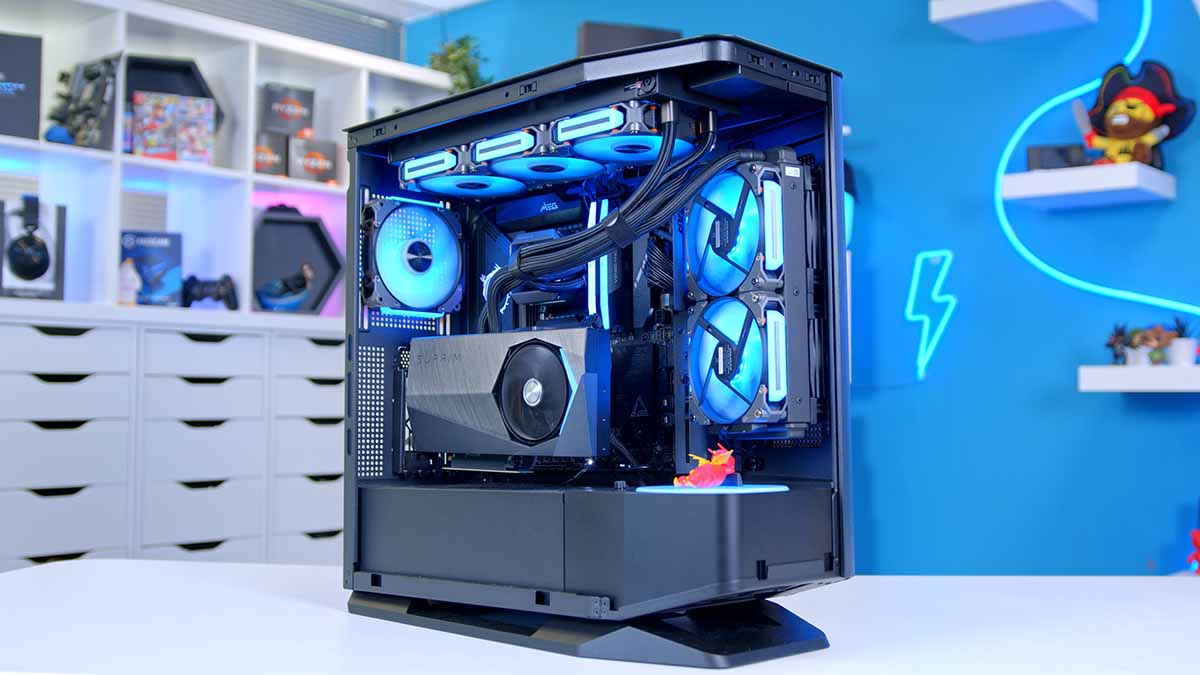
That’s why we’ve put together a fantastic RTX 4090 gaming PC build guide. In this write-up, we’ve gone through all the steps to assemble this system and briefly covered why we chose each part. Our chosen configuration utilises the Intel Core i9-14900K housed inside the Cougar FV270 case, so there’s plenty of ground to cover. As always, a dedicated build video is available alongside our written guide, which we recommend watching as James covers the assembly process in more depth.
Build Process
Step 1: Socketing the CPU
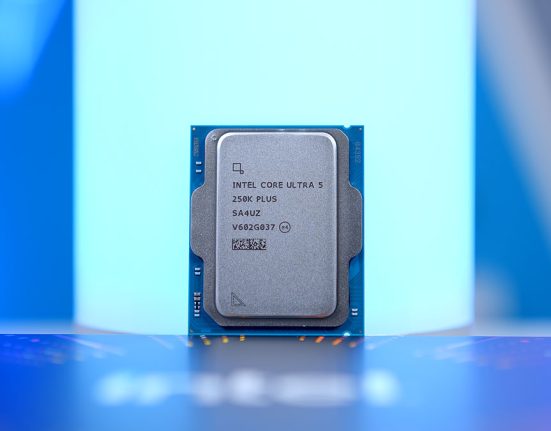
The CPU going into this insane RTX 4090 gaming PC build is the Intel Core i9-14900K. This is one of the most powerful processors available in 2024, before the launch of Intel Arrow Lake. The Core i9-14900K is designed to handle all your gaming needs with its high core count and 6GHz boost clock speed. With 24 cores and 32 threads, the Core i9-14900K can handle high power applications and modern AAA games at 4K.

For an enthusiast-level PC, the Core i9-14900K is a great option, especially for those looking to push their system with programs beyond the scope of gaming. This CPU can also be overclocked, so those looking to gain extra performance can do so with sufficient cooling.
As always, to install this CPU, we must remove the motherboard from its box and place it on top. This provides a clean and soft surface from which we can install the CPU, RAM, and SSD outside the case.

Firstly, unhook the metal retention arm on the side of the CPU socket and lift the cover. This exposes the pins underneath, where we’ll install the CPU. To do this, find the arrow towards the processor’s bottom left. A matching arrow is on the motherboard; make sure these arrows are lined up and parallel.

Slowly lower the CPU into its socket; don’t apply any pressure while the processor goes in. Then, lower the CPU socket cover and push the metal retention arm back under its hook. It may feel like you’re applying unnecessary force to get the arm underneath the hook, but this is normal. The plastic protector will pop off while the arm is being pushed down. Keep this for a potential RMA or future repair.

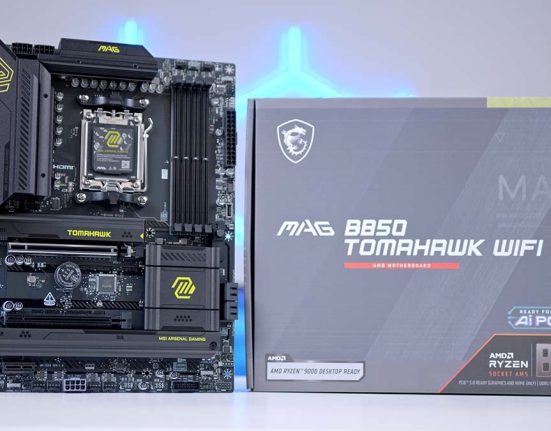
The motherboard we’ve chosen for this insane PC build is the MSI MEG Z790 ACE MAX. We’ve previously looked at the X670E ACE, and if this is anything to go by, the Z790 ACE MAX will be perfect for this enthusiast system. Equipped with Gen5 support for both graphics cards and SSDs, along with WiFi 7 for networking and an obscene amount of rear IO, which includes Thunderbolt 4 Type-C ports and a whopping eight extra USB Type-A ports on the rear IO, seven of which are USB 3.2 Gen2, and one is a USB 3.2 Gen2 Type-C port.
| Specification | MSI MEG Z790 ACE MAX |
|---|---|
| Form Factor | E-ATX |
| Supported Memory | 256GB DDR5 7800MT/s |
| PCI-E x16 Slots | 2 x PCI-E 5.0 1 x PCI-E 4.0 |
| PCI-E x4 Slots | 1 x PCI-E 5.0 4 x PCI-E 4.0 |
| Front IO | 2 x USB 2.0 2 x USB 3.2 Gen1 Type-A 2 x USB 3.2 Gen2x2 Type-C |
| Rear IO | 2 x Thunderbolt4 Type-C 7 x USB 3.2 Gen2 Type-A 1 x USB 3.2 Gen2 Type-C |
| Audio | 1 x S/PDIF 5 x Audio Jacks |
| Networking | WiFi 7 2.5 Gigabit LAN |

Step 2: Slotting in the RAM
The next component to install is the Corsair Vengeance RGB 32GB DDR5 RAM kit. This set of DIMMs is ideal for this system as it clocks in at 6200MT/s, providing outstanding performance in modern games and more complex workloads. And with a latency of CL32, this RAM is more than capable of delivering fast response times. While we could have picked lower latency memory, CL32 is more than enough to ensure this system is speedy during general and intense usage.

Additionally, Corsair RAM kits are some of the best-looking options on the market. The unique triangle pattern on the heatsink provides some depth to the look of this build, while the RGB strips on top add plenty of flair thanks to the programmable RGB lighting, which can be customised through Corsair iCUE.
On the Z790 ACE MAX motherboard, push down the clips at the top and bottom of RAM slots two and four. We use these slots because this is the most efficient configuration when you have two DIMMs.

Line up the RAM with the slots on the motherboard. Each stick can only go in one way, so don’t try to force them in if they aren’t lined up correctly. Finally, push down on the RAM until it clicks in the slot, indicating it is seated correctly.

Step 3: Mounting the SSD
Next, we’ll be installing the SSD. The storage going into this PC build is the Spatium M580 FROZR drive from MSI. This is a Gen5 NVMe SSD offering read and write speeds up to 14600MB/s and 12700MB/s. Furthermore, the Spatium M580 FROZR has a massive built-in heatsink to passively keep the drive cool without fans or additional support.

The Spatium M580 FROZR isn’t the best-looking drive on the market, but few alternatives rival its performance. For this reason, installing it in this build makes sense to provide us with top-end read and write speeds to improve game loading and boot times.
To get this SSD into the motherboard, you must first locate the Gen5 slot. Strangely, MSI has made the fourth slot Gen5 compatible, which is located at the bottom left of the board. Remove the heatsink by loosening the screws on the left and right sides.

Place the heatsink aside and push the M580 FROZR into the SSD slot. It will pop out at a 45-degree angle until we secure it. This is normal. Push the SSD down until it sits underneath the latch on the board. Push the latch anti-clockwise until it holds the SSD in place.
It’s worth noting that James places the Spatium SSD into the primary slot in the build video. This is because we wanted the build to look clean. This drive must go into the Gen5 slot to use the maximum speeds.

Step 3.5: Secure the CPU Cooler Backplate
Before installing the motherboard inside the case, we’ll get the CPU cooler backplate mounted, saving us some time and potential hassle later on. The Intel backplate is square with four rectangular corners. Locate this backplate and push the four male threads through the back of the motherboard PCB. Ensure the threads are in the rear position, which is required for LGA1700 sockets.

Find the LGA1700 spacers (they have slight ridges on them) and push them onto the threads to hold the backplate in place. The threads might be slightly loose, but they’ll sit inside the spacers without falling out.

Step 4: Install Spinning Plate Inside the Case
The PC case housing this build’s parts is the Cougar FV270. Cougar cases have become popular in recent years due to several highly price-competitive chassis hitting the shelves. However, the FV270 RGB, while competitively priced, is hardly what we’d consider a budget case. Utilising the all-too-familiar curved panoramic glass design, the Cougar FV270 is built to show off all your components in all their glory.

This case maximises airflow with ventilation on the top, bottom and opposing side panel, maintaining solid air pressure and assisting thermals. The FV270 is also slightly raised towards the front so air can be pulled in through the bottom and out through the rear, similar to the NZXT H5.
| Specification | Cougar FV270 |
|---|---|
| Form Factor | Mid-Tower |
| Motherboard Support | Mini-ITX, Micro-ATX, ATX, E-ATX |
| Case Dimensions (L x W x H) | 512mm x 268mm x 530mm |
| Front IO | 1 x USB 3.2 Gen2 Type-C 2 x USB 3.0 Type-A 1 x 3.5mm Combo Jack |
| PCI-E Slots | 7 |
| Colour | Black White |
| Max Clearance | 180mm Cooler Height 420mm GPU Length (Horizontal) 450mm GPU Length (Vertical) 250mm PSU Length |
| Drive Support | Up to 4 x 2.5 inch Up to 2 x 3.5 inch |
| Fan Support | Top: 3 x 120mm Side: 2 x 140mm PSU Shroud: 2 x 140mm Bottom: 1 x 120mm Rear: 1 x 140mm |
| Radiator Support | Top: Up to 360mm Side: Up to 280mm PSU Shroud: Up to 240mm Rear: Up to 140mm |
| Pre-Installed Fans | 3 x 140mm, 1 x 120mm |
Features-wise, the FV270 supports up to nine 120mm fans and a 360mm cooler on the top panel, while the motherboard side is limited to 280mm, and the PSU shroud has space for a 240mm AIO. Additionally, there’s clearance for E-ATX motherboards and graphics cards up to 420mm long horizontally or 450mm vertically. This case is a big showpiece, ideal for those wanting to flaunt their build.
The Cougar FV270 case has a unique feature: it can house a small rotating plate if bought as an additional accessory. While this doesn’t add any functionality to the build, it serves as a unique design element, partly what this configuration is all about.

This spinning plate can be swapped out in place of the bottom-mounted fan. To do this, push down onto the fan. It is spring-loaded and will pop out. Unplug the power and place the plate inside the case. Connect it to power, and once the build is switched on, it will start spinning and light up.

Step 4.5: Place the Motherboard in the Case
The Cougar FV270 is pre-configured out of the box for ATX motherboards, so we’ll have to move/add a couple of extra standoffs so that the Z790 ACE MAX has enough structural support behind it. Remove both of the glass panels. They pop out without any screws or tools needed. We recommend removing the top panel to save time when installing the CPU cooler. This case is pre-configured to support ATX and E-ATX motherboards, so there’s no reason to move around any standoffs.

Firstly, place the board inside the case, lining up the rear IO with the cutout at the top left of the chassis. Once the IO is appropriately aligned, secure the board by screwing it down. Make sure to use the correct screws so as not to damage the standoffs, as this could cause any future upgrades to be complex.

Step 5: Installing the Liquid CPU Cooler
The liquid AIO (all-in-one) we’ve opted for in this configuration is the DeepCool MYSTIQUE 360. Across our testing, the MYSTIQUE 360 generally sits in the top five coolers out of around 20. During four-thread and eight-thread benchmarks, the MYSTIQUE 360 held up incredibly well, keeping temperatures on the Core i7-14700K down to a minimum.

Performance data aside, the MYSTIQUE 360 has a 2.8-inch LCD that can monitor system stats or showcase a range of media, such as GIFs and memes. This AIO is also straightforward to install, using minimal tools or additional parts.
First off, we need to get the fans mounted to the radiator. For this build, we felt that the DeepCool fans, while they are excellent, didn’t quite fit in with the theme. So, we used some Cougar APolar 120 ARGB fans instead to provide an alternative look.

To do this, flip the radiator upside down so that the tubing is on your right. Place the fans on the radiator with the cables facing towards you. This makes the installation inside the case extremely simple, as we can flip the radiator back up and screw it in. The cabling can easily thread through to the back of the case without issue.

Using the long screws, secure each of the fans on top of the radiator. Ensure not to overtighten, as this could potentially pierce or damage the radiator. Once the fans are in place, flip the radiator back over and push it up towards the top panel of the Cougar FV270 case. With one hand, hold onto the radiator, and with the other, use the included screws to secure the MYSTIQUE 360 to the mounting rails at the top of the case.
Pro Tip: We advise starting with the corners first while holding onto the radiator and then letting go and doing the rest once the screws can carry the weight.

Next, we’ll attach the mounting hardware to the CPU blockhead. The Intel mounting brackets are slightly angular, unlike the AMD mounting brackets, which are much straighter. Take the four small screws labelled “E” in the manual and use these to fasten the brackets to the blockhead.

Once the mounting hardware is attached, place the CPU blockhead onto the CPU. The cooler comes with pre-applied thermal paste, so there’s no reason to add any of our own. Use the four thumbscrews to tighten the blockhead onto the threads. Use finger strength first, then a screwdriver to tighten the threads the rest of the way in a star pattern.

Plug in the 3-pin cooler header into ‘AIO_PUMP’. Connect the fans up and use the male-to-female extender cable to plug these fans into the ‘CPU_FAN’ header. Finally, plug the USB header into any available USB 2.0 pins and the RGB connector into an addressable 3-pin RGB header.
Step 6: Mount the GPU and Radiator
Next is the graphics card install. We decided to mount the GPU vertically in this system, but this is optional for those who prefer the traditional horizontal method. The Cougar FV270 doesn’t come with a PCI-E riser cable, so you’ll need to supply your own if mounting the GPU vertically. However, it does feature a rotatable bracket for GPU mounting. Do this first so that the PCI-E covers are in the correct position. Multiple screws surround the PCI-E covers, remove these and rotate the brackets so that they’re vertical.

Place the riser cable into the primary graphics card slot and secure the GPU into the other end. Then, two vertical PCI-E covers are removed, and the RTX 4090 is secured.
The RTX 4090 going into this build is unique, as it comes with a pre-installed GPU waterblock and radiator. The MSI RTX 4090 SUPRIM LIQUID X is one of the best-performing 4090 variants on the market, providing crisp thermals and low noise levels thanks to the 240mm radiator.

The SUPRIM LIQUID X card is a relatively small form factor graphics card with a minimalist brushed steel shrouding and a small chevron of RGB next to the fan. This card offers fantastic thermals and can handle almost anything you can throw at it regarding modern AAA titles at 4K. The benefit of picking up an NVIDIA card is that technologies like DLSS and Frame Generation can boost performance where necessary, which isn’t as widely available on AMD cards.
| Specification | MSI RTX 4090 SUPRIM LIQUID X |
|---|---|
| Video Memory | 24GB GDDR6X |
| Memory Bus | 384-Bit |
| Core Clock Speed | 1.38GHz |
| Boost Clock Speed | 2.64GHz |
| CUDA Cores | 16384 |
| RT Cores | 128 |
| Tensor Cores | 512 |
| Power Consumption | 480W |
| GPU Length | Card – 280mm Radiator – 274mm |
For the next step, the 240mm radiator needs to be installed. The standard fans come pre-installed on the radiator, but we’ve decided to swap them out for more APolar ARGB options. This keeps the secondary liquid cooler in line with the aesthetic we’re going for while providing some RGB lighting and brightening up the case. We mounted the radiator to the side of the case, which pushes air through to the centre of the chassis and is exhausted out the rear.

Step 7: PSU Install & Cabling
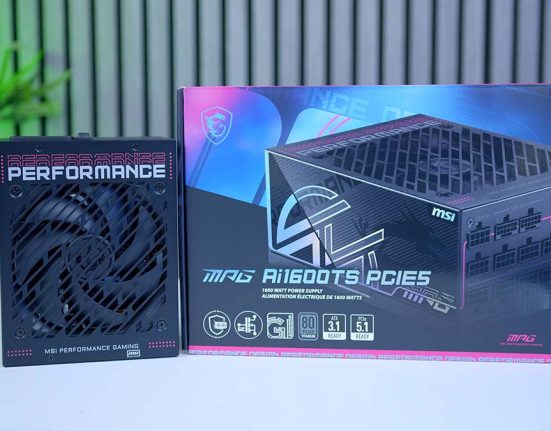
The final component going into this system is the MSI MPG A1000G. Because we’ve picked out an RTX 4090 as the graphics card for this system, we need a solid 1000W unit to keep it powered, along with the rest of the parts. The PX1000G was the best choice based on its solid 80 Plus Gold efficiency rating, ATX 3.0 support, and fully modular cabling system.

The modular cable design allows us to keep the build clean and tidy because there won’t be any additional cable clutter beyond the cables we need. Furthermore, the A1000G is incredibly affordable, and although that isn’t a concern for this enthusiast system, it’s good to save some money where possible.
The cables needed for this system are motherboard power, CPU power, a 12VHPWR cable for the graphics card, and SATA power for the integrated fan/RGB hub. All of these power connectors are relatively easy to plug in. They only go in one way and sit snugly inside their respective connectors. Once the power supply cables have been plugged into the PSU, push the unit towards the back of the case, and secure it using the four hexagonal screws found in the case accessories box.

Then, plug in all of the cables. We recommend starting with motherboard power first and ending with SATA power. If you’re unfamiliar with where these cables go, our Cables & Wiring guide covers all the critical power connectors in a PC build, including front panel wiring.
Step 8: Front Panel Cables & Switch On
The final step of any PC build is cables and wiring. We usually recommend doing this while building the PC, as it can save time, but the benefit of doing it at the end is that you’re aware of component clearances. This simplifies pulling cables through various cutouts or tying them to parts of the case.
While organising cables, we recommend taking the time to plug in front panel cables. This build requires USB-C, USB 3.0, HD Audio and JFP1. Our cables and wiring guide covers what these are and where to plug them in in great detail.

Grab your favourite peripherals and a monitor once the cables have been fully managed and plugged in. Switch on the power at the back, and press the button on the case!
Performance
![]()
4K, High Settings
Avg: 250FPS
Preset: High
V-Sync: Off
Anti Aliasing: TSAA
Texture Filtering: 8x
Ambient Occlusion: High
Volumetric Lighting: High
Dynamic Shadows: Enabled
Model Detail: High
![]()
1080p, Comp. Settings
Avg: 325FPS
Preset: Low
V-Sync: Off
Render Distance: Far
TSR: Off
Global Illumination: Off
Ray Tracing: Off
Effects: Low
Post Processing: Low
![]()
4K, High Settings
Avg: 177FPS
Preset: High
V-Sync: Off
DLSS: Performance
Textures: High
Particle Quality: High
Tessellation: Near
Shaders: High
![]() 4K, High Settings
4K, High Settings
Avg: 98FPS
Preset: Recommended
V-Sync: Off
Anti-Aliasing: TAA High
Effects Quality: High
Texture Quality: High
Shadow Quality: High
Motion Blur: Off
Our benchmarking data shows that the NVIDIA RTX 4090 and Intel Core i9-14900K perform exceptionally well in AAA titles at 4K. This enthusiast PC can easily handle the demands of top-end gaming, offering excellent framerates across a range of titles.
Gallery


![FI_[SR190] HYTE X50 Ryzen 5 9600X & MSI RTX 5070 Ti](https://geekawhat.com/wp-content/uploads/2026/01/FI_SR190-HYTE-X50-Ryzen-5-9600X-MSI-RTX-5070-Ti-551x431.jpg)

![FI_[DP064] ASUS Prime AP303 + 9070XT](https://geekawhat.com/wp-content/uploads/2026/03/FI_DP064-ASUS-Prime-AP303-9070XT-551x431.jpg)