The AMD Radeon RX 7900 GRE is an excellent mid-range graphics card at a highly affordable price. Designed for 1440p gaming, it can easily handle modern and Esports titles and provides high framerates thanks to its solid hardware. This card is one of AMD’s best priced options for those on a tighter budget, so what better way to showcase how good it is than by building an affordable gaming PC?
In this PC build guide article, we’ve highlighted the RX 7900 GRE as the heart of this system. We paired it with the AMD Ryzen 5 7600 CPU and housed everything inside one of Montech’s incredibly price-conscious cases, the XR.
We’ve stuck to a budget of around $1300, which allows us to maximise graphical performance but keep costs relatively low. This article covers the entire building process from start to finish, along with performance metrics and a dedicated build video we recommend watching alongside this article.
Build Process
Step 1: Socketing the CPU
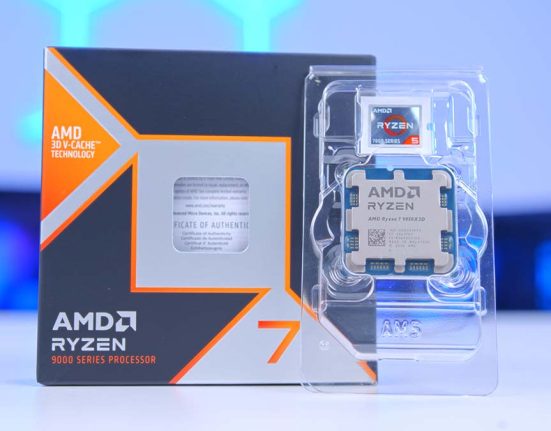
The first component in this build is the CPU. We’ve selected the Ryzen 5 7600 as it is incredibly affordable, sitting well below $200 at the time of writing. Gaming performance is a strong point of the Ryzen 5 7600. Due to its low power budget and core count, this CPU can consistently sustain its boost clock speed of 5.1GHz, quickly handling instructions and processes.

Across our gaming benchmarks and tests, the Ryzen 5 7600 demonstrated solid capabilities at 1080p and 1440p, alongside great 4K gameplay when paired with an appropriate graphics card. For a budget CPU, the Ryzen 5 7600 is a worthwhile pickup, and with the Ryzen 9000 range having launched, prices for this CPU are likely to fall more, further improving the value proposition.
Remove the motherboard from the box and place it on top. This will act as a smooth and stable work surface, holding the motherboard in place while reducing the risk of damage to the PCB or any pins underneath.

Find the retention arm next to the CPU socket and unhook it, releasing the tension on the metal socket cover. Lift the metal cover, exposing the pins underneath. Grab your CPU and locate the golden arrow on the processor. This arrow indicates the correct orientation of the CPU and is typically situated at the top right of the processor. Find a matching arrow on your motherboard and line these up. Slowly lower the CPU into the socket.
The CPU should drop in place and does not require force to be positioned correctly. Lower the cover on top of the CPU and push the metal retention arm down. It needs some pressure to go back underneath the hook, but this is normal. While this is happening, the plastic protector will pop off. Keep this inside the motherboard box if needed for a future RMA or repair.

The motherboard our CPU has just been installed into is the Gigabyte B650 Eagle AX. We’ve used the B650 Eagle AX in a couple of our previous PC builds because of its competitive price point and a solid set of features explicitly geared towards price-conscious buyers.

On the features front, the B650 Eagle AX motherboard supports RAM overclocking speeds up to 7600MT/s at the maximum. RAM overclocked past 6000MT/s can offer improved performance at the cost of stability. Alongside the decent overclocking capabilities, this board has space for a Gen5 SSD and two further Gen4 slots for more storage expansion.
Additionally, the B650 Eagle AX has nine USB ports. Three are USB 3.2 Gen1 or higher, while the rest are USB 2.0. While it’s a shame there are so many USB 2.0 ports, it’s still great to see a solid selection for those with plenty of peripherals.
| Specification | Gigabyte B650 EAGLE AX |
|---|---|
| Form Factor | ATX |
| Supported Memory | 192GB DDR5 7600MT/s |
| PCI-E x16 Slots | 1 x PCI-E 4.0 |
| PCI-E x4 Slots | 1 x PCI-E 5.0 2 x PCI-E 4.0 |
| Front IO | 1 x USB 3.2 Gen1 1 x USB 3.2 Gen1 Type-C 3 x USB 2.0 |
| Rear IO | 2 x USB 3.2 Gen2 Type-A 1 x USB 3.2 Gen1 Type-C 6 x USB 2.0 |
| Audio | 3 x Audio Jacks |
| Networking | WiFi 6E Gigabit LAN |

Step 2: Slot in the RAM DIMMs
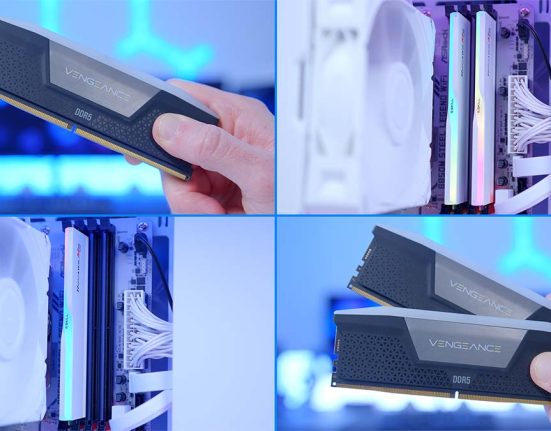
The RAM DIMMs in this configuration are from the TeamGroup T-Force Vulcan kit. This is one of the best value kits on the market because it offers solid performance and is highly affordable. Regarding specs, these DIMMs provide a capacity of 32GB, clocked in at 6000MT/s, and have a latency of CL30.

6000MT/s is the sweet spot for most DDR5 systems, as higher speeds cause instability. Because the latency is also rapid, the TeamGroup T-Force Vulcan memory thrives across gaming and more challenging productivity workloads. It’s worth noting that this RAM is a bit more bland-looking than some other kits we’ve looked at. There’s no RGB on top of either stick, but the black heat spreader blends in nicely with the darker theme of the build.
First, push down the tabs on slots two and four to install this RAM in the motherboard. We’re using these slots because this is the most efficient configuration when a PC only has two sticks of RAM.

Take one of the RAM sticks and line it up with the second slot on the motherboard. They can only go one way, so ensure the DIMMs are lined up correctly. Apply even pressure to both sides of the RAM until it clicks. This indicates that the RAM is correctly seated inside the board and that the push tabs lock it in place. Do this again for the second RAM stick.

Step 3: Mount the SSD
For storage, we’ve chosen the reliable Crucial P3 Plus SSD. At the time of writing, the market has reached a point where pricing for previous-generation storage is remarkably competitive. Gen4 storage prices have reached an all-time low, which allows us to easily pick up a solid-performing drive for a relatively low price point, maximising the amount of money we have for other components.

This drive has multiple capacities, but we’ve chosen a 1TB variant. While 2TB would be preferable for longevity, this 1TB drive should be enough to house a selection of big games, our Windows operating system, and other applications such as Discord and game launchers. Additionally, the fast read and write speeds suit this system’s needs and will keep game load and boot times to a minimum.
To install this SSD properly, the primary heatsink SSD must be unscrewed first. The heatsink has a small screw on the left-hand side, and loosening this will allow you to remove it, opening up the space underneath.

Remove the tape from the thermal pads on the heatsink and underneath the drive. Then, insert the Crucial P3 Plus into the M.2 drive slot. It will poke out at a 45-degree angle until we put some weight on it.

Using the M.2 screw that comes with the SSD, push the drive down until the screw hole lines up with the standoff, and secure the drive in place. Finally, place the heatsink back on top of the drive and secure it.
Note: Before placing the motherboard into the case, make sure to remove the plastic AMD clips by loosening the four screws, as we’ll need to use the posts underneath for the CPU cooler install later on.

Step 4: Place the Motherboard Inside the Case
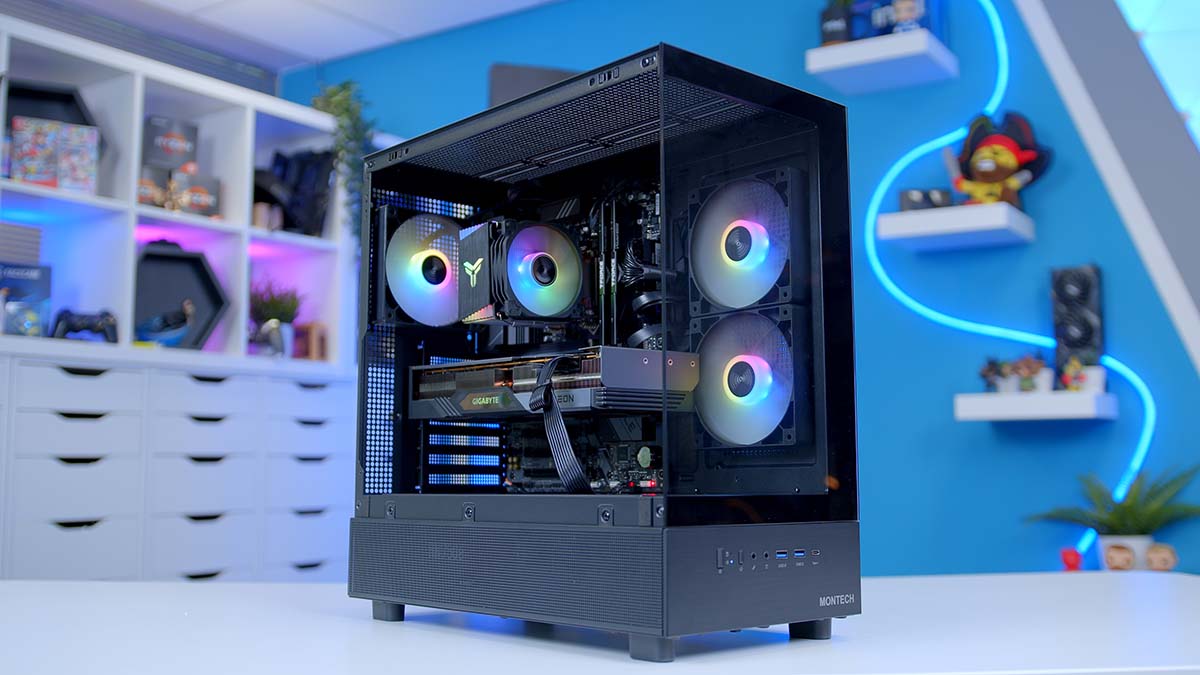
The case housing all of the components in this PC build is the Montech XR. This compact chassis provides ample room for modern components while keeping build costs affordable. At the time of writing, the Montech XR is available for around $60 (depending on the vendor), which is a truly budget price point.

This case features a dual-glass panel design on the front and sides, providing an unobstructed view of the components inside. It offers a wood finish on the front IO, which is a unique touch that elevates the aesthetic. Additionally, the Montech XR comes with three pre-installed fans and can house graphics cards up to 420mm long, which is more than enough room for AMD Radeon 7000 and NVIDIA RTX 4000 GPUs.
| Key Specs | Montech XR |
|---|---|
| Form Factor | Mid-Tower |
| Motherboard Support | Mini-ITX, Micro-ATX, ATX |
| Case Dimensions (L x W x H) | 435mm x 230mm x 450mm |
| Front IO | 1 x USB Type-C 1 x USB 3.0 Type-A 1 x 3.5mm Microphone Jack 1 x 3.5mm Headphone Jack |
| PCI-E Slots | 7 |
| Colour | Black White |
| Max Clearance | 175mm CPU Cooler Height 420mm GPU Length 230mm PSU Length |
| Drive Support | Up to 2 x 2.5 inch Up to 2 x 3.5 inch |
| Fan Support | Top: 3 x 120mm Side: 2 x 120mm PSU Shroud: 3 x 120mm Rear: 1 x 140mm |
| Radiator Support | Top: Up to 360mm |
| Pre-Installed Fans | 3 x 120mm |
Installing the motherboard is a pretty simple process. Because the Montech XR is configured to support ATX motherboards out of the box, there’s no reason to adjust any standoffs. Place the Gigabyte B650 Eagle AX into the case, lining up the built-in IO shield with the rectangular cutout towards the top left.

Once the board is lined up correctly, the standoffs should be visible through the circular holes around the edge of the PCB. Take the small screws found in the accessories box and use these to screw the motherboard down. Don’t overtighten the screws, as this could potentially damage a standoff, which can make future upgrades quite challenging.
Top Tip: This step can be done with the case standing up or lying down. We often recommend lying the case down when installing the motherboard, making the process easier.

Step 5: Install the Power Supply
James decided to install the power supply next to change things up slightly. Doing this might seem odd, but getting all the wiring done before the graphics card and CPU cooler go in is often easier. These steps can be done with relative ease, whereas wiring is time-consuming.
The unit powering all of the parts in this system is the Corsair RM750e power supply. The Corsair RM750e is a bit pricier than our usual power supplies. However, by selecting a solid unit to power the build, we’re ensuring it lasts a long time and provides room for future upgrades.

The Corsair RM750e is a bit pricey due to its fully modular cabling system and efficiency rating. This PSU allows you to pick and choose the cables you need, resulting in a much cleaner build. It also has an 80 Plus Gold efficiency rating, guaranteeing minimal power will be lost as heat or noise during 20%, 50%, and 100% load.
Before placing the power supply into the case, we must pick out the cables needed for this build. We’ll need a 24-pin motherboard power cable, an 8-pin EPS CPU cable, and two 8-pin PCI-E graphics card cables.

Slide the power supply into the back of the case and use the hexagonal screws to secure it in place. Make sure to use the suitable screws, as the wrong ones could damage the threads on the unit.

Next, we can start partially wiring up the power cables for this build. Starting with motherboard power, this is the long rectangular connector, and its header is on the right side of the motherboard. It can only go in one way and will click slightly once correctly seated. We recommend giving the cable a slight tug to double-check that it won’t come out.

CPU power is situated at the motherboard’s top left; fortunately, the Gigabyte B650 Eagle AX only has one header. Because of its small size, this can be a bit tougher to plug in, but again, tug at the cable afterwards, ensuring the clips are correctly engaged. We’ve also got graphics card power, but we’ll save this for later once the GPU is installed.
Step 6: Front Panel Wiring
Continuing with wiring, we can also take this opportunity to plug in the rest of the front panel cables for the case IO. Starting with HD Audio, this header has a selection of multi-coloured wires, so it’s relatively easy to pick out from the rest of the headers. It also has one blocked-out pin, so it can only go in one direction.

The JFP1 header (or front panel power) uses a unified header instead of individual pins, so plugging it in is incredibly easy. Find the label that says JFP1 and install it. This is a mandatory header to plug in, as it allows you to use the power button.

The last two headers are USB 3.0 and Type-C. The USB 3.0 header has a slight notch in the middle of the connector, so it can only be plugged in one way.

The USB Type-C header is notched, so it can only go one way. This is needed to provide data and power for the USB Type-C port on the front-panel USBs.

Step 7: Mounting the Graphics Card
One of the final components in this build is the graphics card, which is the star of this system. The AMD Radeon RX 7900 GRE launched at the start of 2024, which, in the current lineup, places it between the RX 7900 XT and RX 7800 XT. At $50 more than the RX 7800 XT, the RX 7900 GRE is a competitive choice for upping your performance in modern games at 1440p.
Across our testing, this card is a solid option for AAA titles like Hogwarts Legacy and Cyberpunk 2077. And in less intensive titles, you can reach excellent framerates, making it a solid pickup for those with high refresh rate displays.

The variant going into this budget system is the Gigabyte Gaming OC card. This GPU offers a triple-fan shroud designed to keep temperatures and noise levels low. Additionally, because this is an OC model, the boost speed has been overclocked slightly, which means there’s more performance on the table to leverage.
| Specification | Gigabyte RX 7900 GRE Gaming OC |
|---|---|
| Video Memory | 16GB GDDR6 |
| Memory Bus | 256-Bit |
| Core Clock Speed | 1.28GHz |
| Boost Clock Speed | 2.39GHz |
| Stream Processors | 5120 |
| Ray Accelerators | 80 |
| Compute Units | 80 |
| Power Consumption | 260W |
| GPU Length | 302mm |
Remove the second and third PCI-E covers at the back of the case. These need to be removed so the IO is accessible. We’re taking out covers two and three because this is where the RX 7900 GRE lines up in the case.

Once both covers are out, place them inside the case accessories box. Grab the graphics card and firmly push it into the slot on the motherboard. You should hear a click sound, indicating that the card is correctly seated. Use the screws removed from the CPU covers to secure the GPU to the case.

Finally, install the final two PCI-E power cables. Plug them into the graphics card and give the wires a firm tug to ensure they won’t easily come out.
Step 8: Screw in the CPU Cooler & Power On
The last component to be installed is the CPU cooler. We’ve opted for the Jonsbo CR-1400 air tower cooler, designed to rival competitor brands such as DeepCool and Vetroo, which also offer highly affordable CPU coolers. The Jonsbo CR-1400 is pretty basic when it comes to cooling, utilising a single large heatsink matrix and fan. However, it can handle the performance demands of the Ryzen 5 7600 CPU.

You’ll find RGB lighting on the fan and top of the heatsink. It’s nice to see some RGB on a cheaper cooler, and it is addressable, so builders can customise and sync up the lighting with other RGB components in this build.
Take the cooler out of its box and take the plastic protector off the copper plate. This must be removed before, or thermals will be significantly hindered.

Locate the AMD mounting brackets. These are much straighter than their Intel counterparts, which will point diagonally instead of north and south. Flip the tower cooler upside down and secure the brackets using the small screws. Make sure the mounting bracket screws are pointing upwards, as this is the correct orientation for the cooler to be installed.

With some thermal paste, place a rice grain-sized amount on the CPU, ensuring it covers the height of the IHS (internal heat spreader). The Jonsbo cooler has no pre-applied thermal paste, but it comes with a bag of paste you can apply yourself.
After this, place the cooler inside the case and screw it down into the threads on the motherboard. Tighten the screws in a star pattern to ensure that even pressure is applied as it becomes more secure.

Finally, plug the four-pin header into the ‘CPU_FAN’ connector on the board and the 3-pin ARGB header into an appropriate connector. Once this is done, place the panels back on the case, plug in some peripherals and a monitor, and switch on the power!
Performance
![]()
1440p, High Settings
Avg: 231FPS
Preset: High
V-Sync: Off
Anti Aliasing: TSAA
Texture Filtering: 8x
Ambient Occlusion: High
Volumetric Lighting: High
Dynamic Shadows: Enabled
Model Detail: High
![]()
1080p, Comp. Settings
Avg: 275FPS
Preset: Low
V-Sync: Off
Render Distance: Far
TSR: Off
Global Illumination: Off
Ray Tracing: Off
Effects: Low
Post Processing: Low
![]()
1440p, High Settings
Avg: 111FPS
Preset: Custom
Resolution Scaling: FSR
Texture Quality: High
Anisotropy: x8
Contact Shadows: On
Ambient Occlude: High
Level of Detail: High
![]() 1440p, High Settings
1440p, High Settings
Avg: 101FPS
Preset: Custom
Resolution Upscaling: FSR
Texture Res: High
Volumetric Light: High
Shadow Res: High
SSAO: On
Motion Blur: Off
We’ve changed our benchmarks slightly for this PC build and are now featuring two AAA games. Both are quite popular and a great way of gauging graphical performance because they’re quite demanding.
Across Cyberpunk 2077 and Alan Wake II, framerates exceeded 100FPS. The RX 7900 GRE is an excellent performer in rasterised gameplay, so we’re seeing solid returns because of that.
The strong performance continued through to the Esports games. Fortnite and Apex Legends saw insane framerates, surpassing the 144Hz sweet spot with 275FPS and 231FPS, respectively.
Gallery


![FI_[SR190] HYTE X50 Ryzen 5 9600X & MSI RTX 5070 Ti](https://geekawhat.com/wp-content/uploads/2026/01/FI_SR190-HYTE-X50-Ryzen-5-9600X-MSI-RTX-5070-Ti-551x431.jpg)
![FI_[DP064] ASUS Prime AP303 + 9070XT](https://geekawhat.com/wp-content/uploads/2026/03/FI_DP064-ASUS-Prime-AP303-9070XT-551x431.jpg)
![FI_[DM93] Corsair 3200D Launch](https://geekawhat.com/wp-content/uploads/2026/03/FI_DM93-Corsair-3200D-LAUNCH-551x431.jpg)
![FI_[DM89] Phanteks Evolv + AORUS 5090 9850X3D Gallery (8)](https://geekawhat.com/wp-content/uploads/2026/02/FI_DM89-Phanteks-Evolv-AORUS-5090-9850X3D-Gallery-8-551x431.jpg)