Daisy-chainable fans have blown up in the PC component space, with many manufacturers providing cable-less solutions for liquid coolers and individual fans. The MSI EZ range streamlines the building process by providing a seamless magnetic daisy-chained design that simplifies cable management by a considerable margin. It’s as ‘EZ’ as connecting each fan using the magnetic blocks and plugging the hidden cables into the necessary hub and headers.
MSI’s EZ120 fans join an already highly competitive market likely to spark confusion for first-time builders or those who haven’t upgraded in some time. That’s why we’ve put this installation guide together. We’ll cover how the MSI MPG EZ120 fans work, along with a step-by-step guide and our thoughts on the installation process.
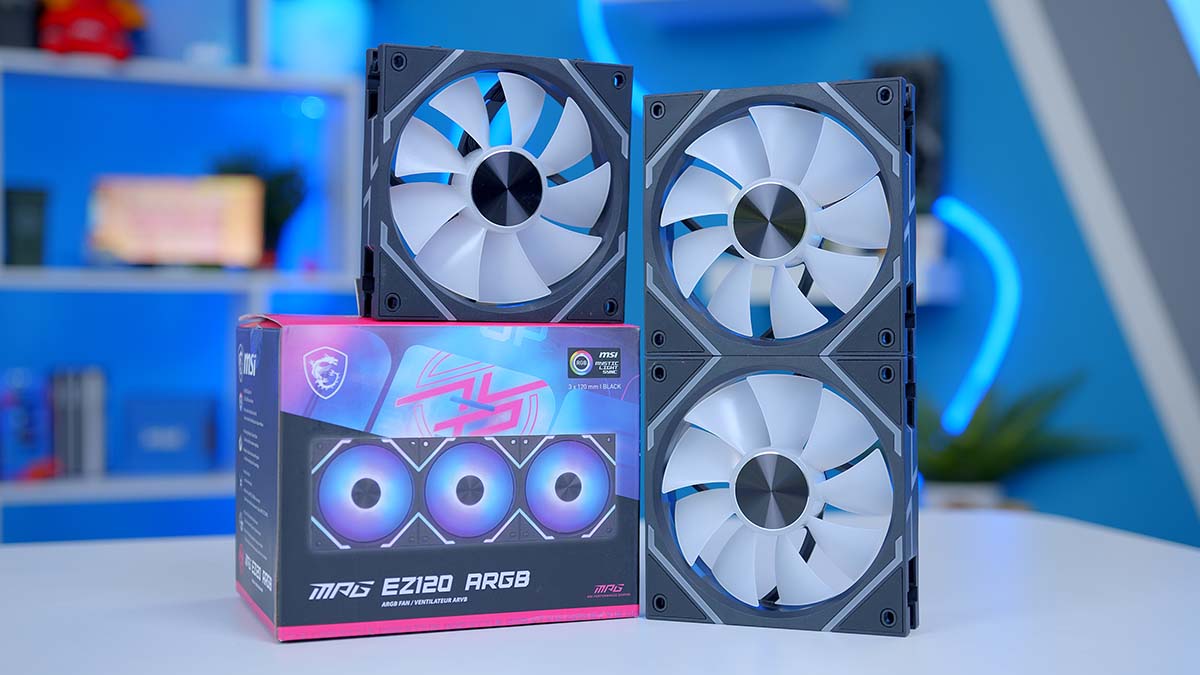
Buy the MSI MPG EZ120 Fans on:
Specification
As you can probably guess based on the name, the MSI MPG EZ120 series are 120mm fans and are 28mm thick. This is a relatively standard thickness for daisy-chainable fans, as most market options need to be this thick to house internal components such as pin arrays, thermal sensors, or RGB LEDs. So far, MSI hasn’t announced any plans to release an EZ140 set of fans, but we might see a future release later down the line.
They come in standard colours for fans, so prospective buyers can choose between black and white. We’ve used the black versions, but the white fans provide a lighter theme for those looking to escape the darker style.

Regarding speed and noise levels, the MPG EZ120 fans can spin up to a maximum of 1900RPM, reaching a noise level of 28.8 decibels. Compared to Corsair QX120 fans, the MPG EZ120 options are slightly weaker. This likely comes down to the bearing type. MSI uses a fluid dynamic bearing, while Corsair opts for a magnetic dome, which effectively alleviates friction and allows them to spin faster. However, the faster speed results in a higher noise level, so there are drawbacks.
| Specification | MSI MPG EZ120 |
|---|---|
| Dimensions (L x W x H) | 120mm x 120mm x 28mm |
| Size | 120mm |
| Colour | Black White |
| Max Fan Speed | 1900RPM |
| Max Fan Noise | 28.8dBA |
| Bearing Type | Fluid Dynamic |
| Fan Connector | 7-pin JAF 4-Pin PWM & 3-pin ARGB |
MSI has provided two different connectors for fans and RGB. The latter, 4-pin PWM and 3-pin ARGB are universal standards that allow the EZ120 fans to be used without issues across any motherboard. However, the 7-pin JAF connector is for those with more modern boards. The latest MSI ‘MAX’ series of boards feature a JAF header, squeezing ARGB and system fan settings through just one cable, handling data and power.
In terms of pricing, the triple pack is available for around $119.99 at the time of writing, while an individual fan is $39.99. This is quite expensive compared to traditional fans, but this price is much more favourable versus Corsair’s iCUE QX120 range, which sits closer to the $150 mark.
MSI MPG EZ120 Design
On the design front, each of the MPG EZ120 fans features a futuristic shroud, with small RGB strips lining the centre of the fan. MSI has adhered to a square chassis for each fan, which results in a somewhat bulkier look. However, instead of just being on the fan, the RGB on the front helps distinguish this aesthetic from other models.

The sides continue the RGB lighting effects, with the small strips wrapping around. While this isn’t necessary, it allows the MPG EZ120 fans to look good from multiple angles, which is a limitation of other models that only feature black or white plastic around the sides.

On the corners of each fan, you’ll find a small grid of pin contacts, which provide the daisy-chain signal to other fans. Uniquely, these contacts are not restricted to a specific connector or cable. For example, if your data and power cables are on the wrong side, the cable connector can be moved to the corner, and it will snap in place with magnets.

Also, MSI has gone the extra mile to ensure no wires or uncovered contact points are exposed. Each pack of fans features a small L-connector for the corners, providing a streamlined build aesthetic.

Installing the MSI MPG EZ120 Fans
Getting the EZ120 fans installed in our build configuration was much more straightforward than we initially thought. While there are a couple of extra steps beyond the scope of just connecting the fans up, it doesn’t overcomplicate things too much. First, lay your fans down on a work surface. For those installing a radiator, place the fans on top of the radiator. Then, connect all of the fans into a 360mm unit. No force is required to connect the fans; they sit snugly together due to the magnets integrated into the side.

Once the fans are in a single unit, place the long connector blocks into the notches at the top and bottom of each fan. These blocks cover up the contact pins and daisy-chain the signal for data and power across all of the fans.

Again, these are magnetised and can only go in one direction. They slot very nicely into the small notches and are flush with the fans’ chassis, so there are no worries about the connectors bumping into other components.

Continue with these connectors across the top and bottom, and use the L-shaped connectors for the corners. Leave one free, and this is where the cable connector will go. You want to ensure that this connector is in a corner where the cables can easily thread through to the rear of the chassis, depending on where the fans are being mounted.
Next, install the fans inside the case like any standard set of fans. If they’re being secured to a radiator, use the long radiator screws. If not, use the smaller stubbier screws to attach the fans to the case instead.

MSI MPG EZ120 Cables & Wiring
After the fans are installed inside the case, they must be wired to the motherboard. There are two ways to approach the wiring for the EZ120 fans: PWM and ARGB versus JAF. Note that the JAF header is only available for modern MSI motherboards (14th-Gen onwards), as older boards do not support this. Plug either of these into their respective headers; the other end must go into the MSI hub.

The Micro-USB cable takes all data control from a USB 2.0 header. Again, plug one end into the hub and the other into a free front USB 2.0 header on the motherboard.

The SATA power cables provide power for each of these fans. If you are plugging in more than 12 fans, both SATA power headers must be secured.

The final cable to plug in is the L-connector attached to the fans’ corner. This cable daisy-chains power and data, which is then controlled through the small MSI hub. The hub has four ports, which use a proprietary type of header. MSI recommends starting with port one and working through to port four if you have more fans or other devices.
It’s worth noting that the MSI MPG EZ120 fans can also daisy-chain the signal from one set of fans to another. If your board does not have additional headers, this method can be helpful for those with multiple EZ120 fans.

MSI MPG EZ120 Installation Process – Our Thoughts
Overall, the installation process of the EZ120 fans was relatively simple and didn’t prove to be too complicated. As a proprietary daisy-chaining system, this often brings confusion concerning which parts must go where. Additionally, introducing extra cables that need to be plugged into various headers is another significant point of contention, but the MSI MPG EZ120 fans significantly reduce this hassle.

All the fans easily clip together, and introducing the connectors at the top and bottom of each fan improves stability and robustness. They don’t feel like they will pull apart if you move them too much, which can be an issue with other designs.
After the fans are clipped together, they can be traditionally mounted like any other fan. There are no extra steps here aside from the cabling. However, the cables and wires are where I feel most manufacturers (MSI included) have perhaps overcomplicated things.

To break this down, the fans have to plug into the hub because they use a proprietary header. While the hub uses universal standards, I feel an adapter would have been an adequate solution instead of adding the hub as a middleman, further increasing the risk of conflicts with non-MSI components.
The physical installation process was very straightforward, and we commend MSI for keeping things simple. But the cabling process, as we’ve seen with other manufacturers, needlessly adds plenty of additional wires.
Conclusion
MSI MPG EZ120 Fans
Product Name: MPG EZ120 Fans
Brand: MSI
-
Design
-
Ease of Use
-
Cabling
-
Value For Money
Summary
The MSI MPG EZ120 fans are among some of the easiest daisy-chainable fans to install. They clip together easily and feel robust and sturdy once the block connectors are in place. After this additional step, the MPG EZ120 fans can be mounted and placed into a build just like any other fan or liquid cooler. Compared to other daisy-chained designs we’ve used in builds, the MPG EZ120 fans streamline the building process significantly, so they’re a solid pickup… until you get to the cabling.
While the cable design isn’t as complicated as a system like iCUE, using a hub and proprietary connectors will likely overcomplicate things for the average builder. The hub uses universal headers, which is good to see. Still, MSI could have cut out the middleman and provided an adapter instead of the hub, further simplifying installation and reducing the risk of RGB and software conflicts. Cabling aside, the EZ120 fans make building a PC much easier, and I think the cabling, to a degree, is a small price to pay for convenience.
Pros
✅ Easy to install
✅ Cool RGB lighting
✅ Uses universal PWM & ARGB
Cons
❌ Overcomplicated cabling
❌ Fan speed vs QX120
❌ Need to use hub