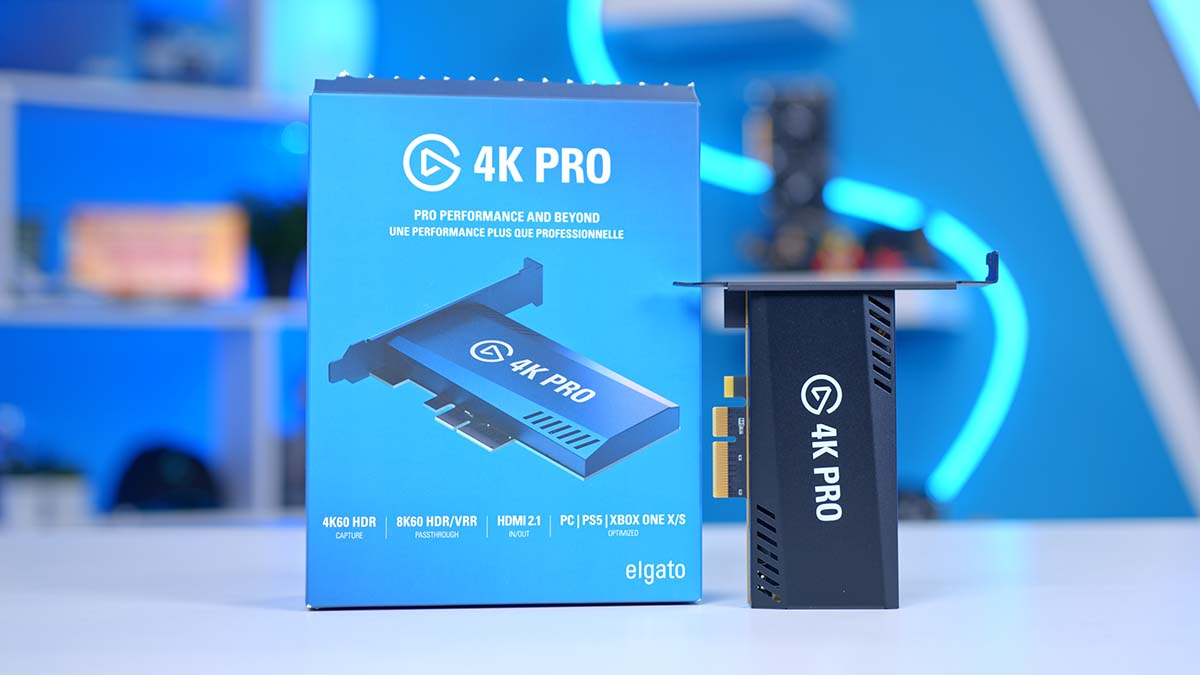
Elgato is one of the staple brands consistently contributing to the content creation and streaming space. For years, Elgato have been the go-to option for a number of audiovisual products, whether you need new lighting, a green screen, camera, microphones, and even capture cards.
Those looking to capture all of their gameplay on a separate computer, or gamers that are streaming a PlayStation title to their Twitch chat will need a capture card. These devices provide a consistent way to record or stream gameplay from an entirely separate device, which is where the Elgato 4K Pro comes into play. This capture card provides buyers with the hardware and software they need to capture gameplay with ease.
In this review we’ll be taking an in-depth look at the Elgato 4K Pro. We’ll be assessing the design, setup, and recording quality to see if this capture card is worth picking up versus market alternatives.
Specifications
Elgato’s 4K Pro is relatively similar to the previous 4K60 Pro, but there’s some notable changes versus its older counterpart. Firstly is the support for 8K passthrough. While the market for 8K is relatively niche, those with an 8K capable display will find solace in the fact that this capture card supports 8K at 60FPS.
Because the Elgato 4K Pro uses HDMI 2.1 which is a further upgrade versus the MK.2 which only used HDMI 2.0, 4K 144FPS passthrough is also supported too. This allows you to enjoy crisp refresh rates at a significantly higher resolution. Pricing has also risen up to $279.99 as opposed to the $229.99 price we saw with the MK.2 card.
The MSRP is going to be a big point of contention for many buyers. While I do understand that this is one of the strongest options on the market, spending nearly $300 on a capture card is not a small amount of money. And this could be justified by the support for 8K displays, but considering your average gamer is playing at 1440p, I don’t feel this adds much to the value of the capture card.
It is worth noting that the 4K Pro is a PCI-Express capture card, so you’ll need to plug this accessory directly into your motherboard. This obviously reduces the portability as you’ll need a dedicated PC build to install it.
| Specifications | Elgato 4K Pro |
|---|---|
| PC Connectivity | PCI-E 2.0 x4 |
| HDMI Interface | HDMI 2.1 |
| Capture Resolutions | 1080p60 1080p240 1440p144 4K60 HDR |
| Passthrough Resolutions | 1080p240 HDR 1440p240 HDR 4K144 HDR 4K240 SDR 8K60 HDR |
| VRR Passthrough | Yes |
| HDR10 Passthrough & Capture | Yes |
| Software | 4K Capture Utility |
| MSRP | $279.99 |
The 4K Pro is also launching alongside the 4K X, which is a portable USB alternative that offers similar specs and hardware to that of the 4K Pro. We’ve highlighted the key specs below.
| Specifications | Elgato 4K Pro | Elgato 4K X |
|---|---|---|
| PC Connectivity | PCI-E 2.0 x4 | USB 3.2 Gen2 Type-C (10Gbps) |
| HDMI Interface | HDMI 2.1 | HDMI 2.1 |
| Capture Resolutions | 1080p60 HDR 1080p240 HDR 1440p60 HDR 1440p144 HDR 4K60 HDR | 1080p60 HDR 1080p240 SDR 1440p60 HDR 1440p144 SDR 4K60 SDR 4K144 SDR |
| Passthrough Resolutions | 1080p60 HDR 1440p144 HDR 4K60 HDR 4K144 HDR 4K240 SDR 8K60 HDR | 1080p60 HDR 1440p144 SDR 4K60 SDR 4K144 SDR |
| VRR Passthrough | Yes | Yes |
| HDR10 Passthrough & Capture | Yes | Yes |
| Software | 4K Capture Utility | 4K Capture Utility |
| MSRP | $279.99 | $229.99 |
Design
Moving onto the design, Elgato’s 4K Pro is pretty much the exact same in terms of look versus its 4K60 Pro counterpart. This capture card sports a black shroud on the front of the card keeping the internals hidden from view.

Moving around to the rear of the card, Elgato have kept the PCB uncovered. While this doesn’t do much for the look, the rear of the card isn’t likely to be visible all of the time, so this won’t be an issue for most buyers.

The Elgato 4K Pro uses a PCI-E x4 interface as opposed to USB. This might be recognisable to those that have built their own PC, as this is the same interface that your graphics card uses. The main difference between your GPU and this capture card is that it needs to use the larger x16 slot to make use of all 16 PCI-E lanes. However, the 4K Pro only needs 4 lanes and can be powered directly off of your motherboard. This is pretty typical for most internal capture cards.

Elgato have kept the design of the 4K Pro pretty sleek. This isn’t a particularly large card, and its good that despite the hardware improvements the size of the capture card hasn’t increased.

As a comparison versus the previous 4K 60 Pro MK.2, these cards are pretty much the exact same from a pure design standpoint. This means those with an existing Elgato 4K 60 Pro looking for an upgrade can easily install this capture card without it altering the look of your system.
Setting Up the Elgato 4K Pro
In this section we’ll be walking you through the steps of how to get the Elgato 4K Pro setup from the hardware installation, all the way to the end where you’ll hit the record button.
Installing the Capture Card
First off, you’ll need to install the Elgato 4K Pro into your PC. You’ll need to find a dedicated slot that supports 4 PCI-E lanes. The best way to find this out is to look at the manufacturer’s motherboard website.
For example, the ASUS TUF Z790-Pro motherboard that we’re using has three slots with x4 support, but because of the larger graphics card that we’re using, we’ve got limited options. Looking at ASUS’ website, the product page for this board indicates that the bottom slot is an x4 option, so this is where we’ll be installing the GPU.

Once you’ve done this, you’ll want to make sure you screw in the capture card to secure it in place, as any sag can slowly damage the slot over time. The capture card is powered by your motherboard, so you don’t need to plug in any additional power connectors.
Before booting up your PC you’ll need to plug in your HDMI cables. The port labelled ‘IN’ will need to connect to the device that you’re capturing. Whether you’re using a PlayStation 5, or you need a dedicated PC to capture games from to free up resources, this needs to be connected up to the ‘IN’ port. Make sure the port on your console or PC offers an HDMI 2.1 signal, or else you won’t be able to utilise higher refresh rates at 4K or 1440p.
To the ‘OUT’ port, this will need to be plugged into your monitor or display of choice. Again, make sure this is an HDMI 2.1 port to ensure you can leverage high refresh rates.

No Video Signal
If you’ve booted up your PC and you’re getting a black screen, there’s a possibility that your monitor might be using a technology known as (DSC). Display Stream Compression essentially encodes video that is visually lossless to fit higher resolutions and framerates over HDMI 2.1. The Elgato 4K Pro does not support high refresh passthrough with monitors that use DSC.
To fix this issue you may need to adjust the resolution and refresh rate of your monitor. With the 4K Pro in your PC, DSC caps out at 4K 120Hz, so this is a good starting point to get your video signal up and running.
Software Setup
Next you’ll want to download your recording or streaming software of choice. We generally recommend OBS, but Elgato’s 4K Capture Utility is a solid option for those just looking to record at 4K.
Once you’ve booted up OBS, it is very easy to get the 4K Pro working. From the sources menu, you’ll want to click the small plus button, and then click ‘Video Capture Device’.

This will open up a secondary window that will allow you to change settings. From the dropdown at the top of the window you’ll need to select “4K Pro”, this will then start capturing your display that you’re playing games on.

Once you’ve done this you can simply click record or start streaming straight away. Alternatively there are some additional settings that you can change dependent on the resolution you’re looking to play at.
Towards the bottom right of OBS click the ‘Settings’ button. This will then open up another window with a variety of different tabs and settings to choose from.

Click the ‘Video’ tab. From here you can change the capture resolution and framerates. The Elgato 4K Pro has a vast range of resolutions you can play at, so there’s plenty of options available.

Fortnite Elgato 4K Pro Gameplay
Below we’ve provided a gameplay recording of Fortnite with the 4K Pro. Performance was stable across the board. We set our capture FPS to 60, with passthrough at 4K144, allowing us to enjoy a crisp refresh rate while securing our Victory Royale. We had no troubles with the video or audio quality once the 4K Pro was fully setup, which goes to show how simple this capture card is to use once everything is plugged in and ready to go.
Conclusion
Elgato 4K Pro Capture Card
-
Ease of Setup
-
Design
-
Performance
-
Value For Money
Summary
Elgato’s 4K Pro is a simple to use capture card that provides content creators with the tools they need to record gameplay from another device at high resolutions and refresh rates. This capture card is highly easy to setup, and offers buyers a well-rounded experience that will result in high content. The vast support for varying resolutions and framerates makes this capture card a highly competitive option versus other market alternatives, and hits a gap in the market for content creators regularly recording at 4K or higher.
My only qualm with this capture card is the fact that Elgato’s very own 4K X looks to be a stronger option. Elgato’s 4K X capture card is pretty much the exact same as the 4K Pro apart from the fact that it doesn’t support 8K passthrough, it interfaces through USB, and it is around $50 cheaper. While the support for 8K displays doesn’t take away from the strengths of the 4K Pro, I don’t feel it adds much either. 8K TVs are not widely available and highly expensive, putting them in a niche category versus 4K and 1440p options. Because of this, I feel the 4K X is a stronger capture card for most buyers, based on how similar it is to the 4K Pro and the fact that it is cheaper.
Despite this, Elgato’s 4K Pro capture card is a great option for 4K, and potentially even 8K gamers if you’re willing to shell out the extra cash to pick up this particular variant.
Pros
✅ Simple setup
✅ Vast resolution support
✅ Perfect for content creation
Cons
❌ Expensive
❌ 4K X as competition
❌ Niche market for 8K


