
Introduction
Putting together a PC build can be a confusing experience with a plethora of different part names, software configurations and installations that can go wrong. One of the most critical stages of any build is installing Windows, which can be baffling and frightening if you don’t know what you’re doing.
In our series of ‘How To’ articles we seek to put your mind at ease and make your PC building experience easier with a series of guide on how to install and put together a gaming PC. Today’s focus is installing Windows, where we’ll be covering off the entire Windows 10 & Windows 11 installation process, including boot options within the BIOS.
Suggested Article: How To Install Drivers on Your Gaming PC Build
Windows 10 or Windows 11?
Firstly, before we get into the guide we should cover why you might choose Windows 11 over Windows 10. There are two primary reasons why you might go for Microsoft’s newer operating system. The first of these reasons is TPM 2.0. With the release of Windows 11, Microsoft made it a requirement that all users have a TPM 2.0 module on their motherboard or CPU for security reasons. Due to Windows being the most used operating system in the world, this makes it a target of various attacks with one of the primary ones being Ransomware.
The purpose of TPM 2.0 is to bring more protection for users across the board, hence the requirement on Windows 11. Those of running older hardware might want to do some research beforehand to check if the motherboard or CPU in your build supports TPM 2.0, because if it doesn’t Windows 11 won’t be installable.
The second reason is the UI difference. Windows 10 has been the ‘staple’ operating system for 5 or so years, so many users might be used to the look and function of Windows 10. Windows 11 has taken more of a Chromebook-style approach when it comes to functionality, with the taskbar centre aligned, and more ‘cartoony’ looking icons. The point of Windows 11 is to be more user friendly, providing simpler and quicker ways to navigate. Whether you prefer this change is entirely down to personal preference, and will be a large motivating factor when considering whether or not to jump on the Windows 11 bandwagon.

Installation Guide
The instructions below will differ slightly based on your motherboard manufacturer, and the components in your system, but will essentially remain the same for the most users. We will aim to cover off the Windows Media Tool, along with navigating the BIOS, including changing the
boot priorities, and enabling TPM 2.0 for Windows 11 users. We won’t be covering drivers in this article, as we have a dedicated piece which covers off How To Install Drivers on Your Gaming PC.
Step 1: Grab a USB Stick
Firstly, you will need a USB stick. This flash drive will need to be at least 8GB in capacity, so if you’ve got a spare one lying around, backup anything that was stored on it, and plug it into an existing PC. Make sure that Windows has detected this drive is plugged in and working.
Remember: Back up any existing data on the drive, as this will be wiped when running through the Windows Media Tool process.

Windows Bootable Media Tool
Suggested: Windows 10 Boot Media Installation Tool (via microsoft.com)
Suggested: Windows 11 Boot Media Installation Tool (via microsoft.com)
Step 2: Download the Media Tool
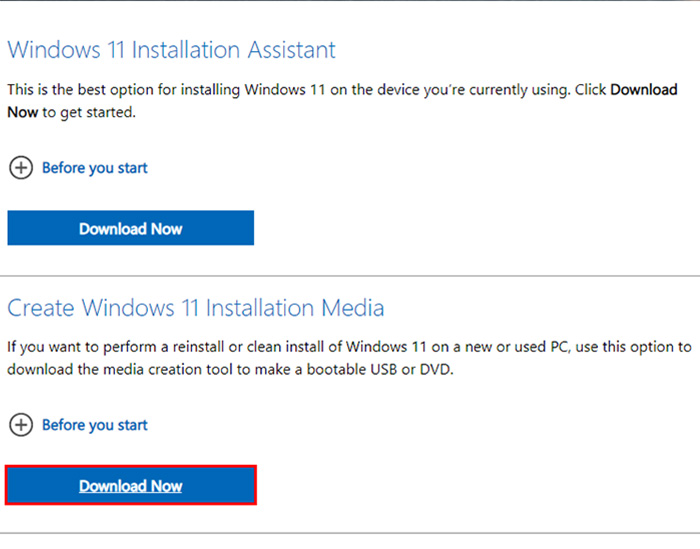
Next you need to fire up a web browser and type in ‘Windows Media Creation Tool‘. Based on which operating system you’ve decided to install, you’ll also need to throw in Windows 10 or Windows 11 to that search to make sure you get the right installation tool. Once you’ve found Microsoft’s page (do not use third party websites), click the ‘Download Now’ button for Windows 11 Installation Media. This will start downloading the tool for you to use.
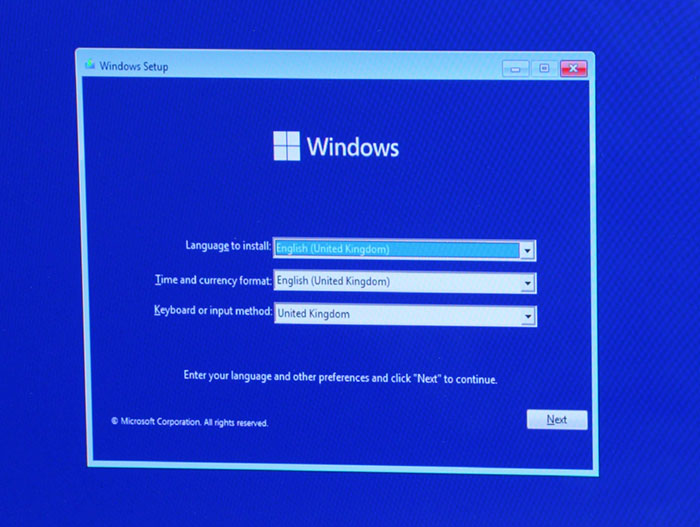
Step 3: Select your Language & Edition
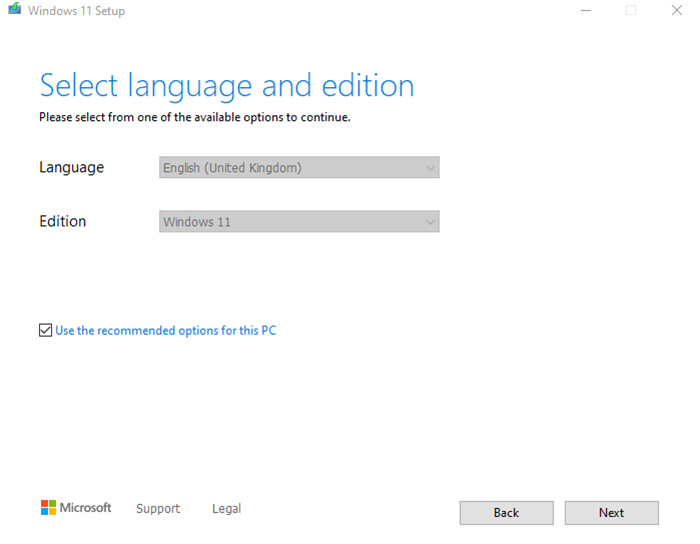
Once you’ve booted up the media tool, you’ll want to click accept, and you’ll then be presented with this screen. Here you can select your language and the edition of Windows which in this instance is Windows 11.
Step 4: Plug in your USB
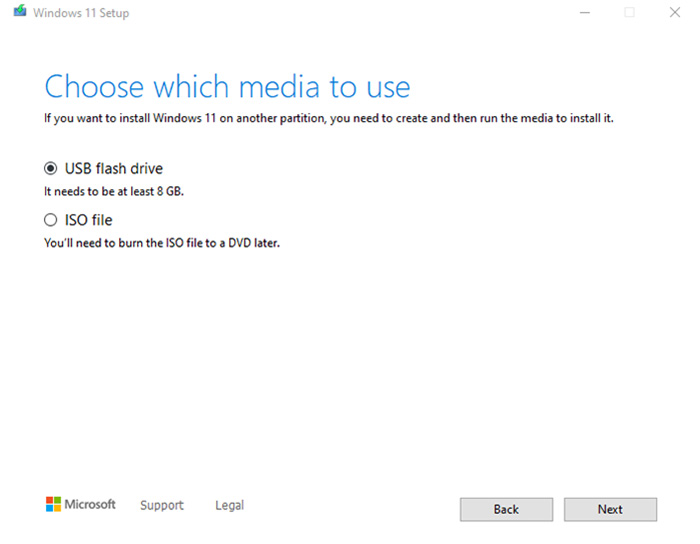
Once you’ve selected your language and edition you can click next. You’ll see this screen which is now time to plug in that handy USB we mentioned earlier. Make sure USB flash drive is selected and not ISO file. Once you’ve done that you can click next and move onto the next step.
Step 5: Select your USB drive
If you’ve got multiple drives or USBs plugged in you’ll need to ensure that the drive you select is the right one. Double check in file explorer which USB is the correct one and then jump back onto your Windows setup and click next.

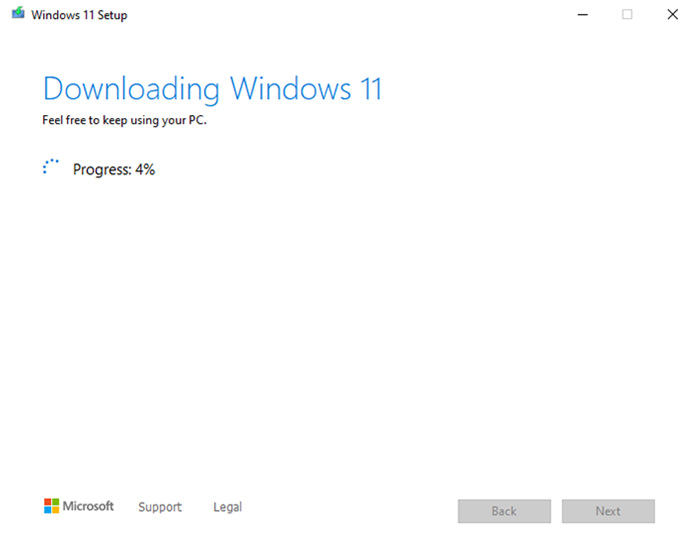
Step 6: Grab a Cup of Tea and Wait
Now is the part where we wait for Windows to download and then for the tool to create bootable media. If you’ve got a particularly slow download speed, we’d recommend grabbing a cup of tea and waiting for this tool to finish and then come back. The tool will download windows, and then create the Windows 11 installation media on your USB drive for you to use later.
Step 7: Move onto BIOS
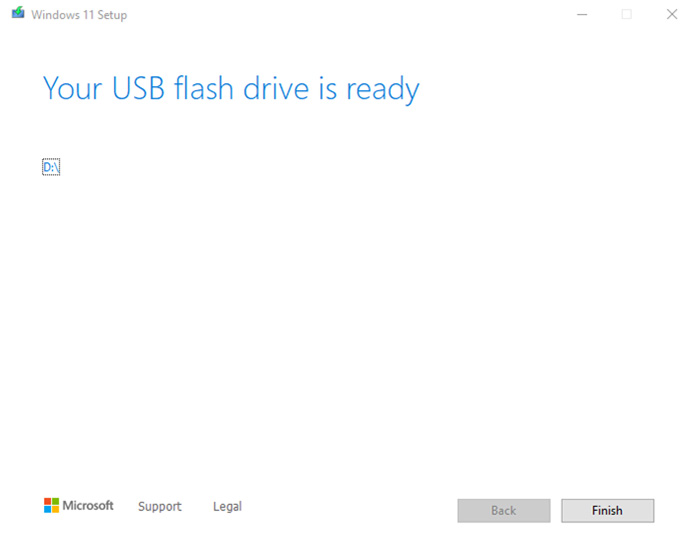
Your Windows installation tool should have finished now and you’ll see a screen that says ‘Your USB Flash Drive is Ready’ and there will be a button at the bottom right that says ‘Finish’. Simply click that and you’re done. You can move onto the next step and get your new bootable USB plugged into your gaming PC.
Step 8: Boot into BIOS
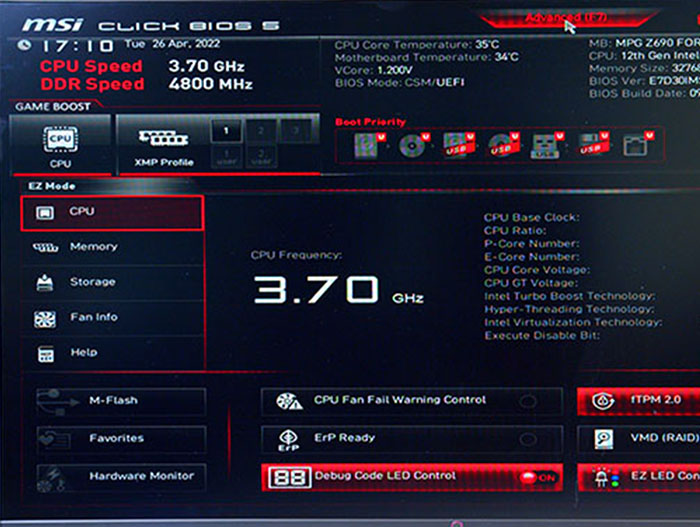
Now you’ll want to take the installation USB that you’ve created and move over to your gaming PC. Make sure you’ve got a monitor, mouse and keyboard plugged in too. Turn on your PC and continually start pressing the ‘delete’ key on your keyboard. Doing this while your PC is starting up will allow you to boot into BIOS.
Once your PC has fully turned on you will see a screen similar to the picture we’ve attached. The BIOS screen will change dependent on your motherboard manufacturer, but they all share similarities. This is the EZ mode of MSI’s BIOS, which allows you to make quick tweaks. For more in-depth information on different BIOS, check out our motherboard reviews.
Step 9: Selecting Your Drive
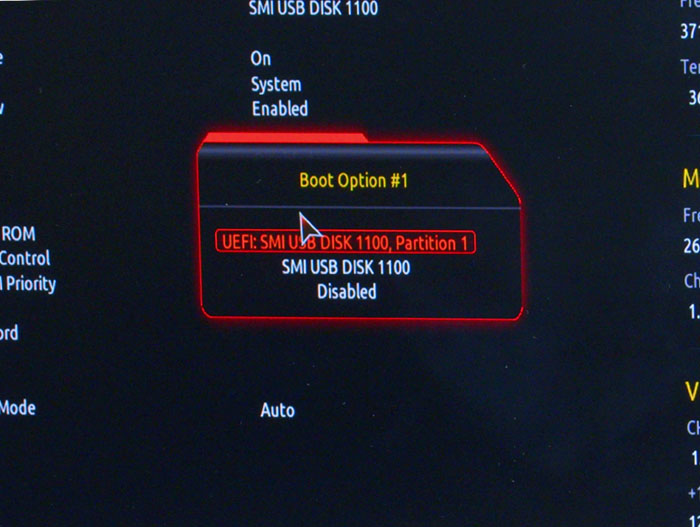
This is the most important part of the setup, selecting your boot priority settings. Navigate to the advanced mode of your BIOS, which is often accessed by hitting ‘F7’, or another function key. Once here, there will be a tab or screen that you can use to look at the boot priorities.
Here you need to click ‘Boot Option 1’ and change it to the UEFI USB partition. This is where the Windows installation is located, and this will allow you to boot into your Windows USB.
Step 9.5: Enable TPM 2.0 (Windows 11 Only)
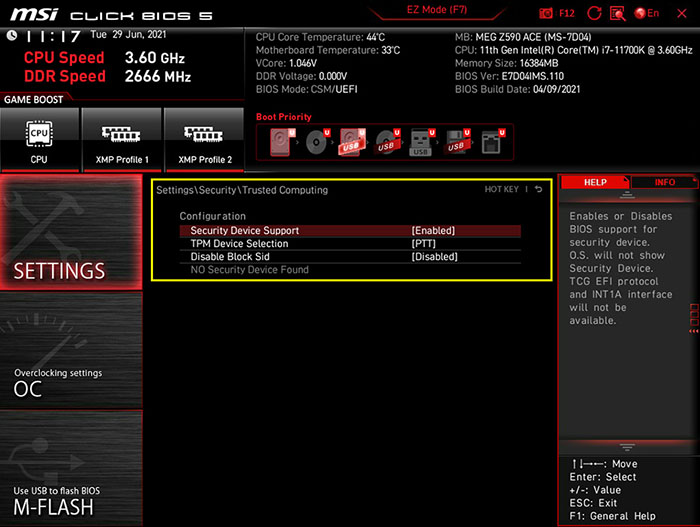
For Windows 11 systems you will need to Enable TPM 2.0. As we’ve alluded to before, this will depend on the motherboard and the manufacturer, so where your settings are for TPM will change.
For MSI users we’ve provided a picture of the BIOS and how to enable TPM. It is listed under ‘security device support’. If you enable this, you should be good to go for your operating system. Just make sure to save the changes.
Step 10: Reboot to Bootable Media
Finally we can move onto the final, main step – installing Windows. You’ll need to exit your BIOS by exiting and saving your changes. our PC should then start booting into the Windows installation.
If you’ve been greeted with the ‘Install Windows’ or ‘Repair your Computer’ screen, you’ve successfully booted into your Windows USB. Now all you need to do is follow the instructions and click next where necessary to get your OS installed.
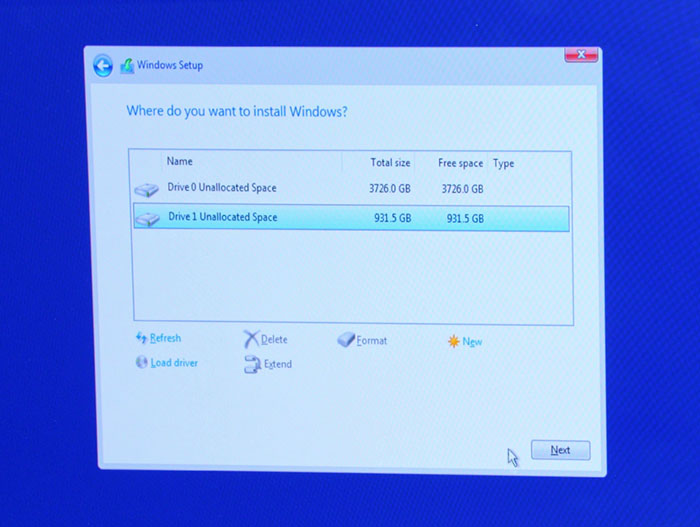
Step 11: Install Windows
Doing so will eventually bring you to a page which asks “Where do you want to install Windows?”. If you’ve only got one storage drive in your PC you’ll want to select this. If you have multiple, you’ll want to use your main, SSD drive. This will provide you with much faster boot speeds than using a regular hard drive.
If your drive is already formatted into multiple partitions, you’ll want to delete these and format the drive. You can do this using the controls at the bottom. As with our USB drive, make sure there are no files installed on the drive, as these will be deleted during the installation process.
The installation process doesn’t differ in UI between Windows 10 and Windows 11 as the setup uses the exact same installer as Windows 7. This keeps things nice and simple, even if it is easy to forget which version you are installing!
The rest of the process should be relatively simple from here on out. Your PC may reboot a few times, but don’t be alarmed as this is part of the installation process.
[adrotate banner=”7″]


